Our new house was built in 1996, which has a lot of advantages–like extra large room sizes, and a few disadvantages–like lots and lots of brass fixtures. The good news is that changing brass fixtures is an easy fix. Changing room size is not.
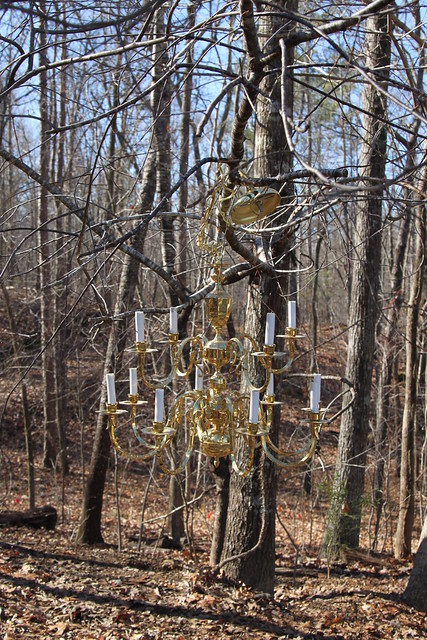
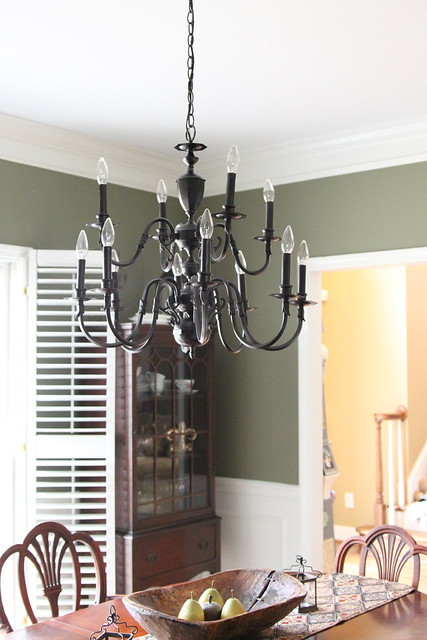
My first attempt at covering up the brass was our dining room chandelier. Here it is before:
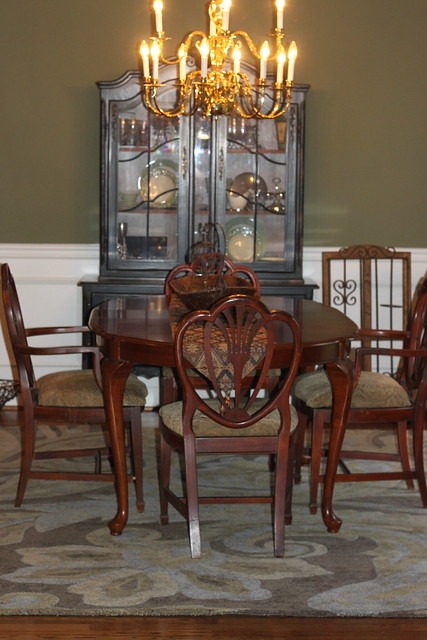
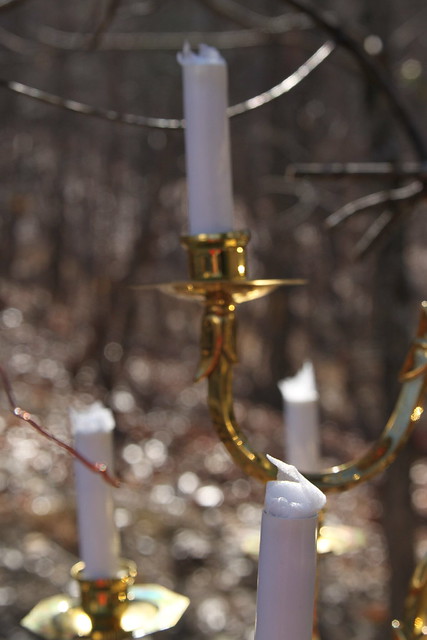
It was GLARINGLY brass, with white “candles” that didn’t do much for it at all. It was the first thing your eye was drawn to in the room, which is why I disliked it. A light fixture should only be drawing attention like that if it is stunningly beautiful. Otherwise it should just blend into the scenery and play a supporting role in the room and not try to get all Julia Robertsy.
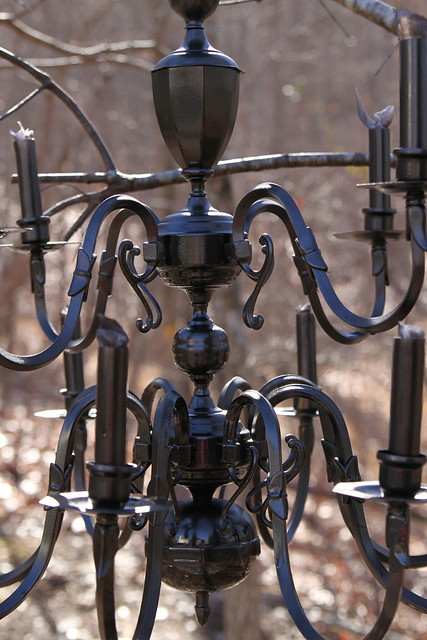
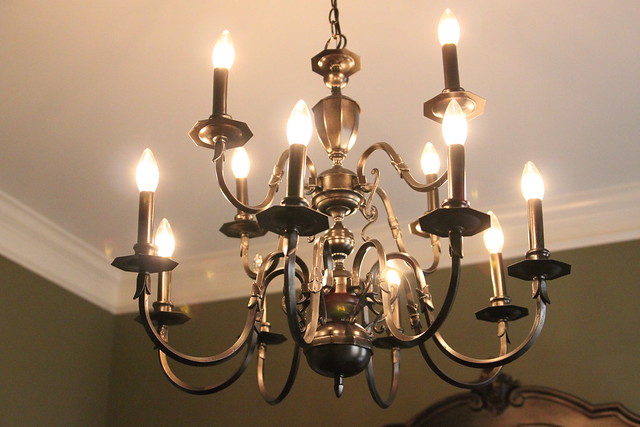
So yesterday I took it down a few notches and turned it into this:
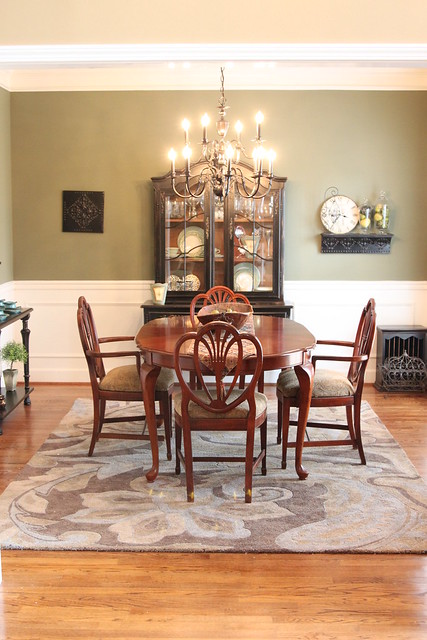
Can you believe the difference that made?? This chandelier definitely needed to be a little more Kit De Luca and a little less Vivian Ward.
I’m pretty amazed at it myself!
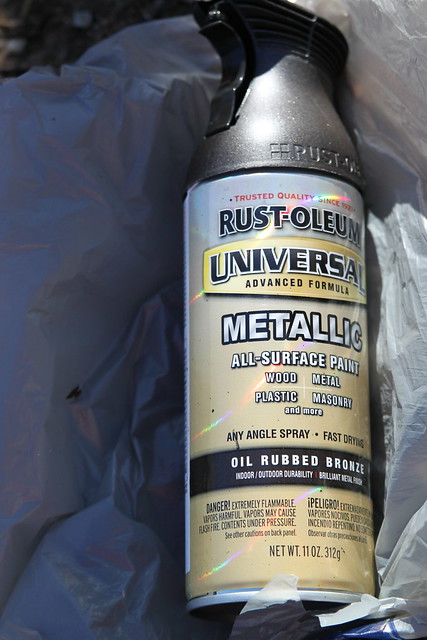
I figured it was well worth a shot before I went out and spent a hefty amount on a brand new chandelier for the room. The only thing I spent money on was two cans of Rustoleum Oil Rubbed Bronze spray paint with a trigger squeezey thing.
Let me stop here and say that this project would never have happened without the help of my wonderful handy husband. He has no fear of electricity like I do. Plus he is tall and can reach the ceiling fairly easily on a step stool. And hold his arms above his head for an extended period of time. That always helps.
After he shut off the power at the panel box (VERY IMPORTANT STEP!) I held the weight of the light fixture while he removed it from the hard wiring. Then he unscrewed it from the mount and it was down. I didn’t realize it would be that easy! I was pleasantly surprised by how simple it was, actually.
Then he took it outside and used an “S” hook to hang it from a tree so I could paint it.

Don’t think it didn’t cross my mind to set up a red checkered table cloth out there and serve Gus and Woodrow a romantic spaghetti dinner. 😀
After I cleaned it really well and knocked all the dust off with Windex I stuck little pieces of foam wrapping stuff down inside each bulb opening. This kept the paint out of there.
Then I sprayed it all over and made sure to get inside and around all the crevices.
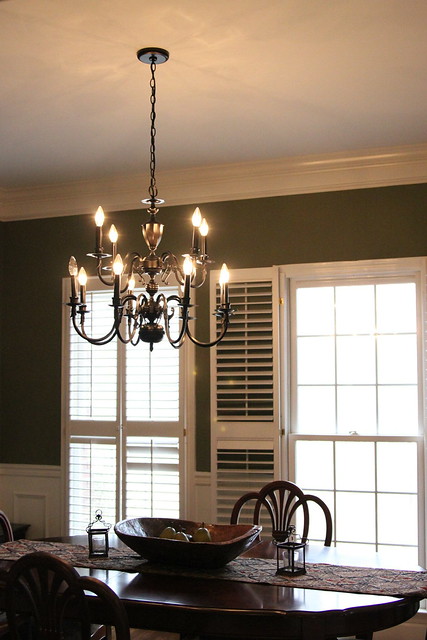
And after letting it dry outside for a few hours, we brought it inside and put it back up!
This was one of the cheapest and easiest DIY projects that I’ve ever completed that made a HUGE impact on the way a room looks. I could have easily spent $300 or more dollars buying a new fixture, but I am happy to get a few more miles from this one.
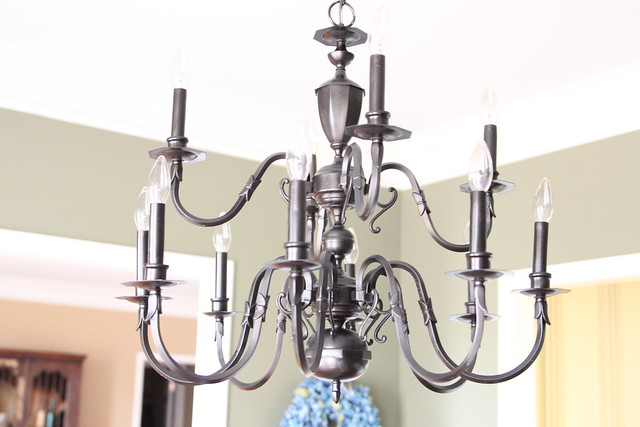
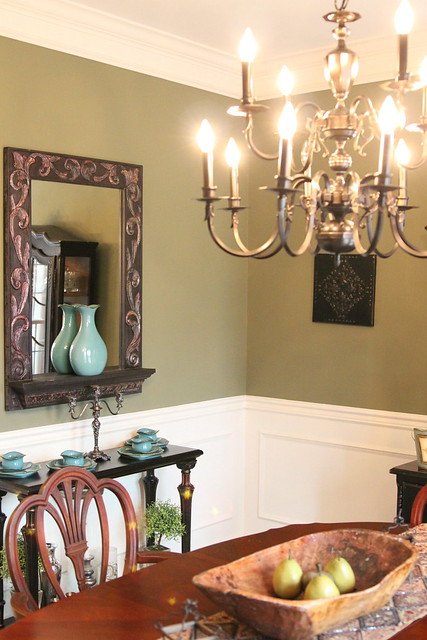
Besides, this light ain’t so bad. Not bad at all, is it? I don’t think so.
It has lots of great curves and I think it fits in really nicely with the other Frenchy fru-fru stuff in my dining room.

I’m so excited about this new project!
Watch out, house. I might be a mad spraypainter on lots of other fixtures around here! I wonder if it would work on doorknobs? And toilet paper holders? 🙂
If you liked this post, be sure to check out “How to Replace a Sconce Light with Something Much Cooler“!

seriously!? wow! this gave me goosebumps!
another reason to adore spray paint.
this is stunning. looks like it came right out of restoration hardware.
love, love, love it!
Wow! Who knew a can of spray paint would make that huge of difference? Looks good!
Beth, that looks amazing! I can’t believe how much difference a little spray paint can make! 😉
Hey Beth,
Great job! I have been wanting to try a product tried it, called Rub N Buff
http://www.bigceramicstore.com/supplies/nonfiredcoatings/RubnBuff.htm
It comes in various metallic shades that is supposed to work to rub on brassy surfaces to change the finish I guess kinda like shoe polish or wood stain for metal?? I would want to test it to be sure it doesn’t rub off on clothes/skin once applies, but maybe this is a good option for doorknobs, etc??
I meant to say “I have not yet tried it” in the beginning of my comment! LOL
Looks great! I did the exact same thing with an old chandelier. Although, I actually bought an old chandelier to paint. In Carter’s room it was red and now in Campbell’s room it is black with watered down pink rubbed on. Don’t be intimidated by electricity as long as it is off! I took Campbell’s down all by myself because I didn’t like just the solid black look. Then I replaced a light in the laundry room. I took pictures of how the wires should hook up and then just made sure I did the same with the new light!
It looks so chic. You gave that light a second life…and all with a can of spray paint. It is definitely something to be proud of.
Cheers~
e
I’m amazed. It looks great and the curves and details show so much better in the new version. Just lovely.
And I’m so happy to see this because I have a few cans of the same stuff to paint the bases of a few refurbished schoolhouse lights that I picked up. They were brass, too. Hope they come out half as good. =)
It is Superb! Just shows ya, trends and styles may change, and all you need to do is roll with it. Well done, tami
I love ORB paint! What a transformation. (and I love that rustic bowl on your table, too)
Cool finish! It looks so chic now!
Wow..that is amazing! I am thinking of trying this..thanks for the inspiration to get ‘er done!
🙂
Beth
Just Beautiful!! A way better look.
We also built when brass was king, so just the other night, laying in bed with a brass chandelier hanging above, I asked Hubby, “How hard would it be to take that down”? He asked,”What do you want to do”? I said, “Never mind, let’s just take it down” : )
Thanks for the inspiration…. my next project : )
Your chandelier looks fantastic! I love your dining room. That rug is gorgeous! I’m so glad I came across your blog!
Wow, great job and perfect color choice. You are right, it makes a huge difference!
That’s awesome!! I have a light in my foyer that could use that treatment…
These metallic paints are amazing! I just saw another tutorial where they used it to transform an 80’s brass bed – it’s dreamy now. Your chandelier is definitely something to brag about – beautiful! -diane
Best spray paint revamp I have seen! That looks amazing!!
looks great – I used the SAME spraypaint today! LOL
Wow- amazing! I was going to do this to the fixtures in my powder room (towel holder, tp holder, light fixture, etc) because they are the ugly gold finish. So glad to see someone who tried it and it worked!
Awesome upcycle! I love my spray paint and that is a favorite color. The fixture looks awesome in the tree, too.
So nice to meet you this past weekend. I’m following you!
Hey Beth, nice job! I did the exact same project a couple of years ago with my brass kitchen chandelier. I used black paint (ORB wasn’t available then), and made a chain cover with dupioni silk. I was surprised at how easy it was. Then I made the silly mistake of thinking it would work equally well with doorknobs. Dumb. I did it exactly the way I’d read – sanded, primer, 2-3 coats, then a top coat. Those damn handles have been the bane of my existence ever since – constantly chipping. Which makes sense, they get HANDLED all the time, right? I’ll be replacing all the handles in my house now before we sell it. What a pain. It would have been easier / cheaper just to leave them brass since we knew this wasn’t our ‘forever’ house.
This looks amazing! I have a friend who used the same paint to re-finish knobs on a dresser: a total new look for way cheap! Can’t get any better than that!
This looks great! SUCH a transformation.
PS I love the Pretty Woman reference in there!
Just found your blog! LOVE LOVE this makeover!! Can’t wait to dig deeper into your craftiness!
You can spray paint anything! My friend spray painted her ceiling fans, door knobs, cabinet knobs, and even the flusher on her toilet!
Very lovely…I like your taste. It is very traditional with a hint of upbeat, just like mine…I especially like your dining room. I like the black breakfront with the cherry table and chairs..
Wow! That’s a complete 180! It looks fabulous!
Wow!!! This is absolutely stunning!!! It looks brand spanking new!! I love it!!
I just came across your blog and am a new follower!! I LOVE all the amazing projects and things you share!!! Thank you do much for all the inspiration!!!
Jackie
Love this! Hate the hideous $1200 brass chandelier in my foyer, but can’t afford to replace. Happy to spend $20 to fix it. Gotta know – did you try TP holders, door knobs, etc? I have a big, brassy 1990s house, too. 🙂
DIY blogs are going to be the death of me…or at least, the death of all the brass in ou r house!
[…] posted this tutorial a while back. With only a couple cans of Rust-oleum Oil Rubbed Bronze Metallic spray paint […]
Thanks for this tutorial! I finally decided to banish the brass in our dining room, and it turned out great. It was easy and definitely a money saver.
I’ve learn several good stuff here. Certainly price bookmarking for revisiting. I surprise how much attempt you set to create the sort of great informative web site.
I love your new light, what is the color on your dinning walls love the colors looking to repaint mine
hi I’ve heard a lot about using that spray paint but was wondering if you sand it first to get a better bond or if it automatically sticks to the brass with no work on your part…extra work that is.also is it a glossy finish or did you coat it with an acrylic spray to protect it in any way? how well can you dust it?
I was wondering where you found your rug at?! It’s perfect and would look so good in my new dining room! Thanks Andrea
I’m a big fan of your blog. Can I ask what color is on the walls in the picture above?
Thank you. Your instructions were very clear and detailed. The lamp looks GORGEOUS now! Great job!
[…] Unskinny Boppy […]
I want to spray paint my brass kitchen cabinet knobs. I need to know other than clean your fixture did you do anything else to it before you painted it? (Sand etc)
How did you paint the chain and cord? Did you also spray paint them? I want to update mine with paint, but I don’t want to mess it up. Thanks!!
Oh my goodness Beth… I may have to become a mad spray painter too… this chandelier looks fabulous !!!
I’ve used clean chandelier bulbs and frosted. The frosted bulbs are much easier on the eyes (on or off) and they actually shine brighter. I got mine at Wal-Mart.
I’ll bet it would look even classier with frosted bilbs!