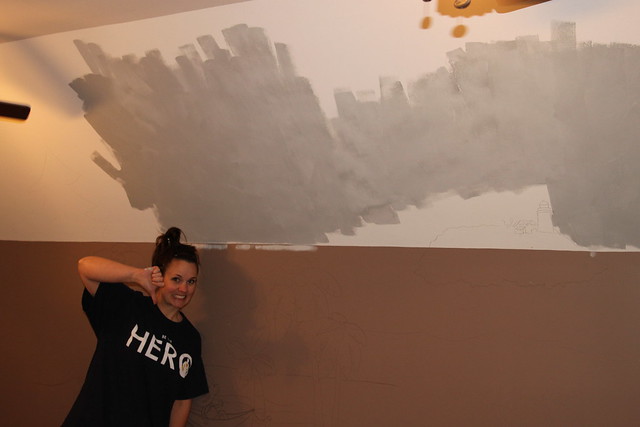
FINALLY, Project Parrothead Playroom is completed and ready for the big reveal!
Here is my confession for the week… this room has been sitting exactly as we left it two months ago when Allison flew back home. Toys and furniture and paint cans scattered everywhere… it was a HOT MESS for the past two months. I vowed to get it finished during this 3 day weekend, and we did it! We finally got all the loose ends tied up.
In case you missed the original post, let me remind you what Garrett’s playroom looked like before:

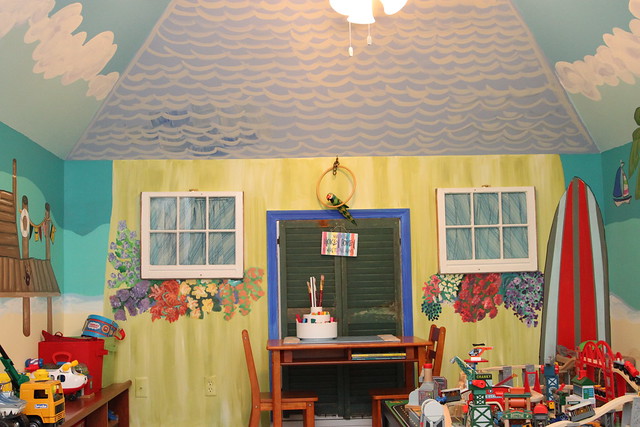
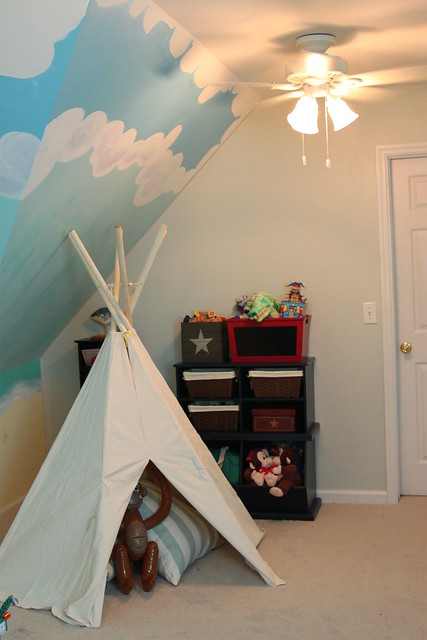
And today, the completed AFTER:
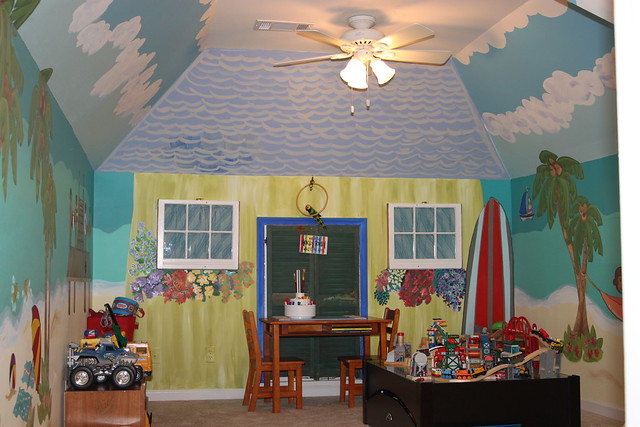
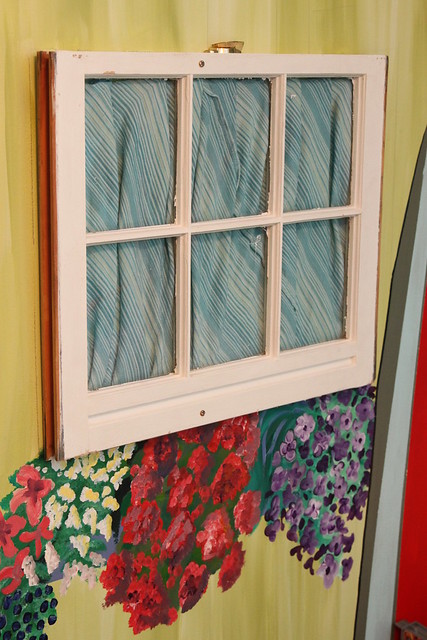
I love the windows and shuttered doors! They help make it look like an actual beach shack.
I got lucky and scored these green weathered shutters at a local antique vendor booth. They were being used as a display for some other things but when I asked the lady if she would sell them she agreed. She named her price, and of course I haggled with her a little bit to get them cheaper! They turned out to be EXACTLY the right size and shape to cover the white attic access doors. It’s a little bit of a miracle, really. I couldn’t believe how perfectly they fit. No sawing required, they just got screwed right onto the existing doors. I just love it when a plan comes together in such a perfect way. It’s also a great reminder that even if something is not for sale at an antique booth, ASK ANYWAY! You never know what people are willing to sell to you at a discount.
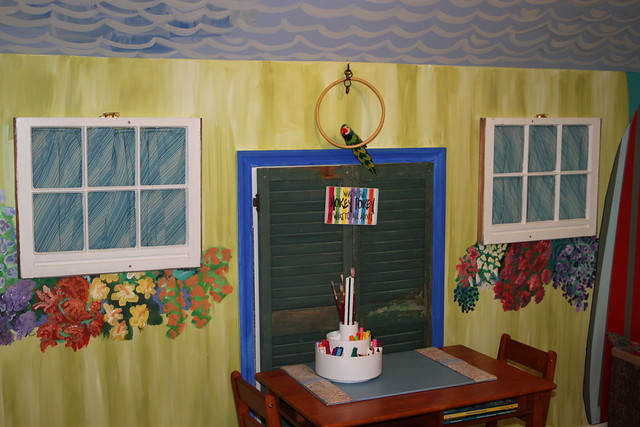
I cut up an old skirt to create the curtains behind the windows. Thrifty, I am.
I chose cobalt blue paint for the door trim but after seeing these photos it looks like I forgot to remove the painter’s tape from around the edges.
Hmmm… I might need to rethink the cobalt blue, even though it’s a really pretty color in person.
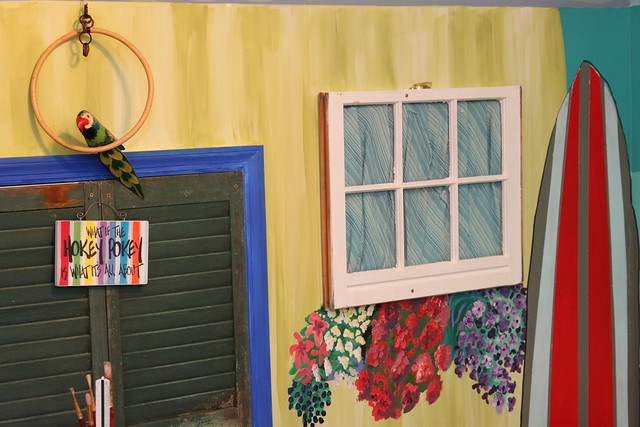
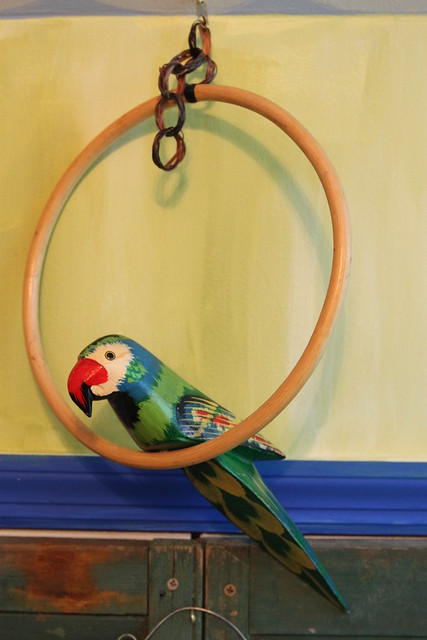
I’ve had this parrot since I was a kid. Like I’ve said before on this blog, I’m a way-back Parrothead, so the tradition continues.
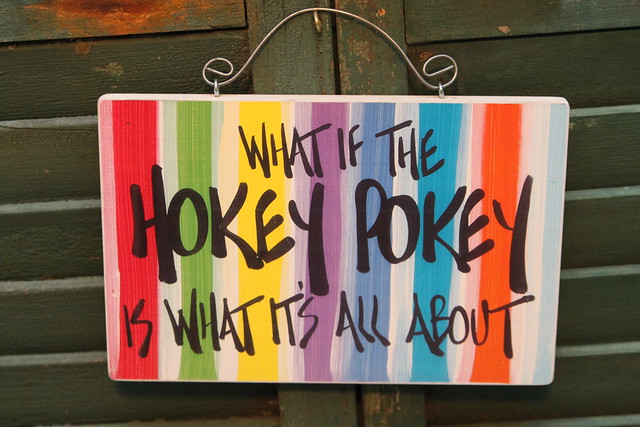
This little sign has floated around my house for a few years, but it’s got a good home now.
The side walls haven’t changed much since the last post, but I’ll show them to you anyway since they’re so dang cute!
The dock:

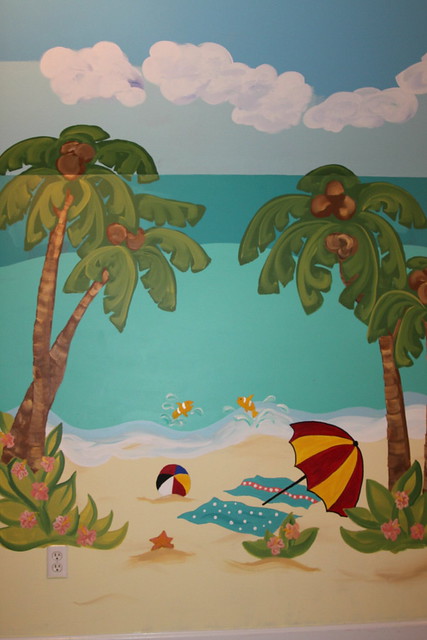
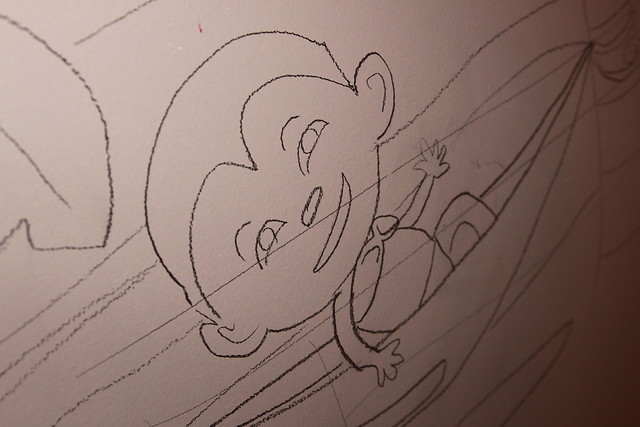
And the cutest monkey in a hammock. I should have sketched in a copy of The Coconut Telegraph beside him.

I got the tee-pee on sale by using my Mamapedia Sweet Deals coupon from Back To Basic toys.
The entrance wall is painted with Sherwin Williams Sea Salt. I have some future plans for this wall, so I left it bare for now. There’s plenty going on in the room, so the bare back wall is kind of calm and nice.

The wooden ski is from J’s grandma’s boathouse. Somebody in the family had some athletic ability back in the ’70’s. I’m digging how the ski looks with all the surf’s up decor in the room.
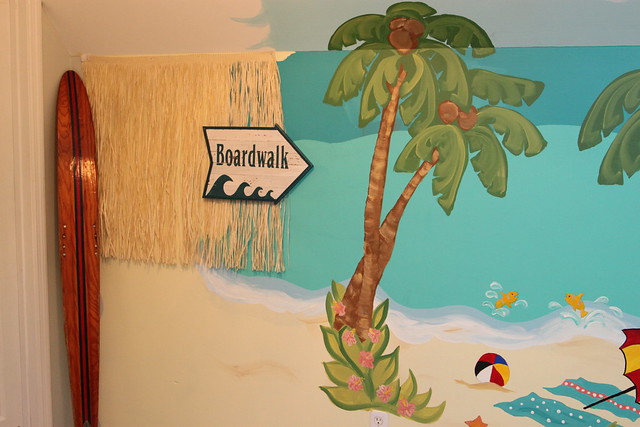
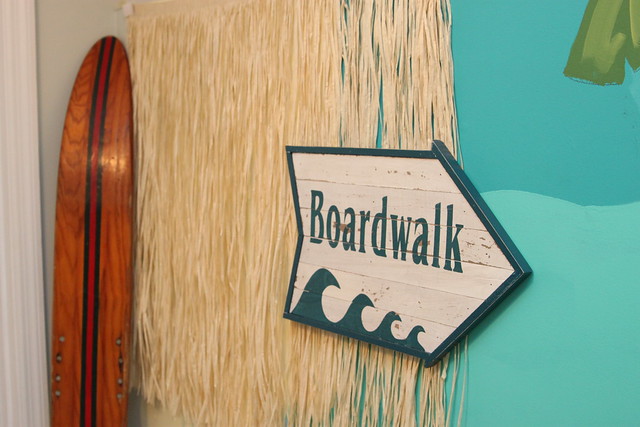
I had a plan to paint a tiki hut but instead I just decided to take the lazy way out and hang this grass skirt on the wall. I picked up the sign from Homegoods.
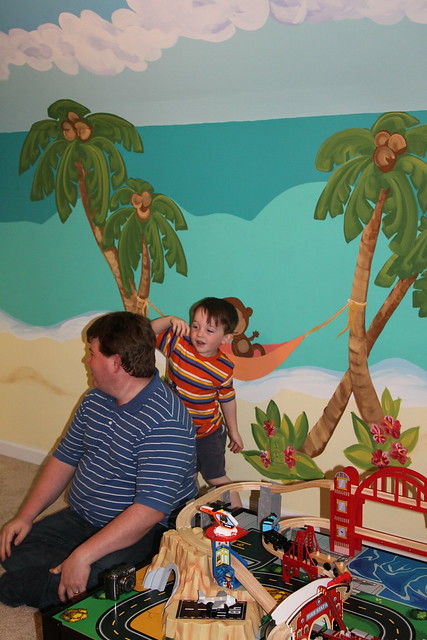
Garrett absolutely loves this room! The tee-pee is a HUGE hit.
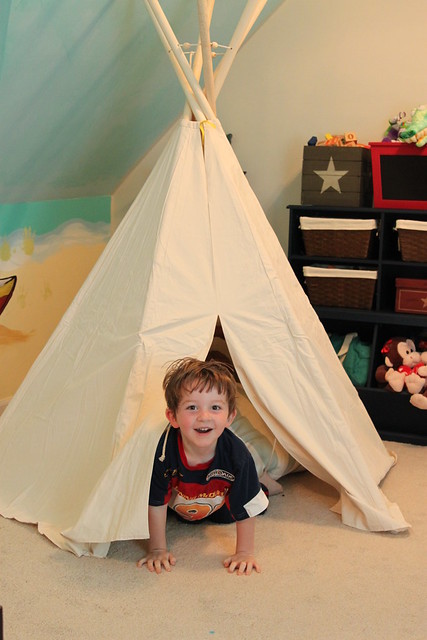
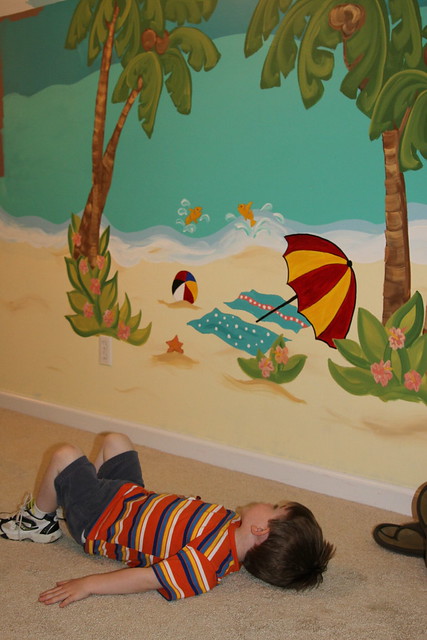
Here he is pretending to lay on the beach:
And pretending to be a monkey.
And giving his wall Eskimo kisses.

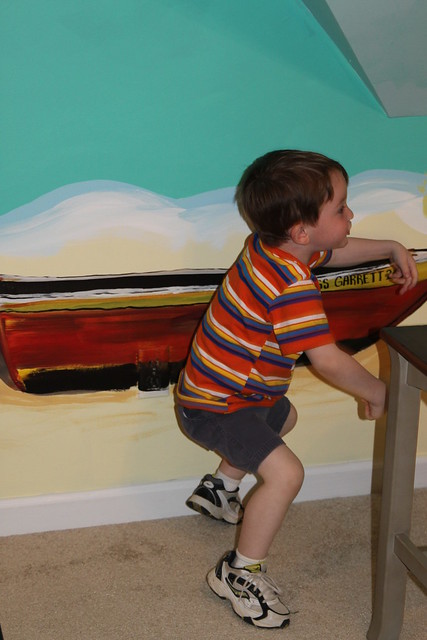
And here he is rowing the boat…. or possibly dropping it like it’s hot.
This project was such a labor of love, and I’m happy that he loves his room. I still cannot say enough thank you’s to Allison for all that she did for us. She is the kindest person on the face of the earth. Seriously.
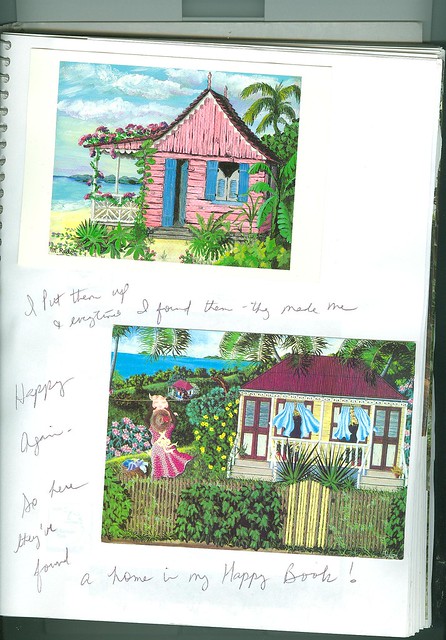
If you are wondering how we painted this mural, my secret weapon was a Sony projector. I had an idea in my head of what I wanted the general layout to be, but the projector helped me fill in all the details. One of the biggest elements that I had in my head was a scene from a postcard that my mom had bought in the Dominican Republic in 1990. I always loved the postcards that she had brought home, so I couldn’t believe my good fortune when I emailed her asking if she remembered them, and she emailed them right back to me as a scanned image!! She had saved them all these years, and was able to put her hands right on them.
Turns out she has an entire scrapbook dedicated to things that make her happy.
And these were inside.
Amazing! Thanks, Mama!
Here they are, so you can see what I’m talking about:
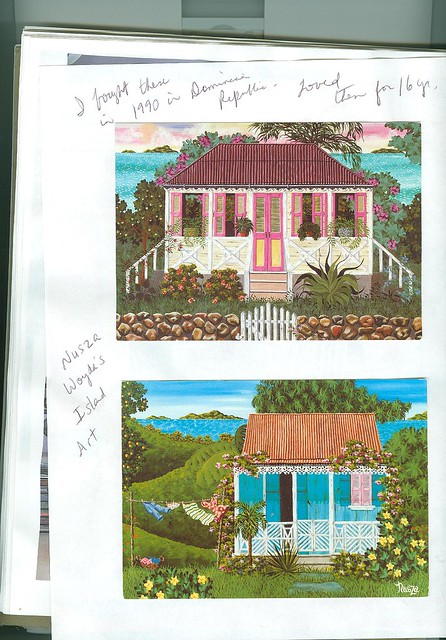
Nusza Woyda’s Island Art from the Dominican Republic.
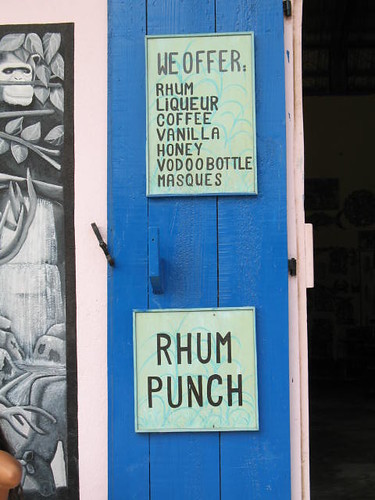
Two other items that I incorporated into the room was the cobalt blue that I saw painted on the buildings when we visited Royal Caribbean’s version of Haiti.
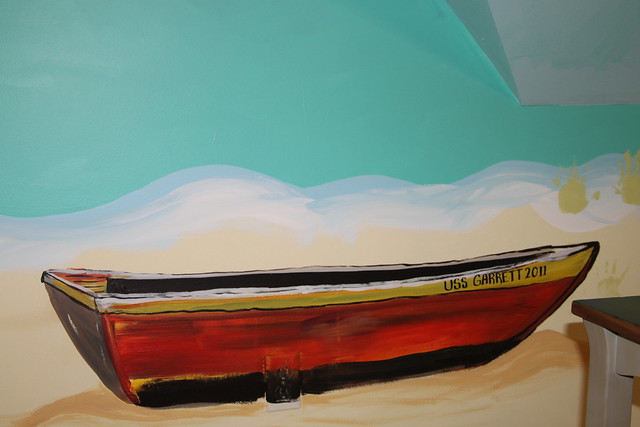
And also this boat that greeted us on the island when we stepped off the cruise ship:

Turned into this on the playroom wall:
I think we did a great job of incorporating a vibrant Hispanola vibe into the mural. 🙂
After that we basically Googled “cartoon beach mural” and then just snagged bits and pieces of other people’s beautiful murals and projected them onto the wall. Once they were scaled to the right size, Allison and I traced over them with pencils.
Tracing directly from a projected image onto the wall is absolutely the best way to draw a mural. Because when I try to be creative and freehand on my own, scary things can happen. Like when I tried to hand-sketch the monkey in the hammock, I got Count Dracula in a bikini. YIKES.
Unless you’re the ghost of Bob Ross, trust me when I say it’s easier to use a projector if you attempt a mural at your house. I had a fancy schmancy Sony projector that was borrowed from my office. In the past I’ve used regular old overhead projectors like you remember from your school days.
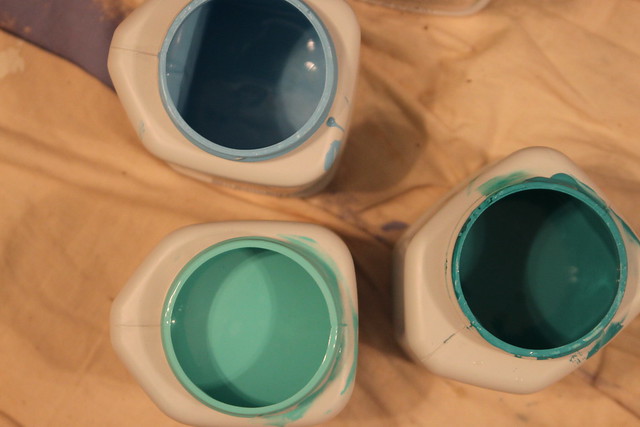
Another tip? Go to Sherwin Williams and buy the $5.00 sample pints of paint in the exact colors that you want.
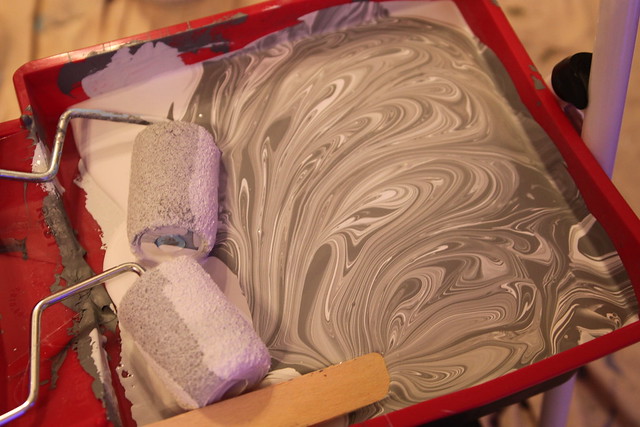
I mistakenly assumed I could use some old wall paint mixed with acrylic paint to achieve the look we wanted. Yeah… No. When Allison started mixing up all the paint leftover from my sunroom and bedroom paint sampling sprees it turned into the biggest mistake ever. Most of these paints were bright and cheery and pale blueish-green in my sunroom so I ASSumed they would be just fine for creating a bright and cheery playroom.
Wrong.
PFFFFFFFFFFFFFFFTTTTT…
Turns out whenever you mix the colors from the “neutral hues” end of the Sherwin Williams fan together they pretty much turn into a muddy color not that different from an elephant’s hiney.
So, we dropped what we were doing and ran to the paint store for some brighter, cheerier colors. After a little bit of deliberation and some heckling from the SW salesman, we brought home a cardboard box filled with the brightest, most cheerful beachy colors from the SW paint fan.
Much, MUCH better.

Another lifesaver was the use of Kilz to cover up that dark dreary paint from the before photo. Once we primed it with Kilz things went so much faster and smoother for us with the mural painting. Luckily we had some yellow tinted Kilz leftover from the previous homeowner, so the yellow paint turned into a nice sandy beach! Perfecto!
Hopefully this room will grow with Garrett for many years. If not, I might crank up the ocean sounds on the old Baby Crack Machine, pour myself a cold drink and move right into that tee-pee.


Wow! What an amazing room!
It looks so good Beth! You knocked out those details! I noticed the sailboat and a better monkey face too, PERFECT! I think I need to come back and enjoy a margarita on the back porch and the playroom!
This is a child’s dream room! You did a great job. I know this was a lot of work… I used projectors to decorate my class room walls but never the entire room, truly a labor of love!
Thank you so much ladies!!
Allison- I broke out the trusty old fat Sharpie marker to outline the monkey and hammock and a few other details around the room. It made it a little more cartoony with a thick black outline. The boat was a last minute addition since you can’t have a beach without a boat, right!? 🙂
What’s great is how you incorporated the shape of the wall into a shack like it was just made to be there! It’s amazing and you did a wonderful job. Your kids better appreciate all that hard work is all I can say! ;0)
Wow! That is absolutely gorgeous! It looks amazing! It’s like a magical place for the kids!
Wow! That looks fabulous!! Great job!
Love it. I hope G doesn’t mind when I show up for an umbrella drink! I promise to put the skirt back when I’m done wearing it. 😉
Oh, I would have loved to have a room like this when I was little. Heck, I would love to have a room like this now!
You did a fantastic job, it turned out amazing!
That is such a wonderful room! I love it! I especially liked the part about Garrett rowing the boat (or dropping it like it’s hot!) Made me literally LOL! Of course, then Hubby looked at me like I was crazy (until he realized I was reading blogs) and had to share it with him. Even HE got a good chuckle out of it! Great job!
wow that is so cool! what kind of projector? I don’t get how you projected a post card picture on a wall doesn’t it have to be transparent photos like on a transparency sheet?
anyway great great room I Love it
KAT
Wow! This room is amazing! You have a very lucky little boy!
Thank you all so much!!
@M– you can wear the skirt anytime, friend! I’ll provide the fruity drinks!
@Deanne–So glad someone is reading my silliness! 🙂 Happy to give you a laugh for the day.
@KAT- I used a projector that connects to my laptop with a USB cable. Similar to the ones used for projection screens at churches or home theaters.
I just pulled up the images on my laptop and enlarged them as best as I could, then projected them right onto the wall and traced them.
It’s absolutely fantastic – great job!! I’m highly impressed.
Hope you’re having a good week ~ visiting from “Wow Us” Wednesday :O)
Hugs,
Marie
Wow – that’s fabulous!! What a fun room!
WOW!!!! You did an amazing job!! This would have been my daughters dream playroom for sure. 🙂
Whoa! What a fun playroom! Amazing transformation! Love it! Does he ever come out?! lol
Great job!
Roeshel
that looks like the most fun room ever!!!!! and when they get older you can change it into a tiki bar… 😉
there is only one word for this project: Wowzer!!!
You are one talented lady!
ladeedacreations.com
You have been crowned a La-Dee-Da diva. I love this project and think it is diva worthy!
Come grab a button.
http://ladeedacreations.com/2011/07/diva-thursday-who-is-crowned-a-la-dee-diva-this-week/
Seriously, what an awesome play room!!! Love it! And I thought the Hokey Pokey *was* what it’s all about…(c: THanks for linking up!
Oh Beth – how fun! You’ve done a fabulous job with that room – sooo beachy! I’ve got this linked to my playrooms post too today, for inspiration!
Wow! That looks fabulous!! Great job! Thanks For sharing..
Roman shades concord, ca
Hank Hendricks
[…] 10. Add a beach mural to your children’s playroom so they have a play-cation Project via Beth @Unskinny Boppy […]
[…] 10. Add a beach mural to your children’s playroom so they have a play-cation Project via Beth @Unskinny Boppy […]
[…] 10. Add a beach mural to your children’s playroom so they have a play-cation Project via Beth @Unskinny Boppy […]
[…] 10. Add a beach mural to your children’s playroom so they have a play-cation Project via Beth @Unskinny Boppy […]
[…] Parrothead Playroom by Unskinny Boppy […]