A few weeks back I promised that I’d show y’all how to create a watermark for your blog photos. The awesome Lori Gordon of Shooting Star Photography showed me how to do this during my last Click Workshop. I’ve always assumed putting a watermark on my photos was some complicated process that required lots of time consuming layers in Photoshop.
I was wrong.
Once you set up the watermark it’s as easy as stamping it onto your photos with one click of a button. Let me show you how! The first thing you’ll need to do is decide what you want your watermark to be. It could be something as simple as text with your blog name, or it could be an image like your blog header to give your pictures a “brand”. If you have a logo designed for your blog, you could use that as well. You decide.
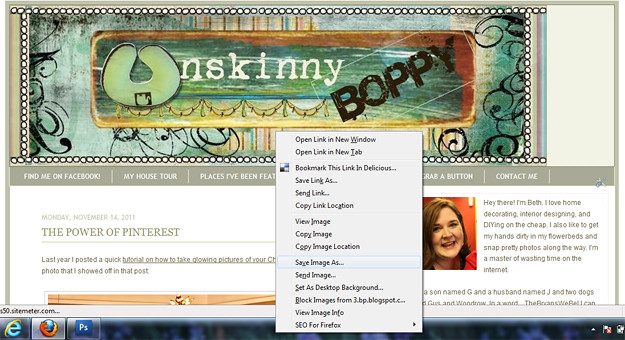
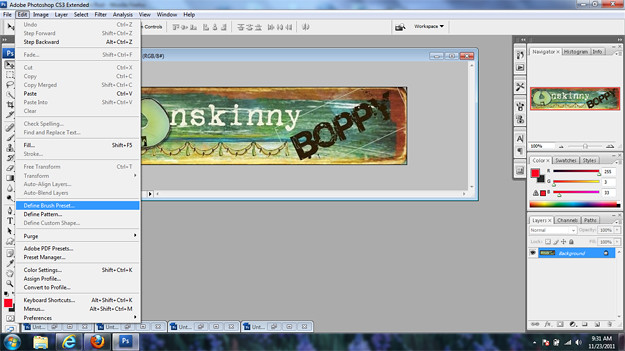
To keep things simple let me demonstrate how to use your blog header image as your watermark. Simply right click on the header image and click “Save Image As”
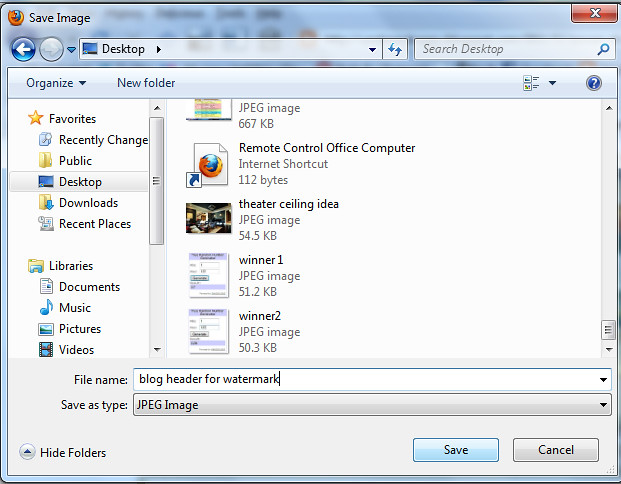
Save it to your desktop so you can find it quickly and easily.
Then open your image in Photoshop. This same trick works in PS Elements or full blown Photoshop. I’ve tried it both ways. After it’s opened in PS I want to take out all the swirly stuff around the edges, so I used the crop tool to grab just the name of the blog only.
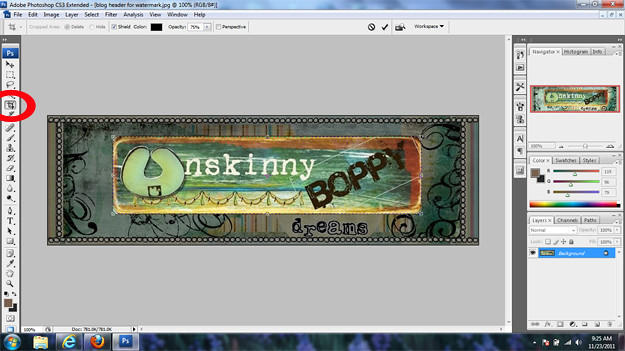
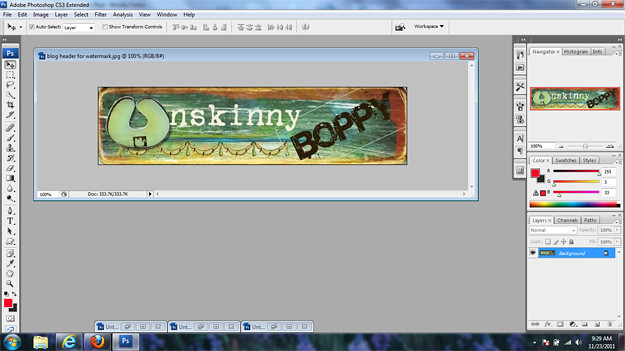
Here is what it looks like when it’s cropped:
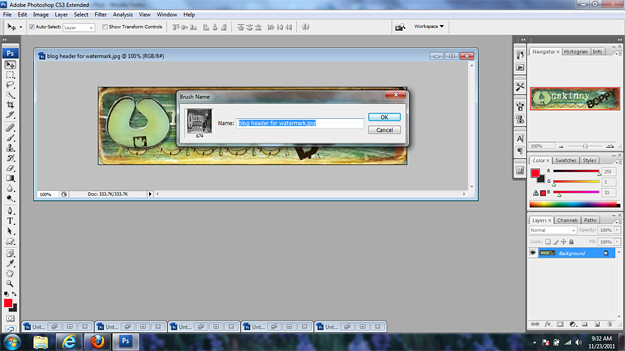
Then click Edit –> Define Brush Preset
And this box will pop up. Hit OK.
Congrats! You’ve just created your watermark! How friggin easy was that?
The steps above were a one-time process. Now that your watermark is set up you won’t have to go through all those steps again until you’re ready to change your watermark, in which case you’ll simply start over from the top. From this point forward, you’ll simply need to follow these steps to put your logo onto each photo on your blog:
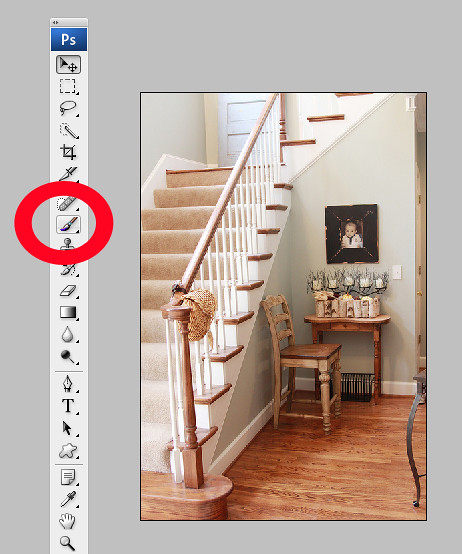
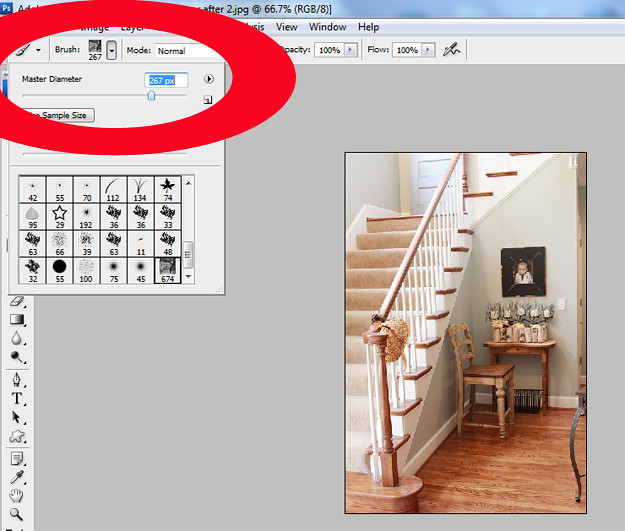
Start by opening the image you want to watermark in Photoshop and click on the Brush Tool in the Tools Palette.
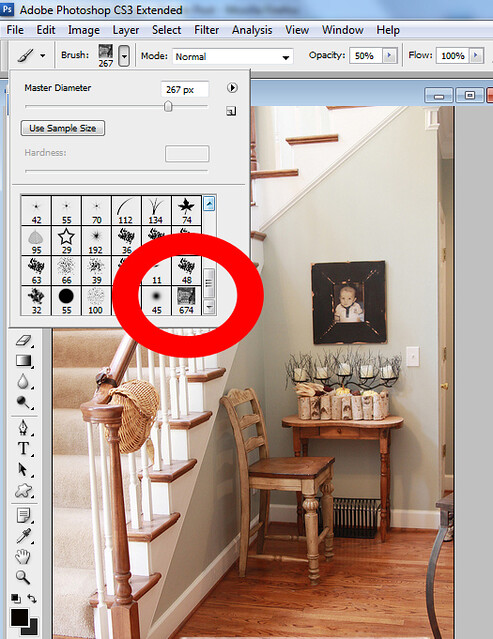
Next click the brush picker dropdown to change your brush type. Scroll all the way down to the bottom of your brushes, and you should see a dark image that resembles a squished up version of your watermark.
Choose it as your brush.
Now you’ll have to adjust the size of your brush so your watermark is the size you’d like for it to be on your image. Some people prefer larger, some prefer smaller. You decide what looks best for your image by sliding the master diameter slider around and seeing what it does to the size of the watermark.
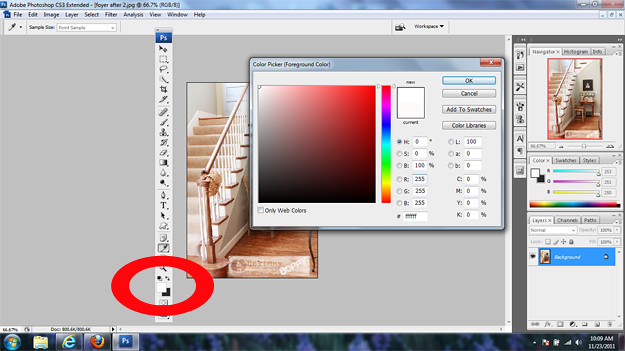
Once you get it the size you prefer you can click on your image and see what your watermark looks like on the image. If you don’t like it, simply CTRL-Z to undo the brushmark. Keep playing around with the color and the size until you are satisfied. And remember to change it you’ll have to hit CTRL-Z to remove the brush mark that you made. If you make several marks you want to remove you might have to hit ALT-CTRL-Z to go backwards several steps. You can change the color of it by double clicking on the color picker in the tools palette. Then you can either choose the color you’d like manually, or move around the image with the eyedropper and suck up a color you’d like to copy. I like white since it’s easy to read on a contrasting color but it’s not obtrusive.
You can change the opacity of the watermark if you’d like it to be a bit lighter by sliding the opacity slider around.
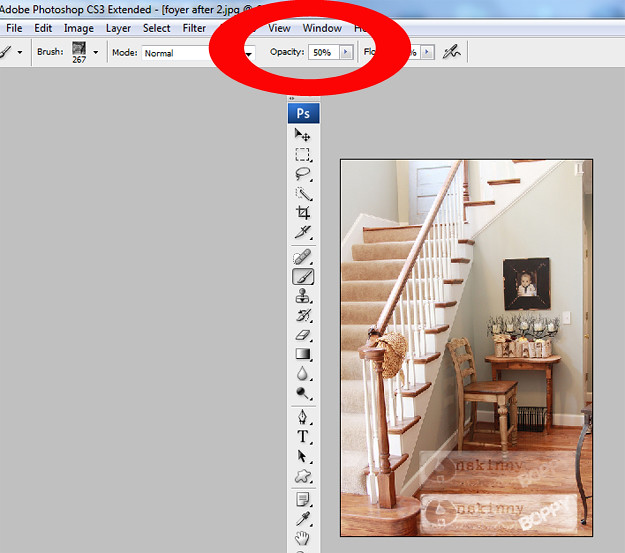
And that’s it! You can stamp your watermark on every single photo now just by choosing the preset brush, playing around with the size, color and opacity and clicking the photo. Remember that you’re not holding and brushing it around like a paintbrush- just one click will do. If you’d like a darker watermark you can click several times in the same spot and it will paint the image over itself, resulting in a darker image. Just don’t move the mouse around when you do this or it will smudge.
So, here is the end result: 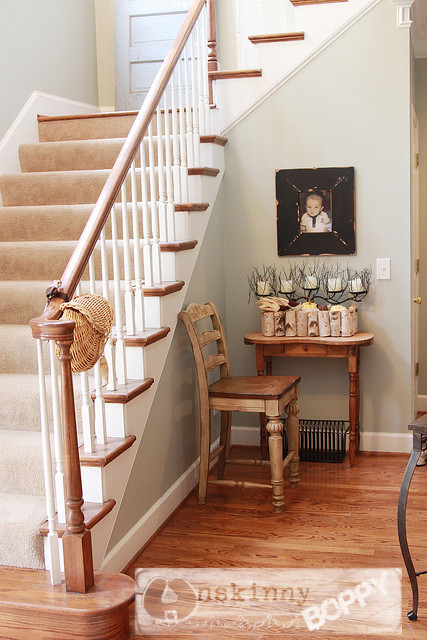
I hope this helps you guys like it helped me. I’m amazed that this process was so simple and easy. Let me know if you try it out, or if you have any questions.

AWESOME…thank you thank you!! It’s always nice for an easy refresher course!
This is awesome! I am pinning it (of course!). I am getting PSE for Christmas!!
Thanks for the tutorial!
Thanks for the info – I didn’t know how to do this. I add text in Picasa to my photos, but I like your method of being able to add a logo. Pinning!
Oh man, do you know if you can do it with any other free program like Picasa or Picnik? I know I can add text in both of those, but the way I know is way too many steps to make it worth it for every photo I post.
Thank you, thank you, thank you!
Thank you! Finally an answer to a question I’ve had for a long time that’s clear,concise and most importantly, I can actually create & use !!
I’ve been thinking about using a watermark for a while now but was unsure as to the best kind to use. Your tutorial was easy to follow and the perfect solution for me. Thank you!
Thanks for the tutorial, I’ve been wanting to do this for a while now! I like the text better than the branding, it seems a little more unobtrusive to me? Thanks again!
[…] couple of things differently, but most of if was the same. If you have Photo Shop you can see the tutorial on Unskinny Bobby’s blog. Also, she shows you how to do it for your logo (a picture), I’m going to show you how […]
[…] of Pinterest it is more important than ever to watermark the photographs you put on your blog. Beth from Unskinny Boppy shows you how to quickly and easily watermark your photos in Photoshop. Share […]
[…] Want more quick blogging tips? Here ya go! How to quickly watermark your photos in Photoshop […]
Thanks. what if i want to use just text as the water mark
[…] There is not a day that goes by that I don’t find myself editing a batch of photos or adding watermarks to my pictures. I have shown you guys how to straighten photos in Lightroom, and how I edit my interior […]
Great, was looking for a change in my blog photos and this is it.
This is awesome! I have a very tedious drawn out way to do this but yours is MUCH better!!
If you like reading news, have you thought to use an online news aggregate to aid boost your comprehension skills within the new vernacular.
The relationships you establish will be the difference between making money online and precious time wasted.
Over the approaching months I’ll be writing a series of articles revealing the techniques for public relations
(all the tasks a journalist really doesn’t would
like you to know.
So now it appears full circle to the individual who may have taken on the role
from the blogging site administrator. There are many blog networks around that enable you to
submit you and promote your blog. In affiliate marketing, people to
a particular website is driven from another website or from email.
very intresting
Useful information, this is exactly what you were missing. I want to add a resource where you can look at different pictures dachau images This will help reduce the time for loading. But it will help keep your nerves