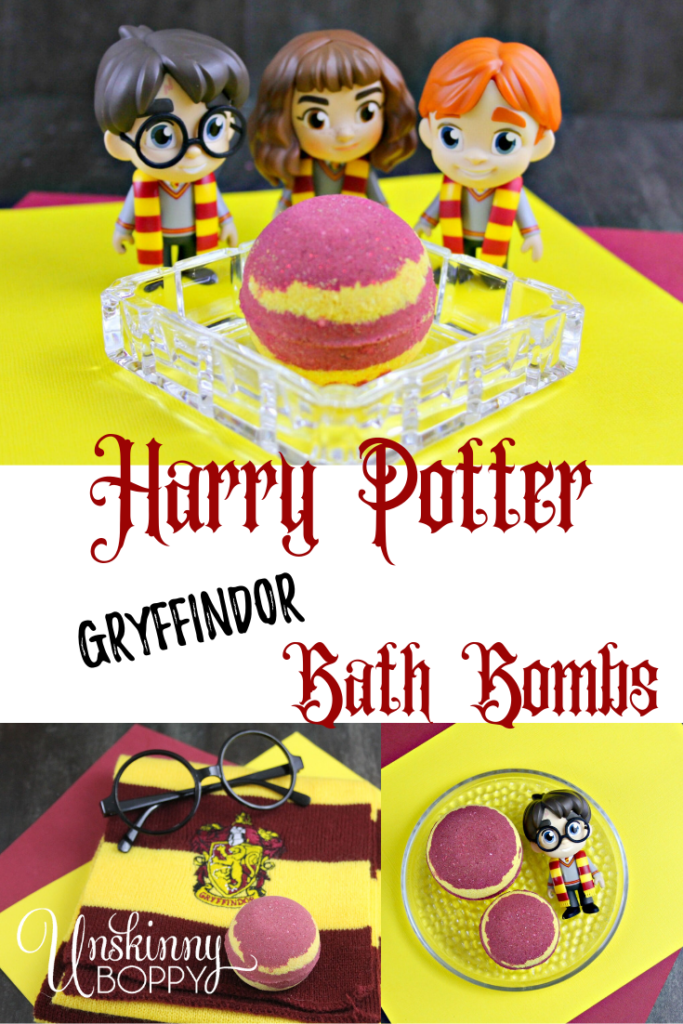
Who here is a Harry Potter fan? If so, you’re going to love these Harry Potter Gryffindor Bath Bombs! Not only are they crazy easy to make, but they’re so nice to have as gifts to hand out as well.
Get ready to fall in love this super simple bath bomb recipe.
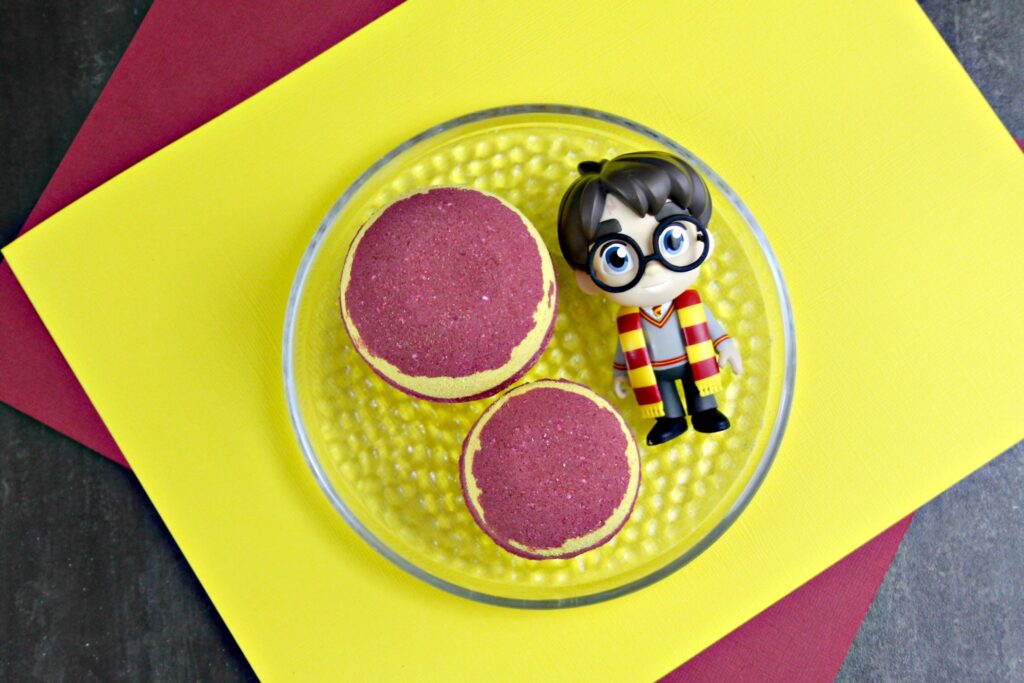
Harry Potter Gryffindor Bath Bombs
Harry Potter is just the best. And no matter if you’ve been a fan for forever or are just now discovering it, have no shame is shouting your Harry Potter love loud and proud!
What I love most about these DIY bath bombs is that they’re such a fun color combination to work with. Plus, with the holidays coming up, they make a great DIY gift idea as well.
If you’re looking for a super simple way to make your own bath bombs, this is the recipe for you!
Harry Potter Gryffindor Bath Bombs Recipe
Supplies:
- 2 cups baking soda
- 1 cup citric acid
- 1/4 cup cornstarch
- 1/3 cup coconut oil
- 1 tablespoon polysorbate 80
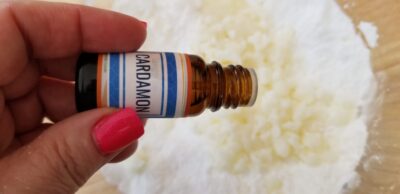
- 10-20 drops clove essential oil
- 10-20 drops cardamom essential oil
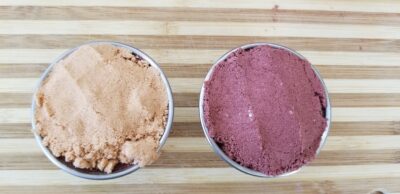
- Wine mica powder
- Yellow-gold mica powder
- Wine cosmetic glitter
- Gold cosmetic glitter
- Stainless steel bath bomb molds
- Spray bottle filled with rubbing alcohol
- 1 large mixing bowl
- 2 small bowls
How to make these homemade bath bombs
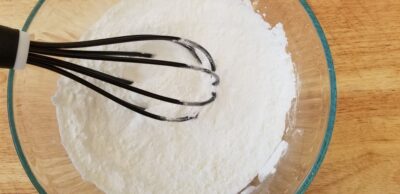
Steps 1-4: In a large mixing bowl, add the baking soda, citric acid, and cornstarch. Whisk dry ingredients together.
Steps 5-6: Add essential oils.
Step 7: Add the coconut oil. This binds all the ingredients together, so your bath bombs don’t crumble when you touch them!
Step 8: Add the polysorbate 80. This helps the coconut oil disperse more evenly in your bath water, makes the bath bombs bubbly and prevents the mica from sticking to the side of the tub.
Steps 9-10: Mix the ingredients together. I use my hands to break down any lumps and make sure everything is really mixed in there. The mixture is perfect when it holds together when you press it into your hands and feels like wet sand. Separate mixture into five bowls.
Steps 11-13: Add 1 tablespoon of the wine mica and wine cosmetic glitter into one of the small bowls and the gold mica and gold cosmetic glitter into the other small bowl. Step 12: Mix colors into mixture thoroughly. Add a bit more color if the mixture is too light. Continue to add a bit and mix until you get the color you want.
Step 14: Add about 1 tablespoon of your first color into a cavity of one side of the mold. Do the same with the other color and continue until the mold is full.
Steps 15-16: Press both sides of the mold together firmly, grinding together to get rid of the excess mixture. Tap both sides of the mold and gently release the bomb.
Allow drying a minimum of 24 hours. If your climate is wet or cold, allow an additional 24 hours. My rule of thumb is that when it is hard to the touch, they are ready for the tub! Store in an airtight container until ready for use.

Oh my! These are so pretty and what a beautiful little DIY Valentine gift idea!!