Six months after it started, the basement remodeling project is DONE! We’ve added a little mancave area down there with an arcade and a theater room. Who wants to come watch some movies with us? There’s even surround sound now!
See?
Ah, I’m getting way ahead of myself. I’ll get to that in just a minute. First let me say that we are beyond excited to have it completed and move-in ready! My husband has put in a ton of work down there that has really has saved us a lot of money. I’m so thankful to have a handy husband who is really great at using a hammer and a saw. We are also SO thankful to my father-in-law for all of the crazy amount of hours he’s helped with framing and putting up cabinets. We owe him big time. Also a big thank you to my coworker, Shannon and his friend for helping out with some of the wiring work. We have some very generous and helpful family and friends. Thank you all SO much. We really appreciate your help.
So, come on downstairs and let me show you the new basement!
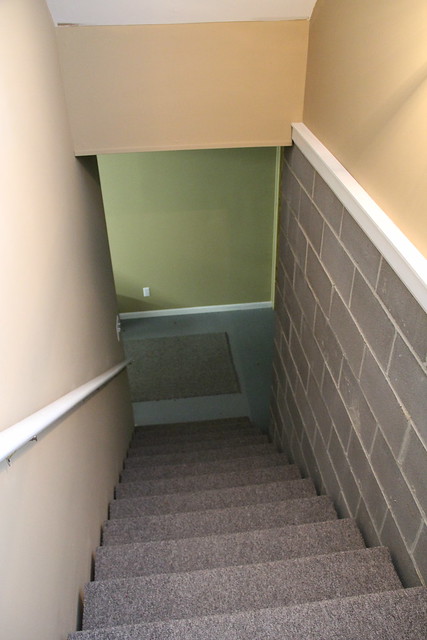
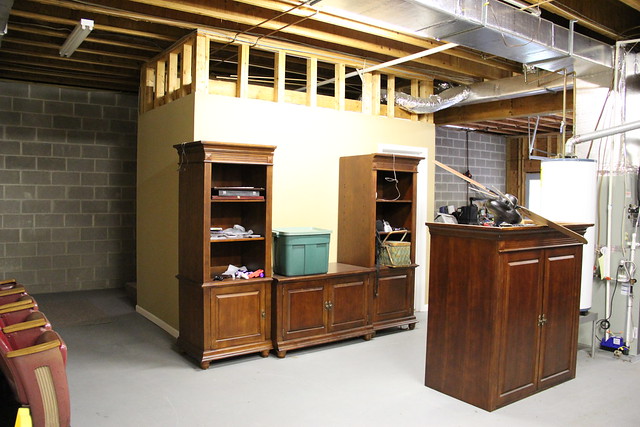
When you headed down the stairs before, this is what you saw:
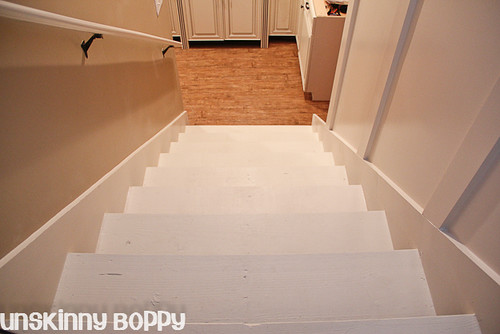
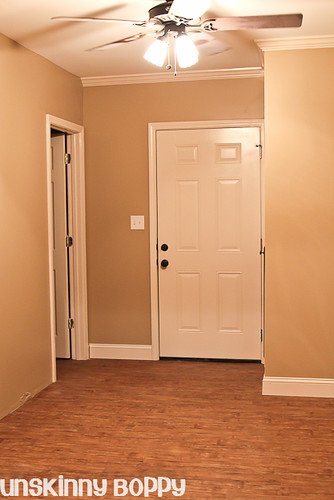
And here is the view when you come down the stairs now!

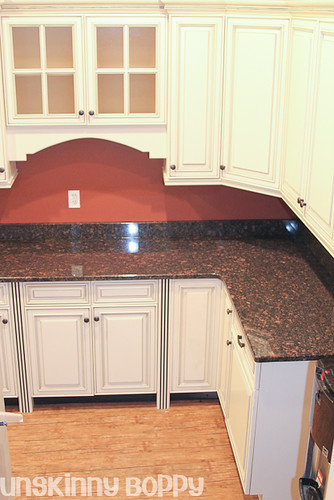
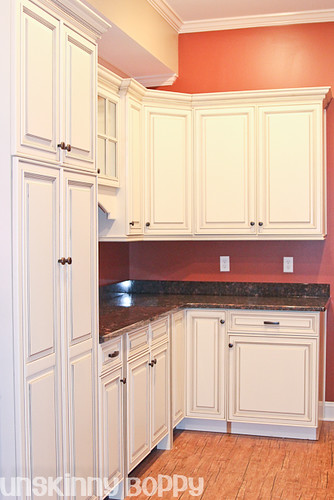
And now that we have countertops installed you see this:
Here is the amazing basement staircase before and after! You can go read the all about the multicolored stair painting process here.

I guess it’s wrong to say that the basement is completely finished because obviously the counter tops haven’t been installed yet. We are debating between going out all out and getting granite to match the kitchen upstairs or saving some money and doing laminate counter tops from Home Depot. We’ll see what happens with that. I’ll let you know!
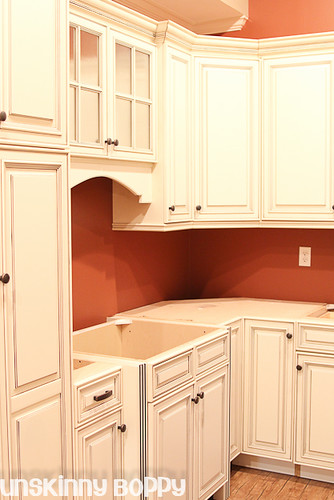
The cabinetry was purchased from my friends at Brewer Cabinets. We got SUCH a steal on them because they were an old display unit from a discontinued brand. They are so beautiful, and amazingly similar to my existing kitchen cabinets. In some ways they are even BETTER than my kitchen cabinets. Check out all this storage in the pantry piece. I love this!
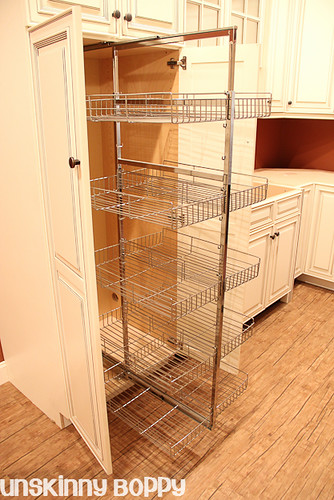
I could not be more pleased with the way they look and the amount of extra storage they provide. Instead of building a closet for storage we decided the cabinets would be multifunctional – a serving spot for parties and a place to hide all the yards o’ Solo cups that we buy from Costco. And maybe some board games as well.
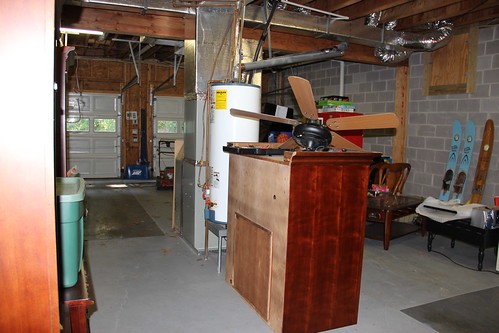
J and his dad installed the cabinets all by themselves, so that also saved us some money. Here is what that area looked like before:
Here is an updated shot with the granite countertops installed:
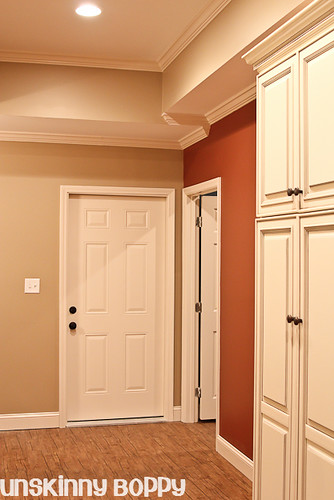
Here is the view looking to the left at the bottom of the staircase.
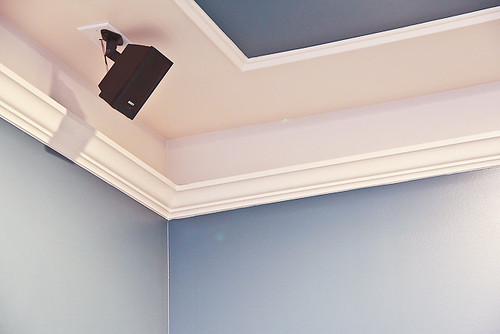
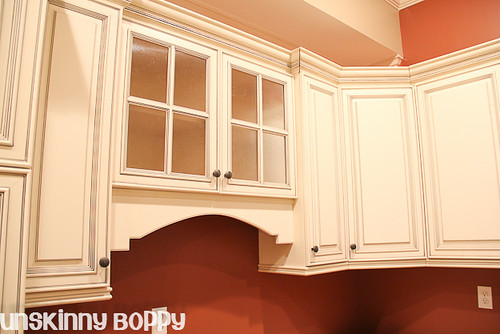
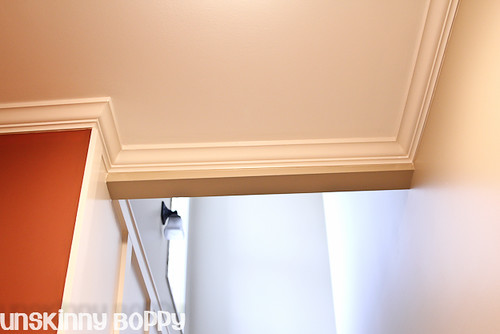
My painter Francisco and crew did SUCH a beautiful job with all the crown molding and trim details. J and his dad boxed out around the air conditioning ductwork in order to give us a much higher ceiling in this area. The tallest portion of the ceiling is ten feet high, and it drops down to 8.5 feet in other spots.
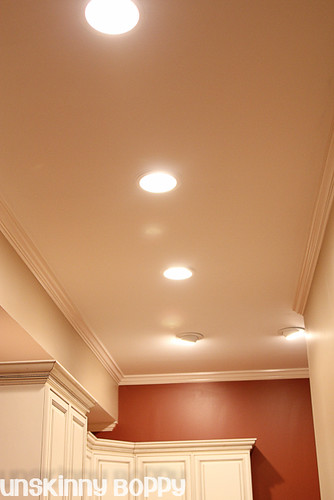
The main reason that we wanted a tall ceiling in this part of the room is because it’s where the staircase comes down. Lowering the ceiling to 8.5 feet here would have made the staircase ceiling impossible to walk under. Since my 6’2″ tall husband hates to bend over while walking down stairs and/or bang his head, we kept it high throughout this whole area.
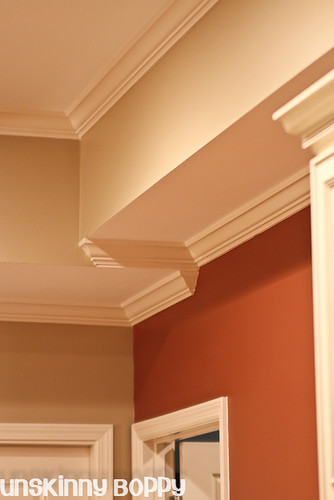
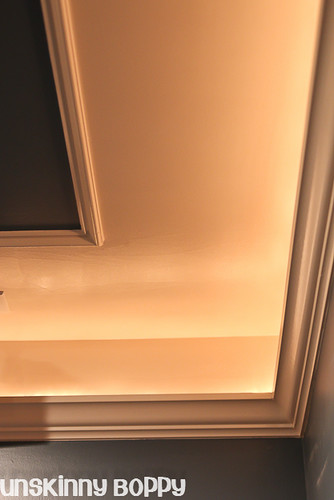
In the spot where the two areas meet, the trim crew worked some magic to make them flow seamlessly. The beige color is Sherwin Williams Latte and the terra cotta color is what I like to call “J’s shirt”. He literally took one of his pullover shirts into Sherwin Williams and had them match it up in a paint color. Let me know if you’d like the numbers from the can. The trim paint is SW Moderate White.
This is the view looking toward the bathroom where the arcade machines will go. I cannot wait to sit in here and play some Donkey Kong and Ms. Pacman with Garrett.
For reference, here is that area before the wall was constructed:
What a difference! J came up with this idea to work around the hot water heater pipes that are right behind this wall. He added a cabinet door in the wall as an access panel to get to the hot water heater shut off valve.
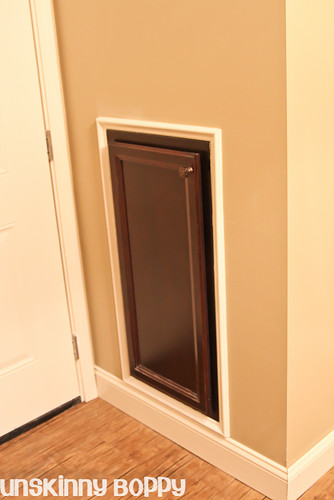
If for some reason we ever need to get to the pipes, just open the door and there it is!
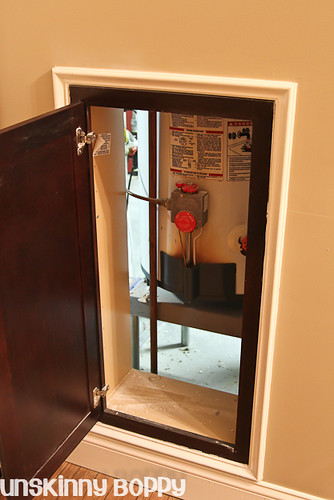
Pretty cool, huh? I think so.
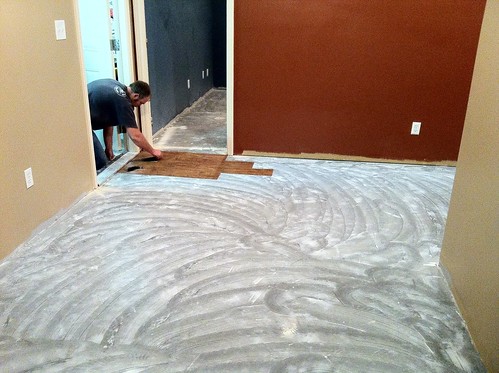
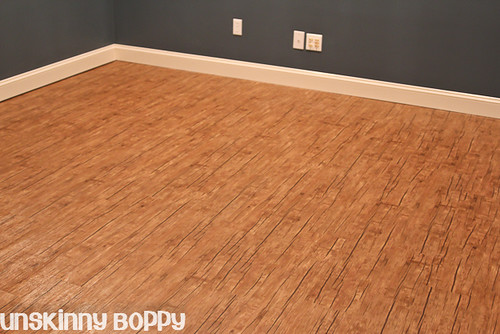
The flooring that we used throughout is LG Hausys Deco Wood in Distressed Beauty (DAW2741). This stuff is a glue-down luxury vinyl tile that looks like real wood. You’d honestly never know it was VCT by looking at it. You’d probably know it was FAKE, but you wouldn’t know it was VCT. When I think VCT I think school cafeteria and nursing home. Blech.

I’ve never mentioned this on my blog before, but at my full time job (as opposed to my little blogging hobby) I design and sell commercial buildings. This is commercial grade high traffic flooring leftover from a job that we did earlier this year. The advantage of this flooring in a basement is its resistance to moisture. This stuff should be able to withstand a little dampness, unlike laminate flooring that can warp if it gets wet. It’s also a glue-down plank material that can easily be repaired by popping up the damaged plank and gluing down a new one. This was another part of the project that we happily paid someone else to do. Being on his knees on a hard concrete floor wasn’t J’s idea of a good time. Here is the flooring guy with the glue applied to the concrete floor and the first few pieces being lined up straight. Once he got the first few pieces in straight, the rest of the floor went in easily.
Now let’s move on over and check out the bathroom. Here is the bathroom before:
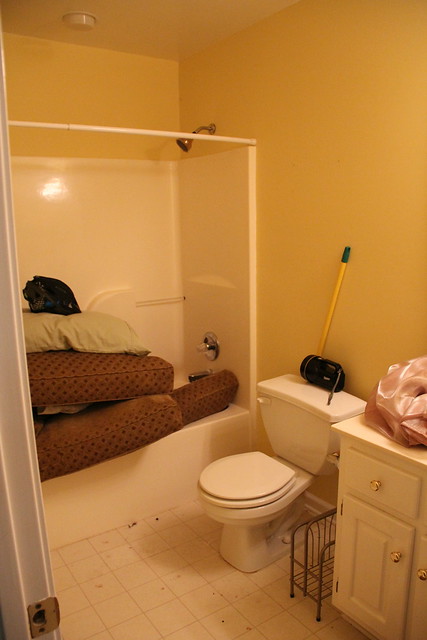
And here it is now:
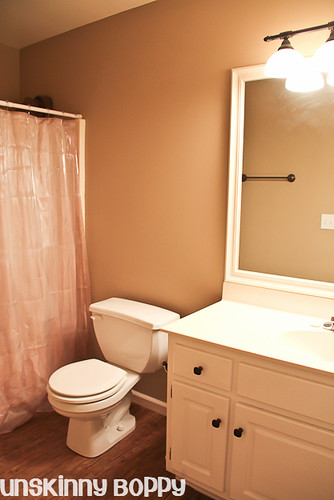
It looks a million times cleaner with the new flooring. And, well, it really IS a lot cleaner than it was the last time I took a picture of it. That before picture is gross.

Hello, peeps!
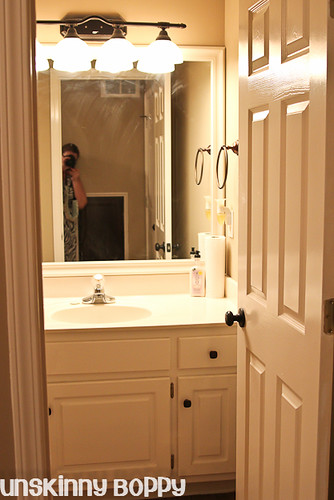
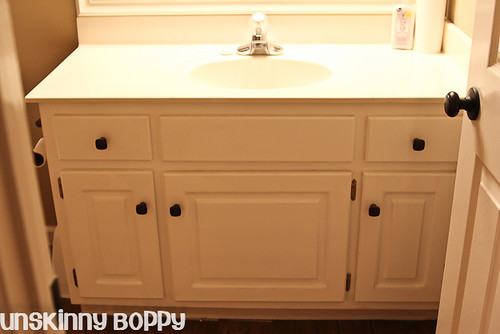
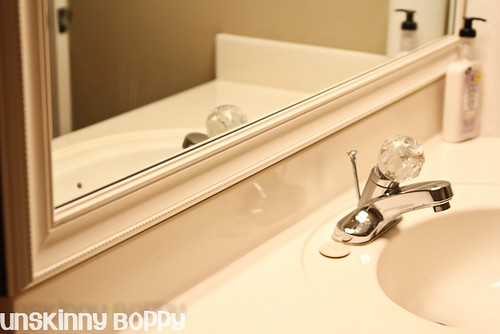
J traded out the cabinet knobs for some oil rubbed bronze ones and wow, what a difference it made!
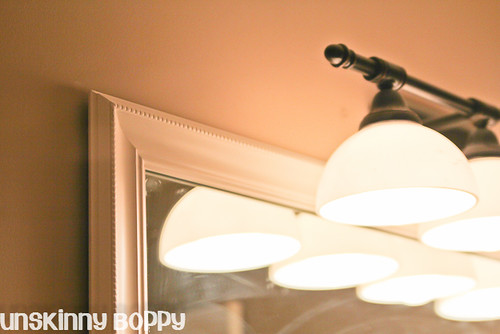
He also added a new light fixture above the mirror and a matching towel holder on the wall. And yes, I realize I need to clean the mirror.
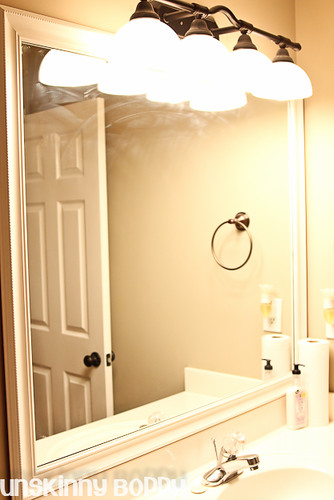
Adding a DIY mirror frame was a great touch for not a lot of money.
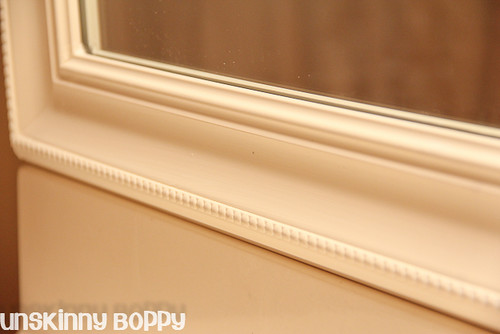
For about $25 and some paint he added this beautiful molding around the existing cheap mirror to make it look like a custom mirror. He just painted the trim, measured the mirror and mitered the trim at the corners to fit, then glued it directly onto the mirror with construction adhesive.
This DIY project along with new paint, flooring and some oil rubbed bronze stuff -really transformed the look of the room.
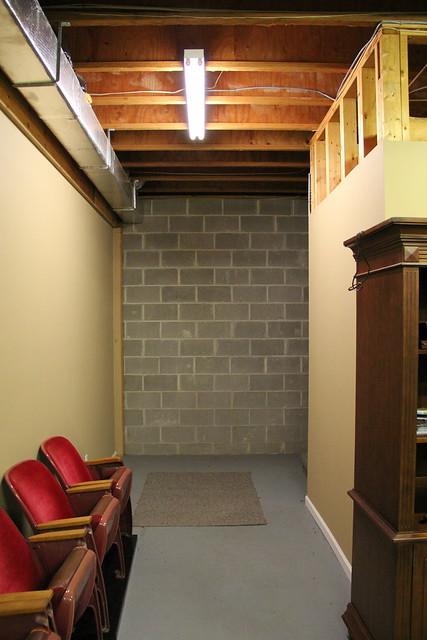
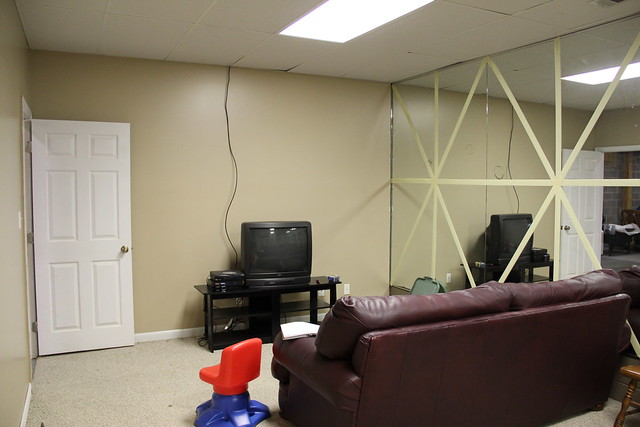
Allright. Last but certainly not least, let’s check out what will be the theater room of the basement remodel. This is the scary mirrored room that gave me nightmares before.
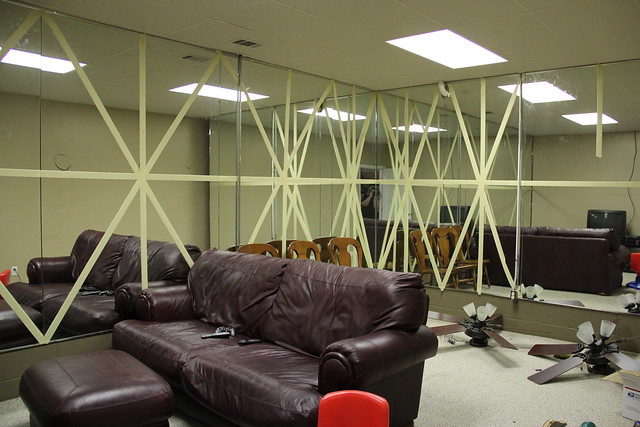
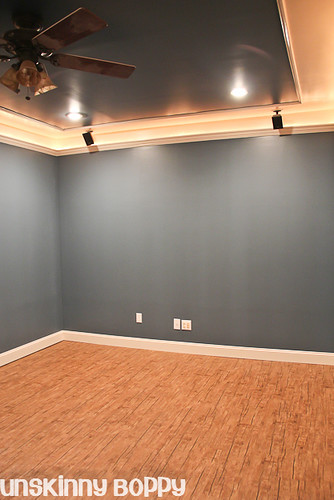
And here it is AFTER!!
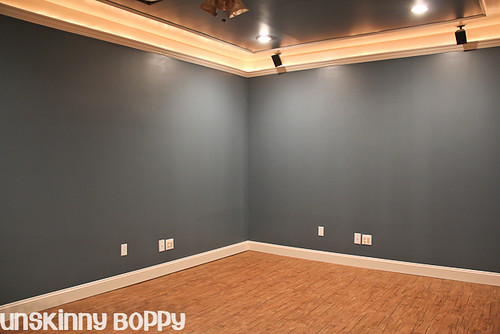
Can you believe the difference??
It is really hard for me to believe that we have transformed this monstrosity of a room:
Into something so spectacular! I just want to whoop and holler! Isn’t it just awesome??
Here is another larger picture of the flooring. I love it.
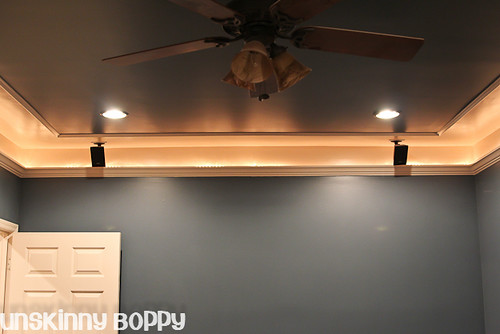
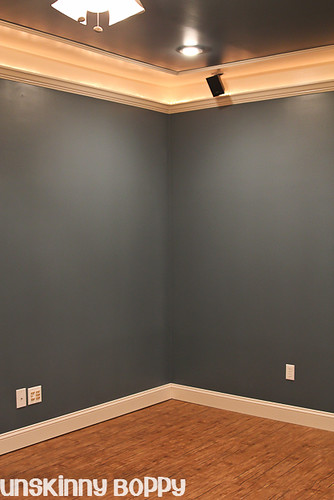
But my favorite part in this room is the ceiling!

When I described to Fransisco what I wanted for the trim he looked at me like I was a ‘lilbit loco en la cabeza, but when he finished the project he really agreed the ceilings were a knockout. He took a standard piece of crown molding and affixed it to the wall about 9″ below ceiling height. Then he took another skinny trim piece and nailed it to the ceiling about 16″ from the wall. Then he simply painted the trim and inside areas white, and the ceiling and walls dark blue. Then J came in behind him and added rope lighting above the crown to light it up. He put the rope lighting on a dimmer switch so when you’re watching a movie you can still have an ambient glow that’s not messing up the movie theatre mood.
So simple, but so stunning. I have to admit that I stole this idea from a photo I saw on Pinterest. Here is the photo that inspired this whole room:
 via Pinterest by SH Interiors from Houzz
Ahhhh, Beloved Pinterest. I love you so.
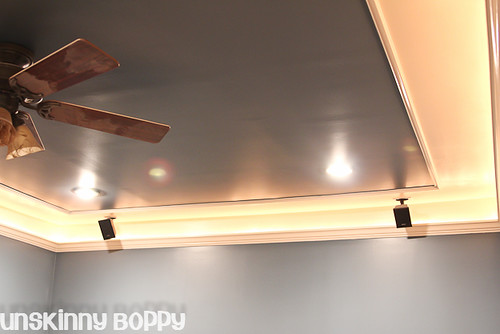
J wired the surround sound system that I bought for him last Christmas directly into the ceiling. No more wires hanging down the wall! YAY!
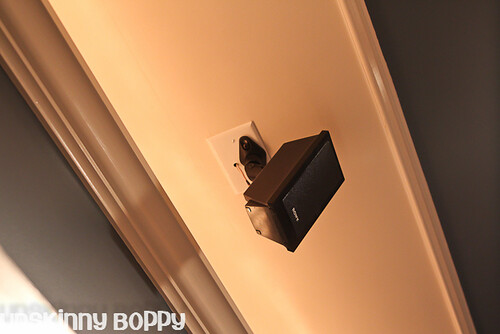
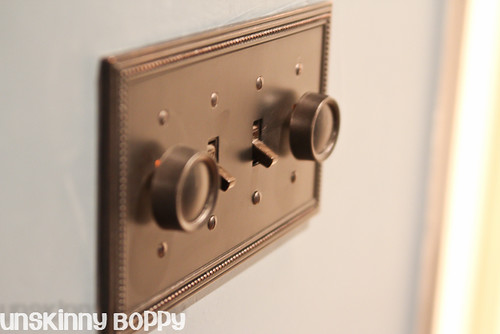
Other little touches, like a new switchplate cover and spraypainted dimmer knobs help the necessary parts of a room not standout so much. White switchplate covers will be covered by furniture so they didn’t matter too much, but we agreed the light switch, can lights and ceiling fan all needed to be dark. He spraypainted everything but the ceiling fan with our trusty old can of oil rubbed bronze spraypaint.
I’m just truly beyond excited that this basement has been remodeled into a home theater that is not only beautiful, but fun and functional all at the same time. Since there is no natural light down here, we wanted to go with medium toned bold colors that wouldn’t be took dark or fall flat in the dimly lit room. I believe we really got it right this time.
Besides, the Auburn fan in me is extremely happy with the paint choice. What better colors to put on the walls of a man cave than orange and blue? I can’t think of any at all. 🙂
Hope you guys enjoyed the big reveal! I can’t wait to see it with all the furniture moved in and the smell of popcorn floating up from the floor joists. It’s movie time, y’all! What movie should we show first?
To see the finished room with furniture and decor that includes a giant poster of an apple core, check out this post and this post.
If you’d like to see all the basement progress from start to finish, click here.


It is just beautiful! I’m so happy for you to have it finished. You hsve to watch Lonesome Dove first.
SUCH an amazing makeover!!
1. The photo of the cushions in the bathtub is hilarious…
2. I love all the little details like the light switch and hardware and that {awesome} pantry pull out you scored…make a huge impact
3. The kitchen area ROCKS…holy moly I want one in my basement now…
4. Your color choices rock my socks.
5. You rock my socks.
Amazing transformation!
Great Photos too!
Well done!!!
AMAZING!!!! I would kill for those cabinets in my kitchen!!
woah buddy!!!!! AWESOME! The theater room is unbelievably awesome!
I totally envision a bunch of young “Nesties” coming to your house and asking for a tour like we did in Atlanta! Except they would probably be “Pinteresters” and not “Nesties” — showing my age there.
I am so inspired by this post! We moved into our newly built home 2 years ago, and we’ve been doing alot of talking lately about what to do with the basement.
I have to admit, I wasn’t sold on the kitchen at the bottom of the stairs at first, but it turned out beautifully! Love everything you did down there!
Holy Moly! That is one AMAZING transformation! Seriously! It’s beautiful…all of it!
WOWEE!! It’s okay to be completely and utterly jealous, right? How awesome is it to have that kind of space?!?! I love that flooring too. I’ll have to remember that for my next life. :o)
Four thumbs up!
Shut up (and I mean that in the kindest way) because your basement rocks!!!!! How about stainless steel counter tops? I hear it’s the cheapest way to go and very durable!?!?
Wholly kamoly girl – that looks just gorgeous!! I love the colours you picked out too, it’s stunning!!! Nice job…
Beth-
What a great transformation. All the details are terrific! Candace Olsen worthy! I love it all.
My best- Diane
Beth, it looks wonderful! I think I commented recently that I did B&B in my stairway, and we are so happy with it. It really brightened things up considerably … I know I will love yours, too!
WOW is all i can say!!!
everything looks great but I think that access door to the gas water heater might be illegal. Is it in a little closed in closet? No ventilation? Listed on the water heater it might say the minimum clearances. Worse comes to worst you can install a louvered grill above that fancy door. check codes
Love that Blue paint color, what is it?
[…] […]
Awesome post & designs I really like the way you have done the designs
Even as a confirmed Bama fan, I have to agree with your color choices! Gorgeous! The crown molding/rope lighting I saw Kristopher Lowell do years ago and have written in my ‘dream’ book of design ideas. I’ve never seen it executed before though! What a fanstastic job! The whole mirror thing would given any but the most hardened narcissist nightmares! EEEK! I’m so glad to follow your blog, and think you and J are completely brilliant! Thanks so much for sharing!
I love the new flooring!! Where do you get it at? I would be interested in doing our basement in it. We just bought this house in November and I’m starting on the redo. Slowing while trying to work full-time from home. But the painting has begun! lol
Thanks Melissa! Here is the link to the Luxury Vinyl Tile we used. It has held up great! http://www.shawhardsurface.com/productspec/show/0188V
What was the price per sf for this floor?
New reader here. I’m just starting my basement renovation so I’m loving your post today. Your basement looks great!
-Chelsea
http://pinteriordesigns.wordpress.com/
Thanks so much! Good luck with your basement project!
What are the measurements for the ceiling trim? I’m remodeling my basement and really like this idea.
Hey Chuck, I’m pretty sure it’s 12″ of white paint in either direction on the ceiling and wall, including the trim work. Hope this helps!
[…] on my to-do list to remedy this situation, but right now it works. It’s also on our to-do list to frame out the mirror with some matching trim pieces like we did in the basement. It will help finish out the room for […]
Nicely Done! I love the attention to detail in the cabinetry and trim work!
Well done! I love all the changes made. You have a knack for finishing basements =)
Wow, what a transformation! You may have just inspired me to tackle my unfinished basement (maybe lol). Thanks for posting!
[…] image via Unskinny Boppy […]
You’ve GOT to tell me where you found the pull-out pantry rack!!!
Me too! I need that for my deep pantry. That would solve all my problem. Please do share 🙂
Awesome Post…!!!
[…] Source: unskinnyboppy.com […]
Love the tranformation. Thanks for sharing!!
[…] Tip: To hide the rope lighting’s cord, her husband drilled a hole in the wall so he could plug the lights in on the other side. He thought about having an outlet installed closer to the ceiling, but wanted a finished look. See her entire basement remodel here. […]
This is a big change and it looks great! It just goes to show that a basement remodeling is an investement woth making for any home.
What’s up, after reading this remarkable article i am also glad
to share my familiarity here with colleagues.
This is an informative post. I like to read similar post in near future. Keep up the Good Job.
Heya,
This is super-cool and soooo inspiring! I have been trying to get some ideas for some home renovation for a project of my own. I love what you done so much, I saw this other basement renovation which you might like https://www.olbc.co.uk/portfolio/renovation-large-victorian-house-basement/
Thanks for sharing 🙂
Nat
xx
We are a professional construction company with years of experience. Gets tailor-made luxury remodeling services with us. We offer Kitchen Remodeling, Bathroom Remodeling, Living Rooms Remodeling, luxury outdoor space remodeling and more.
Complete Home Remodel Los Angeles
Bathroom remodeling near me
Kitchen Remodeling near me
Complete home remodel near me
Master Bathroom remodeling los Angeles
Complete home remodel near me
Bathroom remodeling specials in Ventura County
I have the same thoughts as you, it’s really great. thank you very much. Visit my blog here http://finishedbasementkanata.com/