Today I’m pulling one from the archives to show you guys how we transformed our basement staircase with a little bit of paint and some board and batten. I originally shared this basement renovation project over on the DIY Showoff’s blog back in 2011.
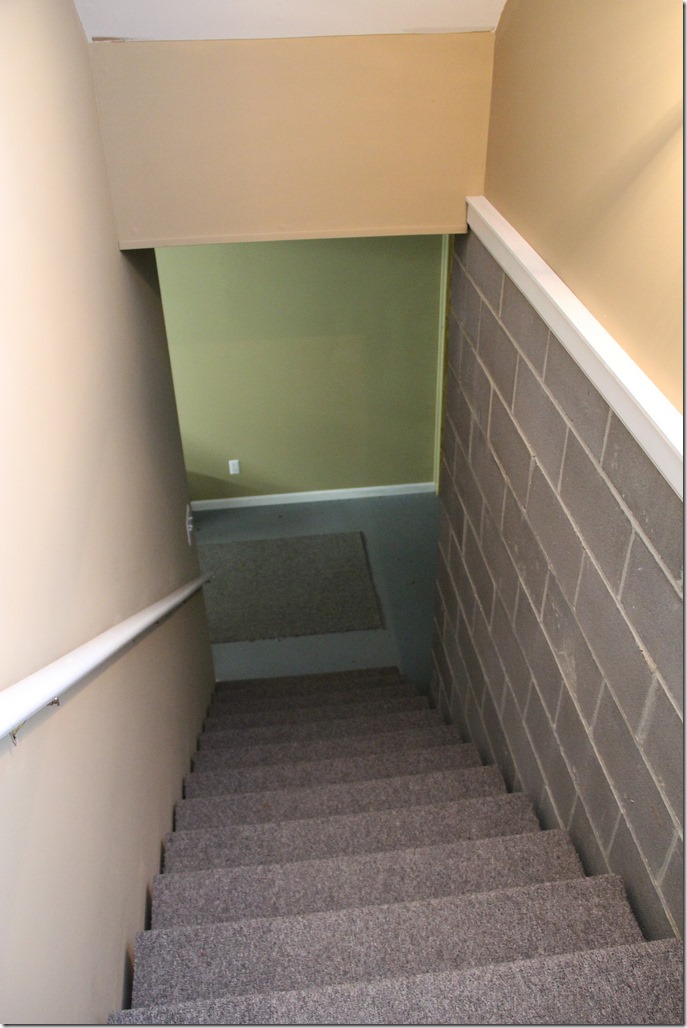
When we moved into this house, our basement staircase looked like something from a maximum security prison. Here is what the steps looked like when you were headed down into the dungeon:
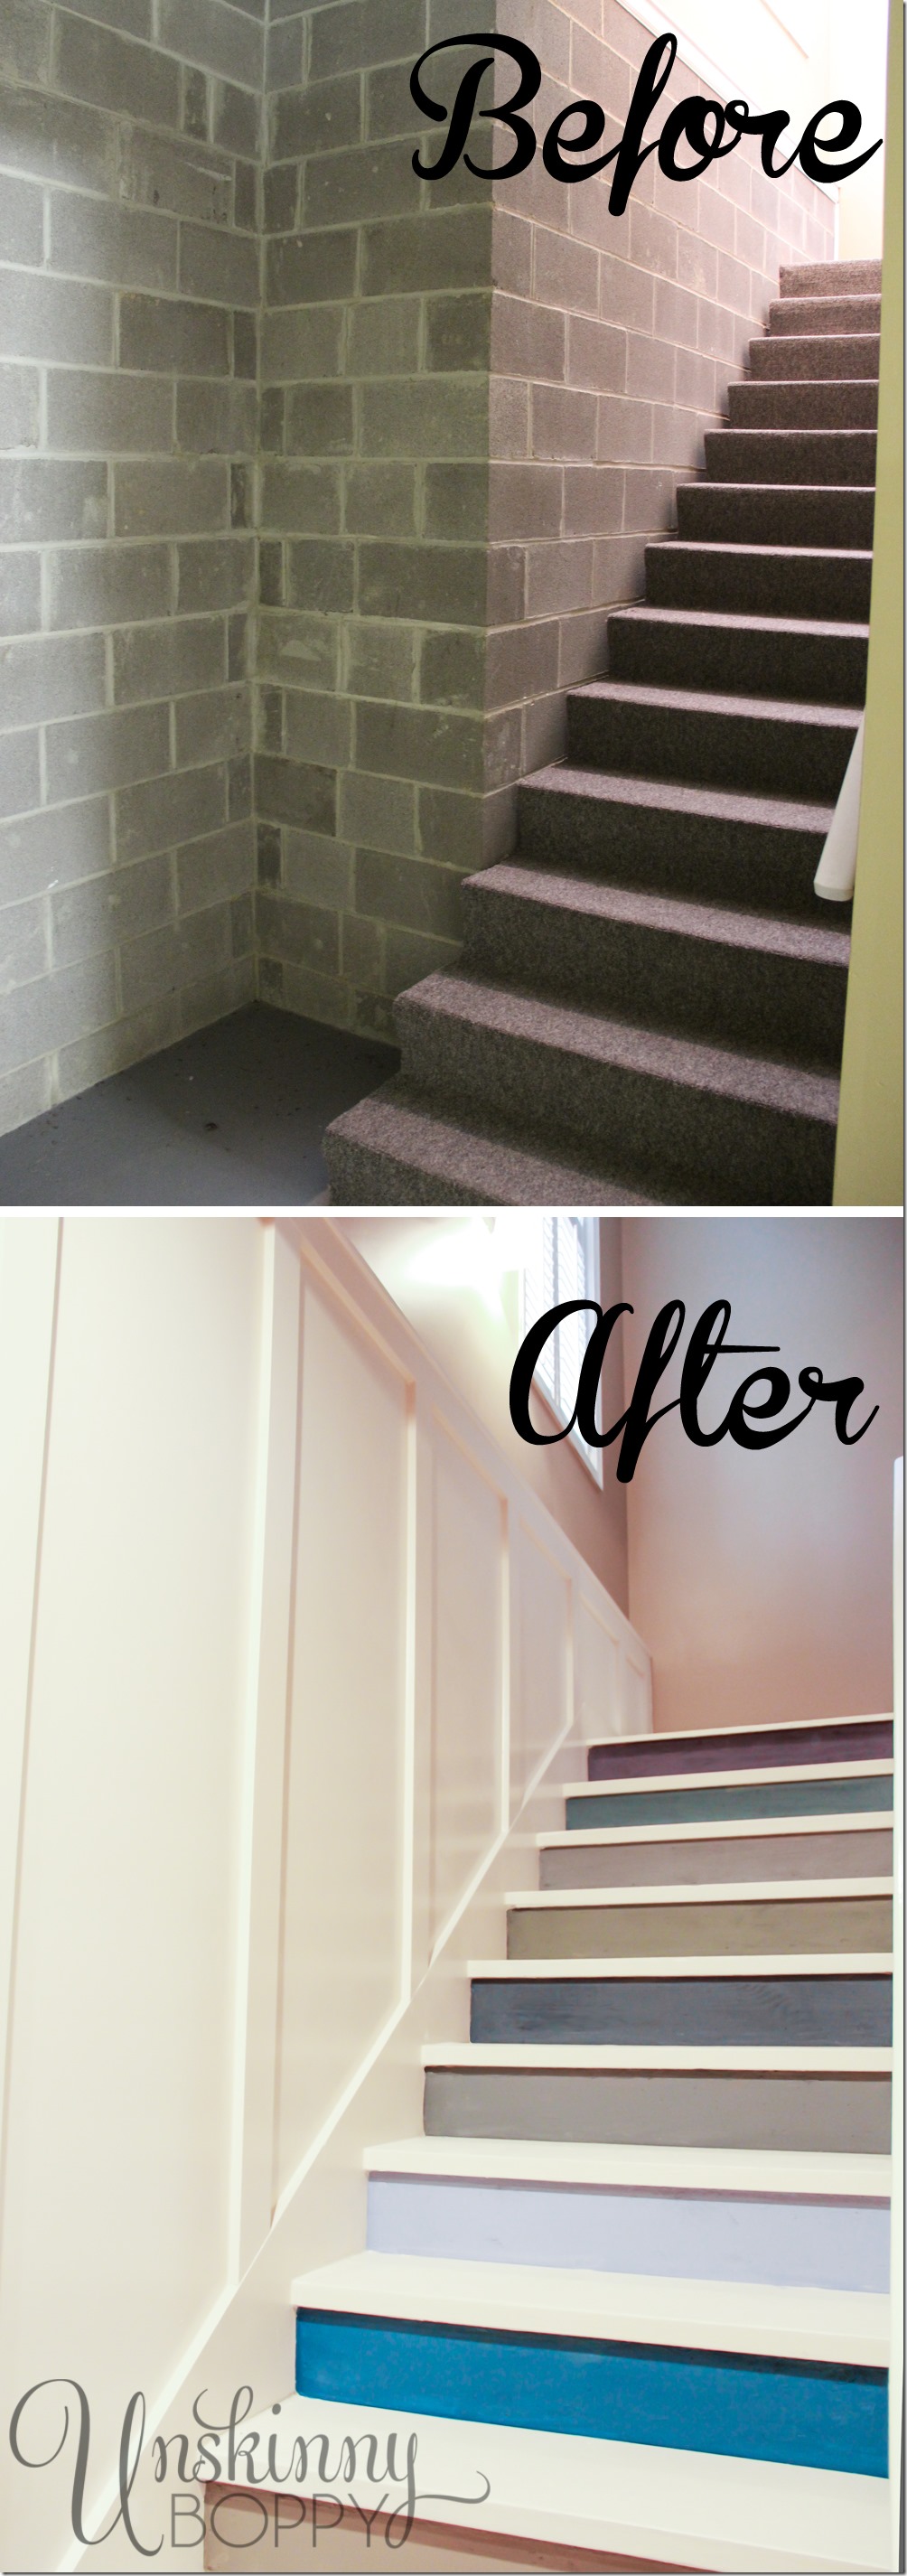
Once you got down there, the scene did not improve. Grey concrete block walls with cheap grey indoor/ outdoor carpet stapled down to the steps. It was NOT a pretty picture. My husband parks in the basement, so every day after work this is what he was greeted with at home. It wasn’t the most cheerful place to come home to everyday, so one day we decided to change that.
Let me show you how we transformed it from the depressing Alcatraz dungeon to something really beautiful, using just paint samples and a little bit of carpentry work.
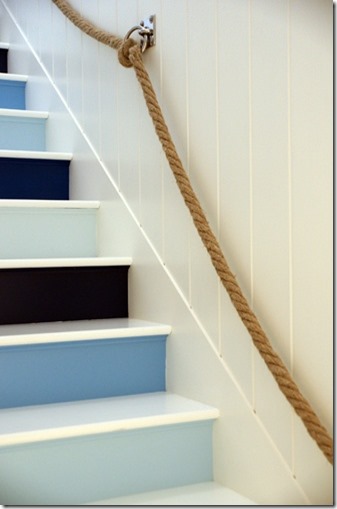
When I was searching for staircase inspiration I ran across this photo on Pinterest of a Jonathon Adler beach house with multicolored stairs. Each stair riser was painted a different color, some light, some dark. I loved the uniqueness of this staircase, even if it was a little bit too nautical for my home.
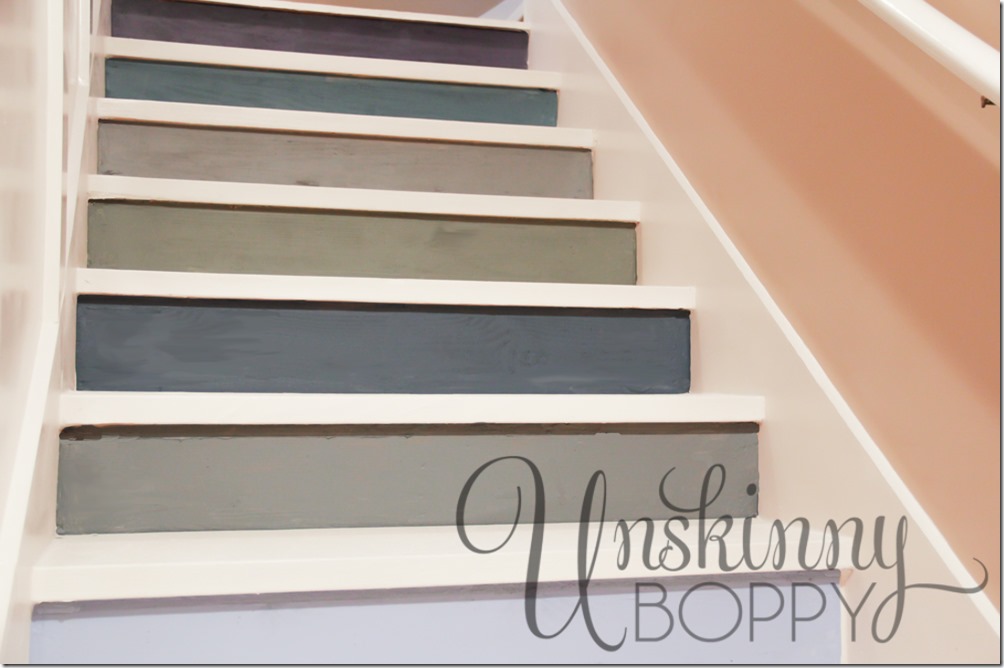
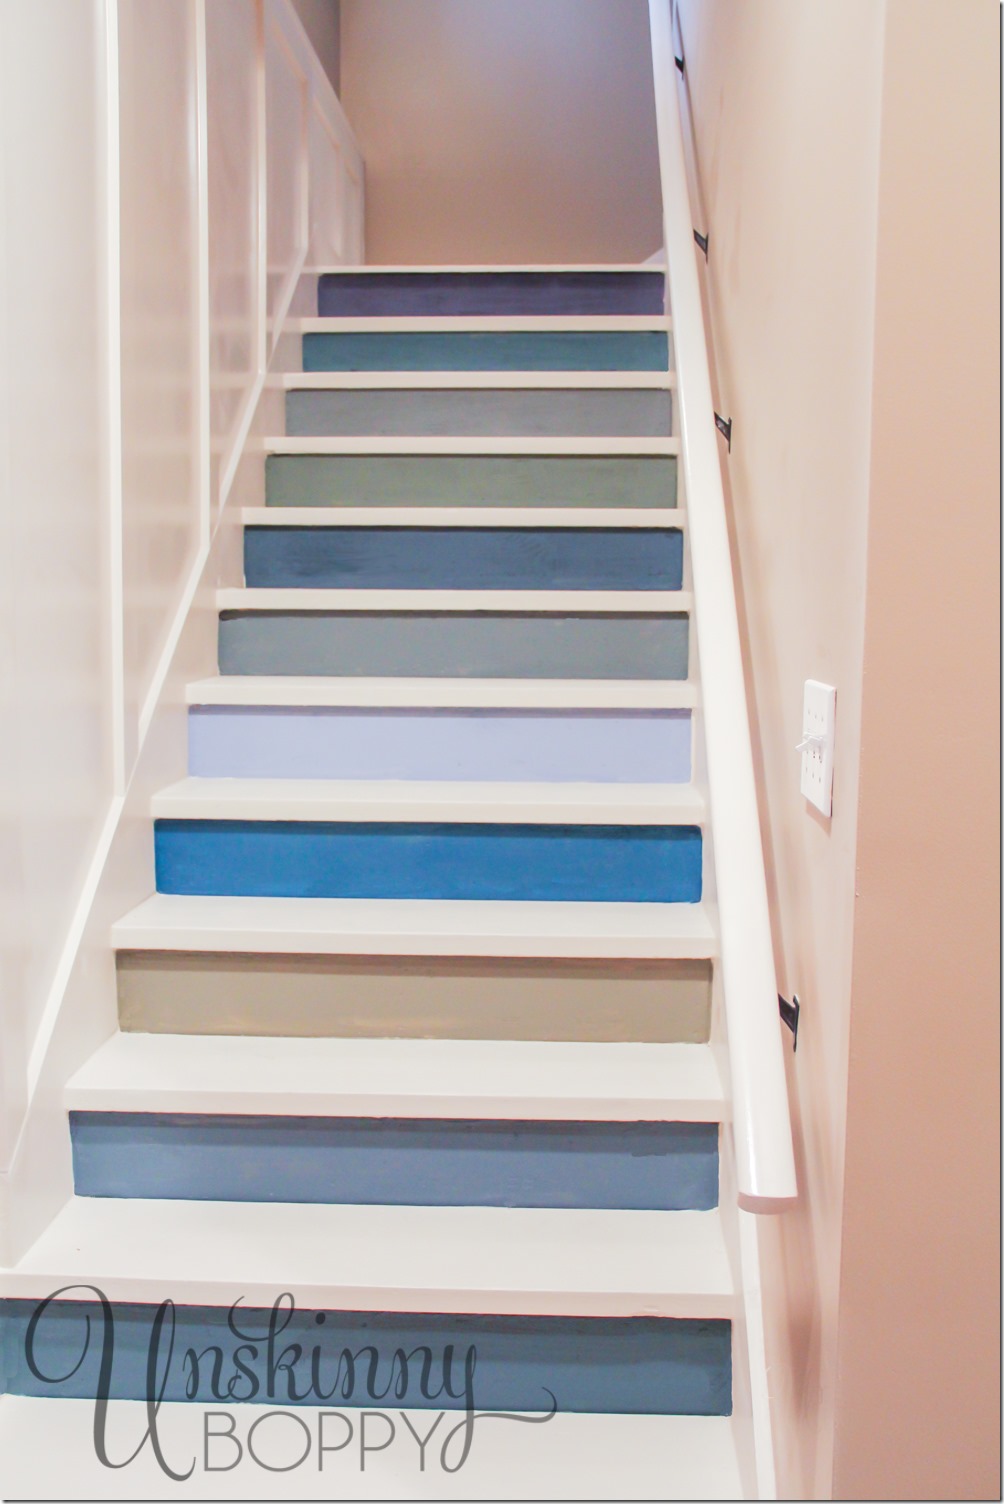
Here is my interpretation of that staircase in my own house.
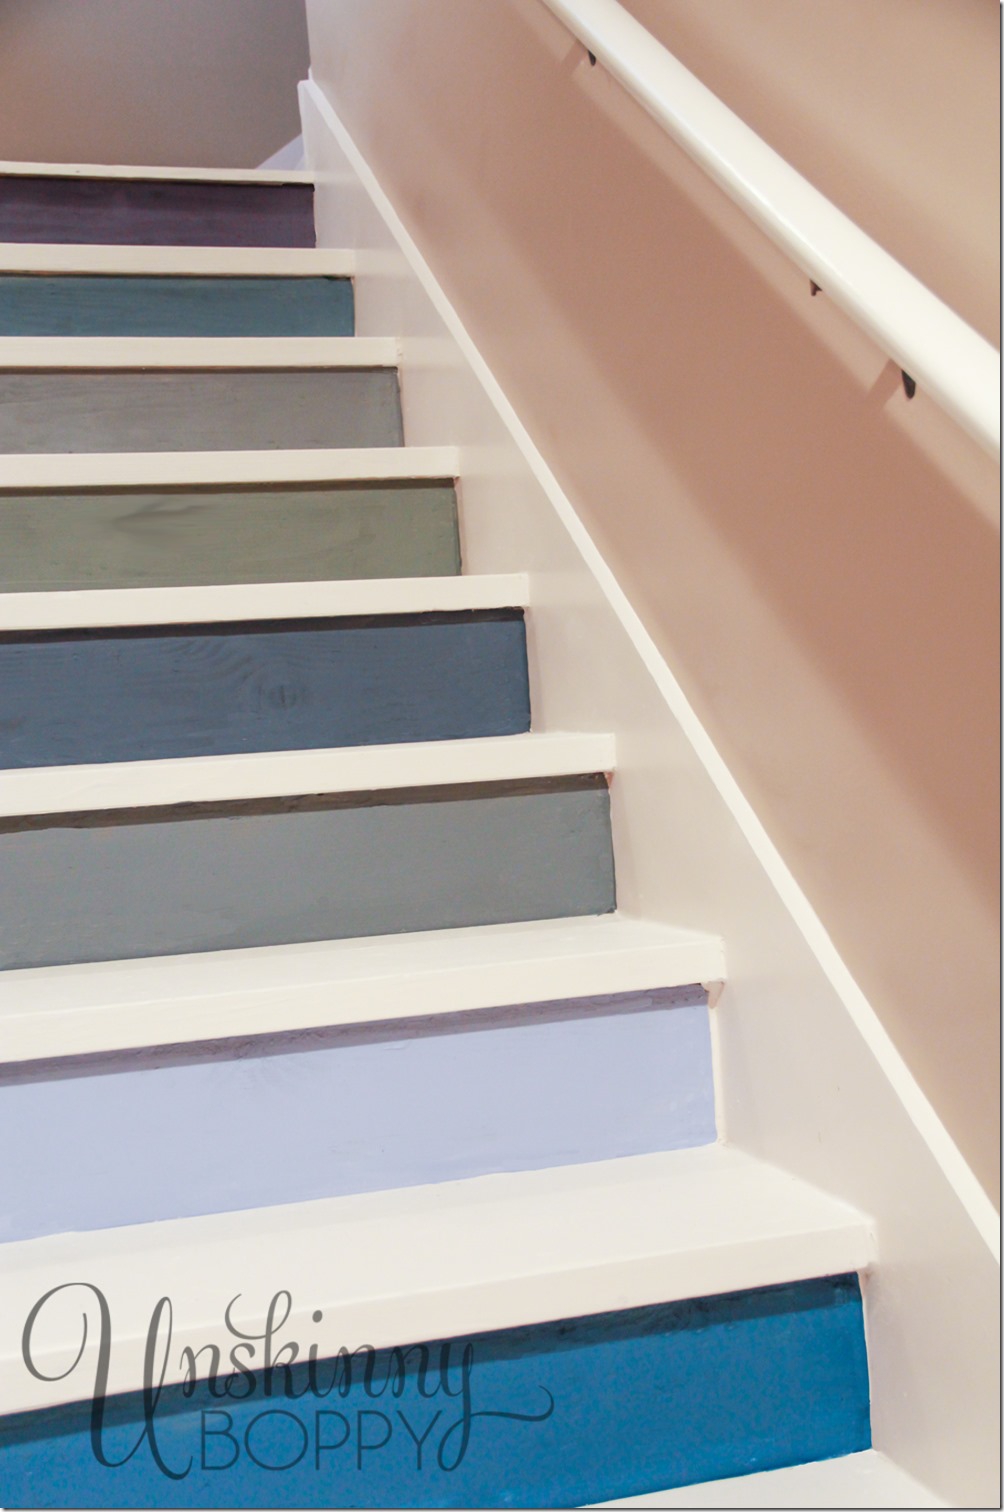
Guess how I got all those risers a different color! Paint samples!
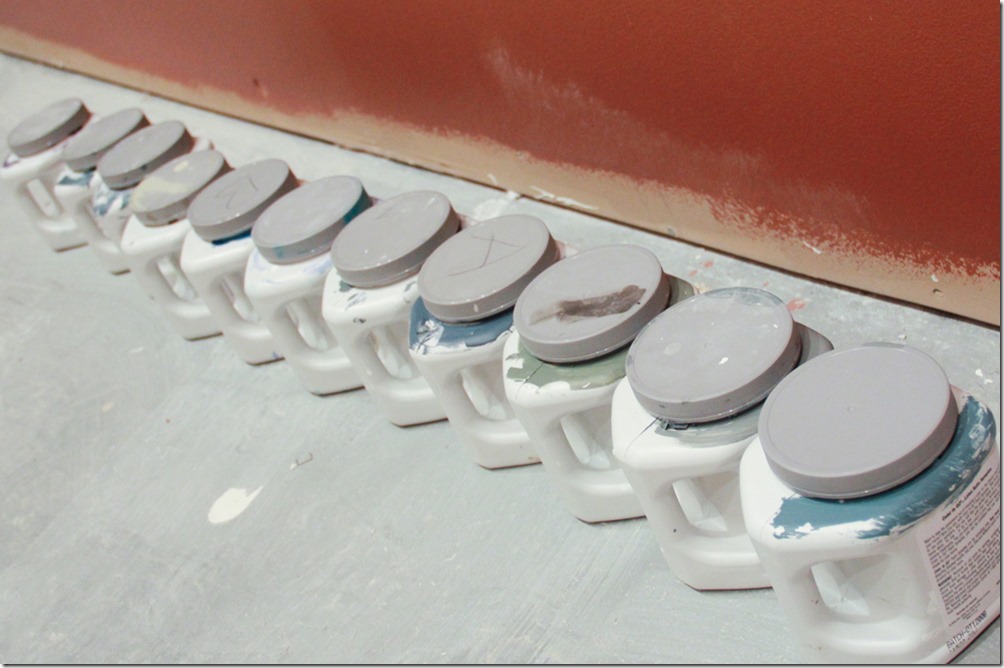
Let me back up just a minute here and say that I have a bit of a paint sample addiction. Whenever it is time to choose paint colors for a room I agonize over the paint fans for hours, then we make a run down to the local Sherwin Williams and buy their $5 quarts of sample paint. I firmly believe the best way to tell if you really like a paint color is to get as much of it on the actual wall as possible. After living in this house for three years and painting almost every room in it (and some rooms twice!), I’ve acquired quite a collection of paint samples. It might even be a borderline hoarders tendency since I refuse to throw any of them away. They sit on a bookcase in my basement just in case I find a piece of furniture (or stairwell) that needs a coat of paint on it. Here are all the samples I used for this project.
So, what do you do when you have a set of bare wooden steps that have been toe’ up from the flo’ up and fifty quarts of Sherwin Williams paint samples in various shades of blues and greens and greiges? You paint a blue/green/greige rainbow, of course! And that’s just what I did. Every stair riser got a different paint color. I’m kind of ashamed to admit I could have painted about three more sets of stairs and not used the same sample twice.
Since this staircase is basically the first thing my husband sees every day when he arrives home from work, we wanted it to be a brighter and more cheerful space. Plus, the basement was getting a major overhaul, so it was hard to imagine leaving that ugly carpeting on the staircase with all new paint, sheetrock, and trim throughout the rest of the space. So one day after a little discussion about my plans my husband ripped all the carpet up with his bare hands. Of course I have no photos of this event since he simply came upstairs with his chest stuck out and announced “Carpet’s up!”
And I was all, “WHATthewhat?!?”
Well, allrighty then.
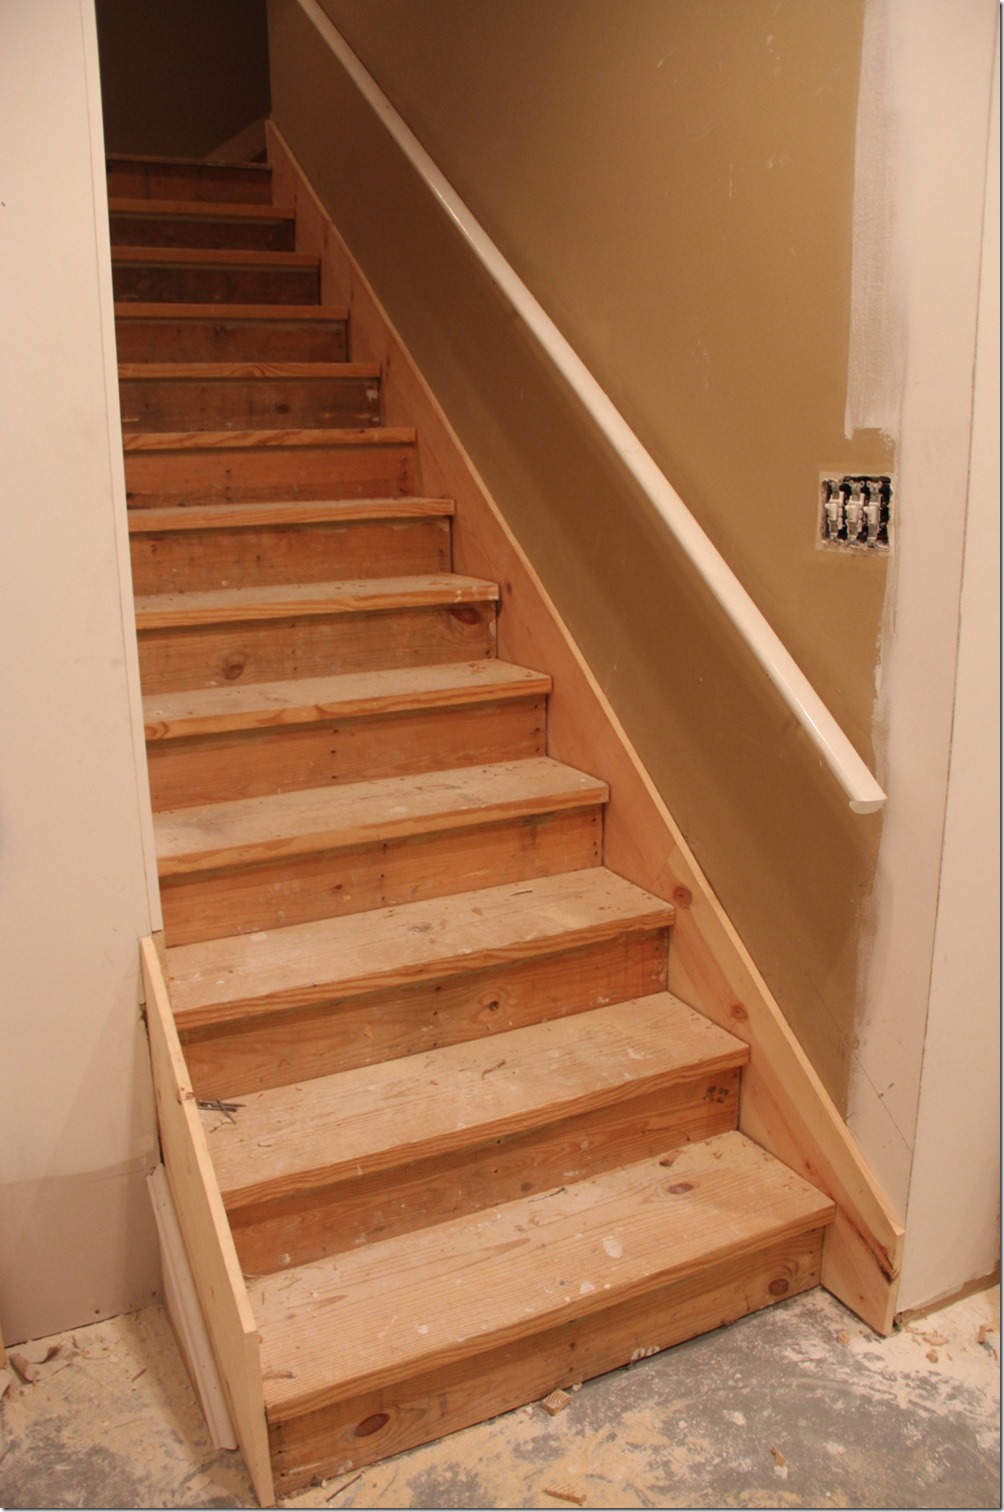
Here is the staircase after he went all Wreck it Ralph on them and ripped off the carpet. Before painting I had to pull out all the staples left behind from the cheap carpet. A pair of pliers made short work of that job. Then I went behind with a tube of spackle and filled in the holes and crevices in the wood.
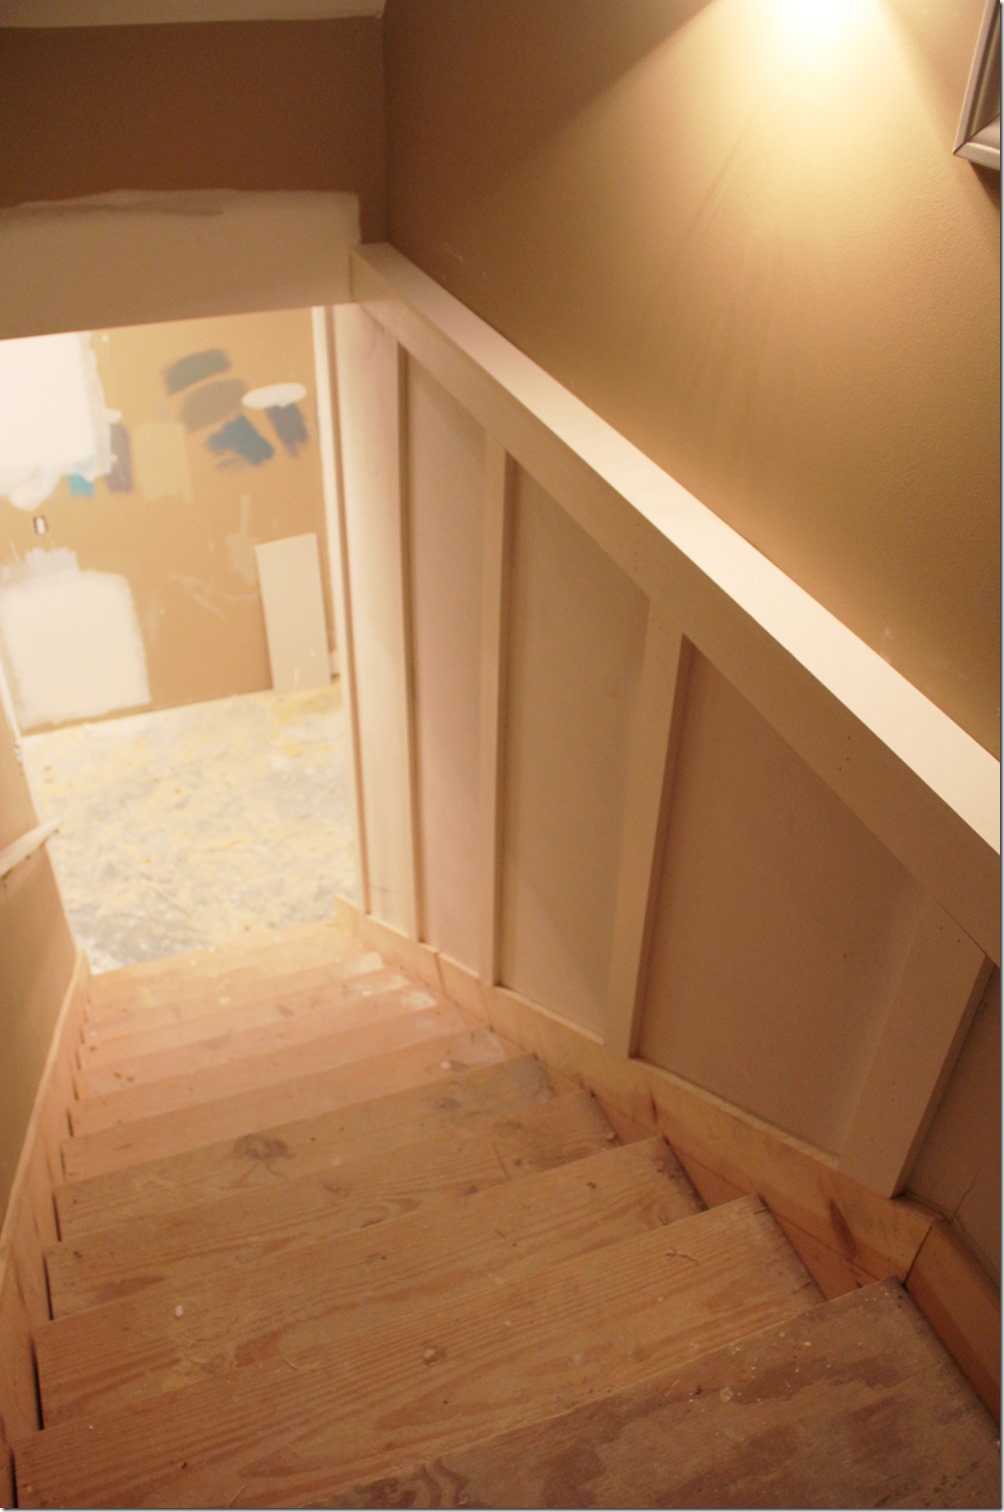
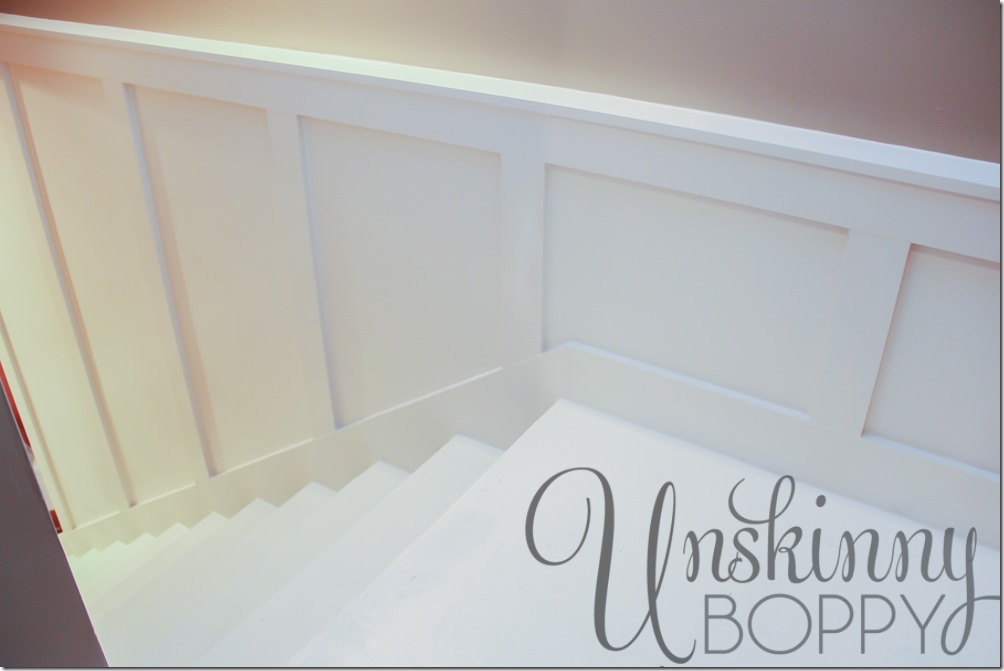
And here is the board and batten taking shape our of 1×4 lumber. Since it was in the budget, we hired out the board and batten on the concrete block wall to be done by a carpenter. He built out the wall with furring strips attached to the concrete, then added sheetrock and 1×4 lumber for board and batten over that.
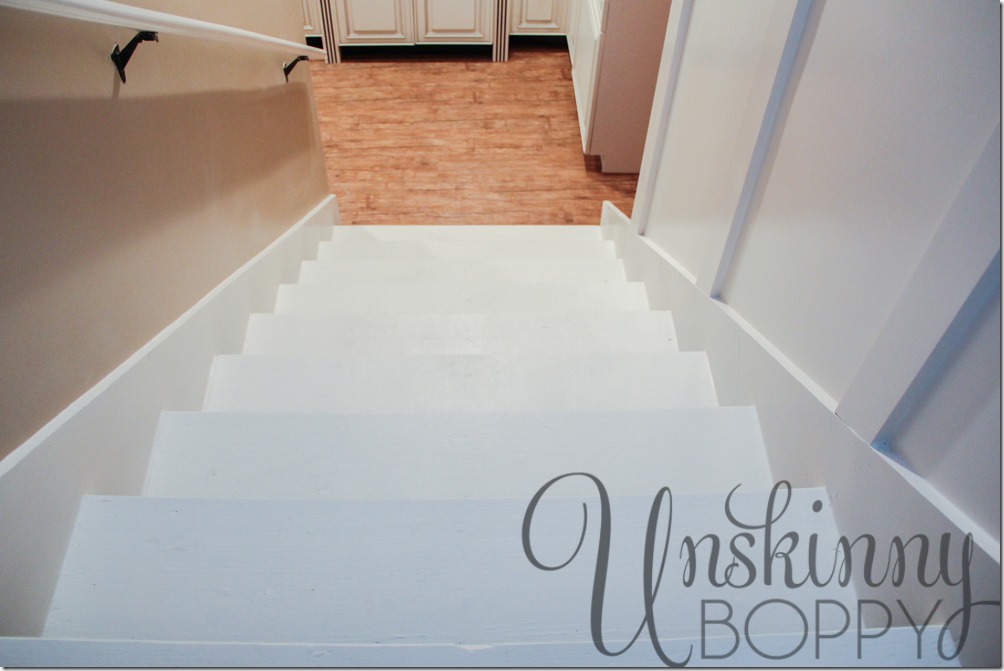
And here is the finished result! Everything got a few coats of Sherwin Williams Porch & Floor Enamel paint (the color is Moderate White in a high gloss).
I totally adore the finished result. Although I cannot claim the board and batten as my own DIY project, I can say that the stair paint is 100% me! My knees were happy to get this project completed because there was a lot of staple pulling, spackling, paint brush rinsing craziness involved in this staircase.
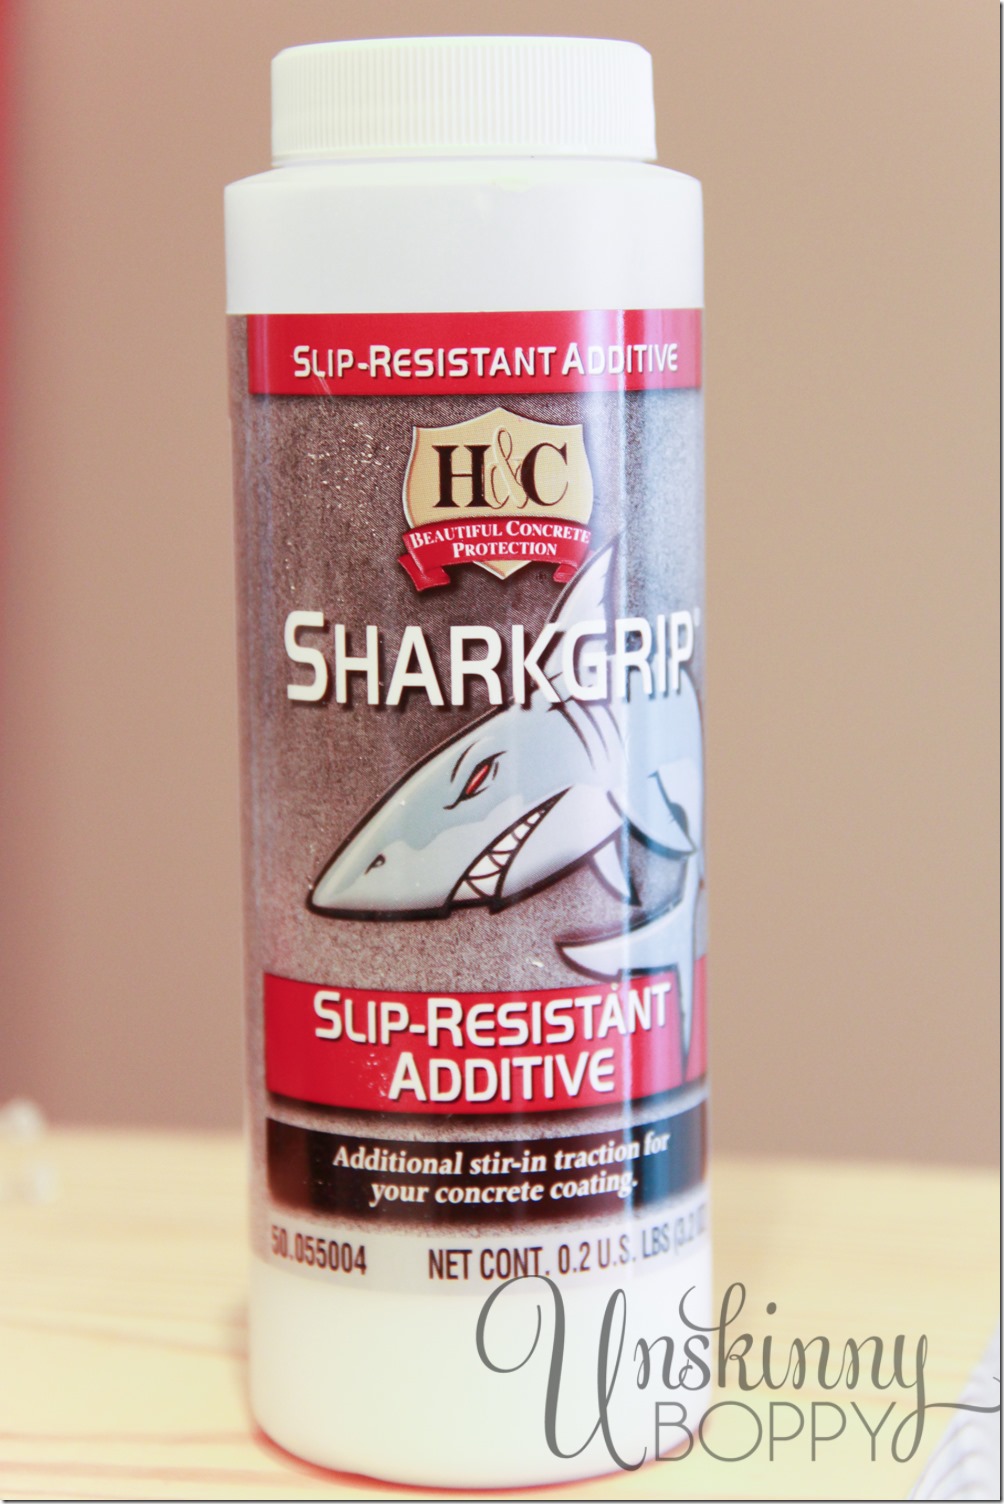
To keep the stair treads from being slippery, I mixed H&C Sharkgrip slip resistant additive into the paint. I highly recommend this stuff for use on wooden stairs. I’ve learned that it does NOT work on ceramic tile, but this is a different story for another day. The basement stairs are super non-skid with this stuff mixed in. It is good stuff. Here is a tip about Sharkgrip, though- Home Depot does NOT carry it. I could only find this brand at Lowes and Sherwin Williams.
So there you have it! The finished basement stair case with a rainbow of blue/ green paint samples.
It’s been over a year and a half since this project was completed, and the paint is holding up great. It’s not chipping or wearing at all, even with daily use. I’m so happy we put all those paint samples to use and gave the basement stairs a makeover that it deserved!
If you’d like to see more of our completed basement renovations, check out these links:
Basement Remodel Update: Electrical & Sheetrock…. Check
Basement Remodel Update: We’re Almost There
The Finished Basement Revealed
Because Matboard is Boring: A Unique Way to Frame Poster Prints
And if you need TONS of great finished basement inspiration idea, be sure to visit my Hometalk clipboard of Finished Basement inspirations.




This looks so fabulous and what a terrific job you did on the stairs. This makes coming home for hubby much more inviting!
Ummm, Beth….this is awesome!!! I am pinning your stairs (and I never heard of shark grip) to my board of ideas for my old building redo.
Bliss
i LOVE LOVE LOVE this, Beth!!! you did a fabulous job!
Great idea Beth! I’m a paint sample addict too. I have GOBS of them. Your stairs look awesome!
Wow! They look absolutely amazing!!! GORGEOUS!!!
I absolutely LOVE your multi colored stairs!
What a fun idea! I emailed this to my mom because they have a plain plywood staircase in their house and a bunch of fun paint samples from repainting the front door a few months ago. Perfect!
There you go! Great solution!
Wow…just WOW! I love this so much. This is so much better than the nautical look and so creative. Thanks for sharing. You’ve definitely inspired me as I’m working on my basement right now!
so so so so so GREAT ! sigh…xo
😀 Thanks Lucy!
I LOVE the look of your stairs. (and where I’m sitting, I have perfect view of our own stairs… how much would the Mister freak out if I just DID this today I wonder… hmm.) But I have to ask – how well does the white stair color do with heavy foot-traffic? I mean, it looks like the paint held up alright, but how do you keep it clean-looking?
I can honestly and shamelessly say that I have never even swept these stairs since we finished them, and they do not look bad at all! The enamel paint with the shark grip helps to keep the treads from getting scuffed up. They do have some dirt on them, but after a year and a half they don’t look much worse for the wear. Since my husband is just about the only person to ever see them I’m not in a huge hurry to keep them clean. 🙂
Yup. I totally remember this in all of it’s AWESOMENESS…
This is such an incredible makeover. And I’ve never heard of that SharkGrip stuff before. I think I’ll use that this summer on our front steps. Thanks for sharing and inspiring!
Very cute! I’d love to paint my home’s basement stairs. The basement is unfinished, and the stairs are all now plywood. And I have lots of paint left over from various projects, too!
Great makeover! I collect “mis-tint” paints… or as I see them “paints that go beyond the paints decks to places that sometimes scare people.” I use them on furniture, so smaller amounts of a one-off red, is perfect. However, they would be great too for a project like this!
I love the board and batten solution. The battens would protect the wall from abuse better that simply drywall!
Great job!
Super fun!! I’ve been contemplating this myself. I’m still a super newbie when it comes to DIY and I am scared stiff that I’ll screw things up. P.S. I thought I was the only one who said “what the what?!”
This project has always made me wish I had stairs to try it on. Love all of your projects, Beth!
It’s beautiful Beth! You would never know it’s the same stairway. Great job!
I thought I had subscribed to your blog and just thought lately that I hadn’t seen anything in my inbox for awhile. So I came over and subscribed again. Or maybe I thought I had but didn’t – anyway I hope to keep up with you a little more now!
I’ve seen plenty of step risers painted an accent color, and even several with some design work for an accent, but have never seen the multi-colored approach like you used on your basement steps. The overall effect is wonderfully eclectic and fun. If I came up these same steps every day at the end of a long work day and harried commute, it would make me smile. Well done!
this is so GREAT! my husband and I are currently renovating our condo and there’s a long stairway down to the garage I’ve been trying to figure out a cheap solution for. (we’re spending way too much money on the main stairway in the house, I can’t bear to put more flooring down on the stairway down to the garage) This was such a great post – even my husband’s excited for this project!
Hi!
I love your idea and want to copy it! My only concern is with the shark tread. My home is a 70’s split level. So my stairs are right at the front door and are used a ton. Is the shark tread ruff on your feet? We don’t wear shoes in our home and I would like something that wouldn’t be too ruff. But that would still make it safe in the winter time when things are wet and slippery too. Any advise would be greatly appreciated! Thanks!
Thanks for putting this post together. It is the solution we have been looking for to replace our carpeted stairs with a painted white surface over the wood like you have done.
The issue we were worried about was the slipperyness of the stairs without carpet, Thanks for sharing the details of the product you mixed with your paint along with this great post, step-by-step.
🙂 Thanks CRystal
You’re very welcome! Thanks for the comment! Hope this helps!
I love this staircase- I was looking for something a little more unique/interesting than just plain white- and I absolutely love the idea of using different colors on the risers. I plan to put this to use on our basement stairs very soon- Thanks so much for sharing! 🙂
I love, love, LOVE this! Do you know what the process is of putting the lumber on the side, to create the board and batten? Like the continuous line on the top of each stair? I want to do this…been too afraid but am gathering courage. 🙂
How did you fill the cracks at the ends of each step?