Ever wondered how to remove wallpaper like a professional? Today I’m sharing all the tips and tricks I learned for the quickest and easiest ways to strip wallpaper. Remember when I told you about both of my upstairs bathrooms that were covered in 1990’s “Home Alone” throwback wallpaper and dying for a makeover? Well, today I’m going to show you what we did to totally transform Garrett’s bathroom from dated and boring to totally fun and fresh!
Here is the Before and After of his bathroom makeover (don’t you love a good before and after photo? I sure do!)

After many years of sitting on my to-do list waiting patiently for me to get around to it, the wallpaper finally came down with some help from my friends at True Value. When I was in the store last time, I picked up some wallpaper removal tools, including a Zinsser Paper Scraper, a Zinsser Paper Tiger, and Dif gel wallpaper remover. I already had an empty water bottle, a putty knife/paint scraper and a razor blade, but I wish I had this angled razor tool to get into some of the harder to reach areas.

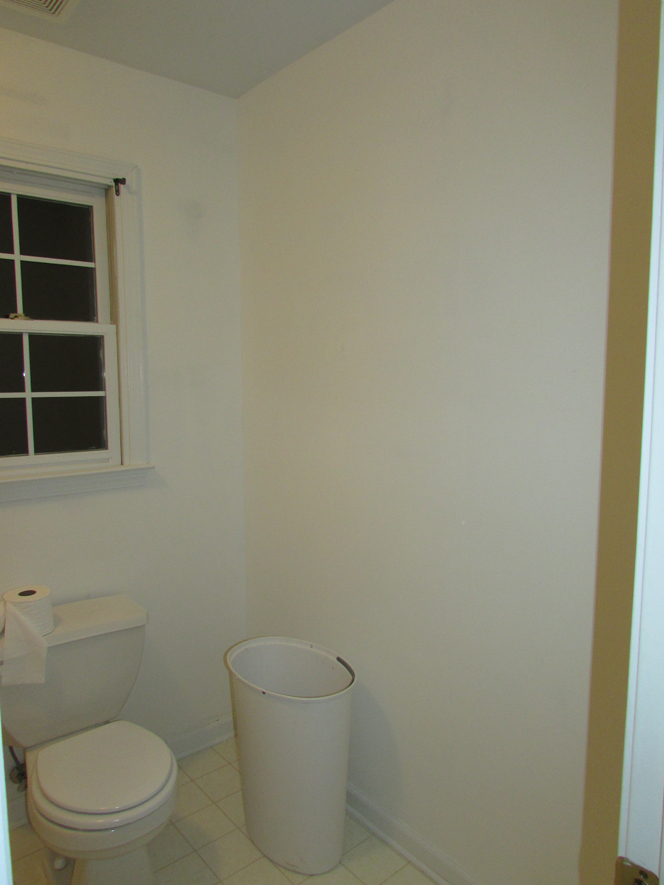
Here is what the bathroom looked like before I started the process. Lots of navy/burgundy/hunter green stripes and borders.

And here is what the bathroom looks like today!! What a difference, right?

I am ecstatic with the way it turned out, but it took a whole lot of effort to get to this point. The wallpaper in this room was THICK. Apparently the people who built this house originally spared no expense when it came to wallpaper, but unfortunately they pasted it directly onto the bare sheetrock without any primer underneath. This was a nightmare for us, because we had to first strip off the top layer of paper, then attack the glued layer underneath.

The first thing we did was find a seam and rip the edges off as much as we could. Then we sprayed heavy amounts of water on the glue layer. This softened up the paper and allowed us to start scraping it with the paper scraper.

Some areas were stuck so firmly that we had to get out the razor blade and peel it up millimeter by millimeter. This was painstaking work, even in a small bathroom area. I’m not going to lie, wallpaper removal is not for the faint of heart. It’s a lot of soaking and scraping and soaking and scraping. What a tedious process. I’ve heard rumors that there are wallpapers out in the world that are able to be removed with one great big “RIIIIIIP”… We did not get that lucky.

So that is when we broke out the Paper Tiger. This tool is excellent if you have wallpaper like mine that is super thick and hard to penetrate with water or the gel remover. It basically shreds the paper and allows moisture to seep in behind the paper so it can release from the wall. The downside of this method is that it also can shred your drywall, which creates more of a mess for you to clean up and patch later. In an ideal world, all wallpaper would come off in one big strip, but that is obviously not the case, so this tool helps when you are working with really stubborn paper.

See how it allowed me to get water and the Dif gel back there so that I could remove it in bigger pieces than thumbnail sized? Whew, I felt accomplished when I would get a big piece off at once! I learned that if I kept moving my paint scraper back and forth in a line while pulling down slightly with my other hand I got good results, like this. Remember to keep that paper wet at all times! Wet paper comes off MUCH easier than dry! Do not be afraid to get that sheetrock wet. It won’t hurt it at all, and it will help make your removal process go so much faster.

Here was some progress after a days work. I’m not gonna lie… the bathroom sat there like this for a long time before any more work got done. This is a great project to start when you are feeling introspective and have a whole lot of time on your hands to sit and think and strip tiny shreds of paper off the wall.

Finally we saw more progress! Look, nearly a whole wall is bare!

I won’t bore you with the details of every square inch of removal, but eventually after a few weeks of repetitive soaking, scratching, scraping and stripping the bathrooms came to look like this:
Ahhhhh… it was looking nicer and cleaner already! Next step was to patch any holes with drywall repair material (aka sheetrock mud). The right tools to spread the patch are essential, and I like this one stop shop 7 piece drywall repair kit that True Value offers at a great price.
When you are mixing up your sheetrock mud, keep in mind that it needs to be the consistency of thick pancake batter. Liquid and runny but just a bit stiff. Slather the mud on any deep holes and try to maintain a super smooth finish with the taping knife. The more wrinkles and lumps you leave in it while it’s wet, the more sanding you’ll have to do later. Let the drywall patch dry overnight, and longer if it’s humid outside. You will need to sand this down to a smooth finish before any painting begins. After the wall was sanded smooth 100%, next up came a basecoat primer. We used this brown tinted primer because it is what we had on hand. It won’t matter either way because it’s going to be painted over anyway. To create the ledge around the top of the room, we used 6″ speedbase turned upside down with a 1×2 on top and a piece of quarter round to trip out between the 1×2 and the speedbase. Cue lots of hammering and calking as you go into this last leg of the project. A nail gun or a brad nailer make this part go SO much faster.

I didn’t worry about rounding off the edges where they stuck out past the door frames. I figured it wouldn’t matter once it all got painted white. And I was right! The paint we chose for the trim and walls below the trim was a high gloss latex enamel paint in bright white. It holds up to water stains well, but it also shows every flaw in the wall, so be prepared for this paint to show a lot of imperfections if you didn’t get your wall smooth enough during the sanding process!
So, are you ready to see more before and after photos? Here you go:
Here is the sink area before:

And here is the sink after! I spray painted the brass light fixture a grass green color. Love the way it pops against the blue and white paint!

I’ve had the stuffed moose and bear heads since before Garrett was born, but they always scared him when they hung in his bedroom. I’m hoping he will do better with them in the bathroom. Out of sight, out of mind.


Here is the wall behind the sinks. I absolutely LOVE that blue color! I let Garrett pick it out himself from any of our paint fans, and he chose a great one! The color is SW 6496 Oceanside. I think I’m going to let this kid choose all of my paint colors from here on out.

Be sure to check out my next post to find out all the details on where I purchased the decorative items for the bathroom, including this awesome vintage Ford truck tailgate and beautiful rustic towel rack! There is even a story behind the bench… stay tuned!

For more wallpaper removal and DIY tips, visit StartRightStartHere.com or follow True Value on Facebook and Pinterest.
I was one of the bloggers selected by True Value to work on the DIY Squad. I have been compensated for my time commitment to the program as well as writing about my experience. I have also been compensated for the materials needed for my DIY project. However, my opinions are entirely my own and I have not been paid to publish positive comments.

On a day off of school, I once bribed 3 of my kids to help me peel wallpaper. At the end of removal, the kid who had peeled the largest piece got to pick where we went for lunch. Now I want a Ford tailgate to complete that bathroom too.
It turned out so gorgeous Beth! I’m dying over that Ford tailgate!
I thought you’d like that, MB! 🙂
Beth, the bathroom looks great and the bench and tailgate rock! Looks fantastic 🙂
I don’t know that I’d ever feel that introspective… lol. It looks amazing though. So, so cute. The wall color is rocking. Way to go G. Love the wall treatment and the tailgate is fantastic!!!!
OMG!!!! This brought back some terrible memories!!!!! The same thing happened to us. My husband was almost ready to divorce me when our bathroom was finished and threatened to if I ever put up wallpaper again. But he kinda forgets his threats after a short time. HEHEHE!!!!
Looks great! I love the bench and the tailgate – can’t wait to read about where you found them!
WOW!! That is so gorgeous! I have removed wallpaper years ago and I sure wish I would have had this! Sharing this on FB and pinterest! ~Sonya
That is really, really cute, Beth! I think I need you to come over and help me finish a wallpaper removal project I started a few weeks ago. I have tried steaming it, but haven’t tried the Dif gel. Maybe that would help me progress a little further. It’s definitely a tedious process!
Thanks Ashley! Try that water bottle and paint scraper trick. Soak down the backing as much as possible and get scraping! You cannot get it too wet, honestly. Don’t be scared, the wetter the better.
That IS “Home Alone” wallpaper! I can just hear Kevin in the other room, “Hey Buzz, I’m in your room getting in all your private stuff, you’d better come out and pound me.” What a dramatic transformation! It looks great and Garrett did an excellent job on the paint color.
Right!? You should have seen the hunter green and burgundy paisley print that used to be in my master bathroom. It was a CLASSIC!
shut up! this is unreal! I love the molding and paint color! AWESOME before and after Beth!
how much do I love the stuffed animal heads? a lot! looking good and great tips Beth.
You’re such a better person than me. I would have totally painted over that crap.
Seriously though – I admire your tenacity! And what an adorable bathroom!
its been years since i removed wallpaper and i don’t think they had the gel then! remembering this for another time when i meet my nemesis again. pinning!
Holy cow! That is amazing. Your bathroom looks fantastic!
Whew, what a great end result! Wallpaper removal is certainly not for the faint of heart!
Hugs,
Beth P
Oh my gosh, Beth. This looks AMAZING! You did such a great job! I admire you more than ever after seeing what it took to get the paper off those walls. Holy heck. The tools look like they helped out a TON though. LOVE LOVE LOVE IT!!!
I have some hideous 80’s paper that needs removing in a bigger area. and part of it is up high. I don’t look forward to doing it after seeing what a pain it looks like to remove. Your room turned out great. Really cute!
Oh that wallpaper removal brings back nightmares!! Great tips & great outcome! Love!
Ok I have to comment…..My little 8 year old boy just noticed the Angry Birds and is thrilled…LOL…he wants me to do the same in his bathroom now…..Love what you did!!!!! AMAZING….Christine from Little Brags
ooooh, I feel your wallpaper remover pain, been there done that so many times! love the shelf railing, its all wonderful, great job!!
Hopefully you’ll share the paint color of the walls and the green on the light fixture. My daughter is pregnant with her first and would like to model the nursery after this room.
[…] I showed the big reveal of my rustic boys bathroom makeover and shared my secrets on how to remove wallpaper like a pro. Today, I’m gonna break down where I scored all of the fun elements of the bathroom and tell you […]
Nice job! Looks wonderful.
Hi, Great description of all the hard work that went into this room! It looks great…my dilema is that all my walls are horse hair plaster! Its a 100 + year old home. There is some wall paper that I want to get rid of and don’t want the walls crumbling down when I go to do them. Any suggestions? I don’t think painting over the wall paper would be good, right?
Hello, There’s no doubt that your site might be having
web browser compatibility issues. Whenever I look at your website
in Safari, it looks fine however, when opening in I.E., it has some overlapping
issues. I merely wanted to provide you with a quick heads up!
Aside from that, great website!
Quedo muy bonito!!! pero el papel de pared que tenias puesto, ya estaba pasado de moda!!! Yo estoy cambiando la decoración de mi casa, y me compre unos papeles de pared impresionantes. Te dejo aqui para que lo veas. http://goodvinilos.com/es/7-fotomurales
[…] HOW TO REMOVE WALLPAPER LIKE A PRO – UNSKINNY BOPPY – DIY […]
[…] tired of it, you have to remove it, a process that any DIY renovator will tell you is one of the least fun of all time. There’s got to be some other way to add character to your walls, […]
[…] Patterned walls are back in, and wallpaper remains, as ever, pretty much a giant pain to deal with. First, you have to find some paper that suits your style. Then, you have to practically take out a loan to afford the stuff. Then you have to glue it onto your walls—and you’d better get it on straight, because that glue is not kidding around. Lastly, if you ever get tired of it, you have to remove it, a process that any DIY renovator will tell you is one of the least fun of all time. […]
Wow, after you got rid of the wallpaper, your bathroom looks like a totally different room. We are looking at buying a home, but almost all of the walls are plastered with wallpaper, and that’s something we don’t want. I’m glad to see that you can remove it, but if it’s that much work, we might just call someone else to do it.
Tips from a pro – once you peel off the top layer , usually vinyl , apply lots of hot soapy water with a paint roller, then lots more hot soapy water , and still more hot soapy water the more the better . Then start scraping off the backing paper
[…] How to Remove Wallpaper Like a Pro (repinned 8,000+ times) […]
Hello Beth! Just coming over from Rhoda’s 50 Inspiring Bathrooms post today… So many good ideas, including yours!!! I really love what you’ve done with your son’s bathroom ~ totally cute! I was looking at all of your wallpaper removal tools, too, and the Zinsser Paper Tiger. Did it work well for scoring the paper so the gel/water could get underneath?? We had THE WORST TIME getting all of the paper off my son’s room when we had to finish one wall {that never got done as he kept hanging pictures and athletic awards before I could finish! Lol!} before we moved. It took water, a steamer, and a wire brush and even that didn’t work all that well. I learned about the Paper Tiger after the fact, but will remember for the next time!
Enjoy your new bathroom; it is beautiful!!!
Barb 🙂
Hey Barb!! Thanks SO much for coming and visiting my blog! I appreciate your sweet comment very much. The paper tiger definitely did a great job of scoring the paper quickly so the liquid could do the work. Wallpaper removal is NO fun, though. I hate to see this trend coming back in style but I’m afraid it’s headed our way again. I hope our grandkids will be able to read my post for tips on how to remove it in the future! LOL
I appreciate you talking about how you can use a wallpaper steamer if you want to remove wallpaper that has a layer of paint on it. My wife wants to remodel our bedroom and wants to remove the existing wallpaper to make sure the room gets a complete makeover. Personally, I would want to make sure I consult with a professional to make sure I don’t damage my walls and tools by using the wrong items or techniques.