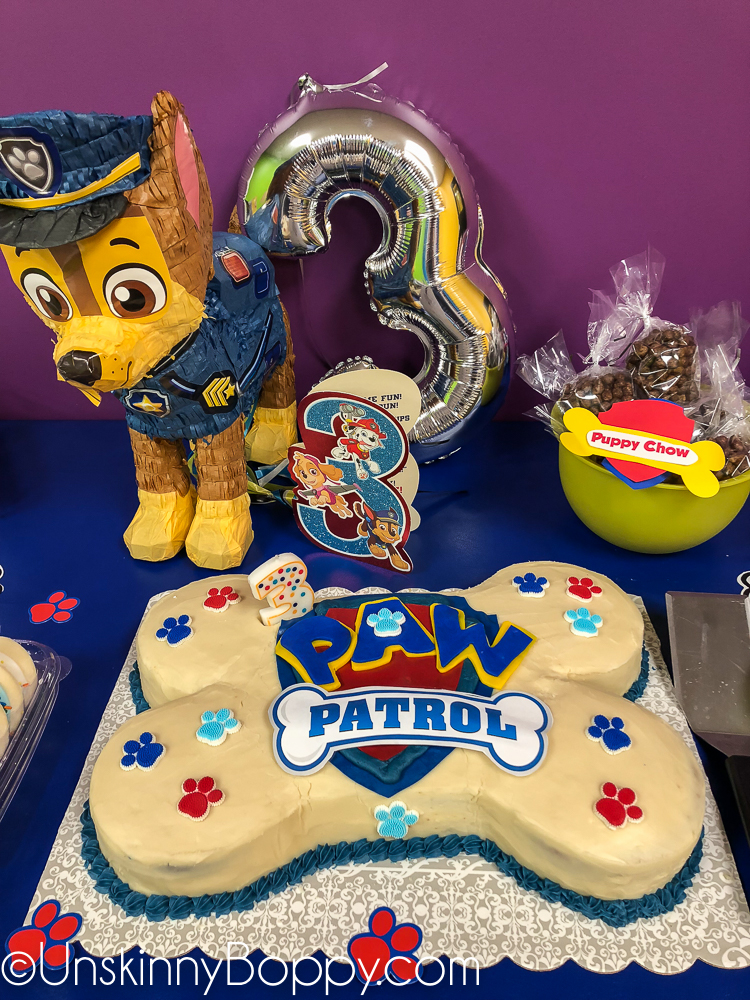
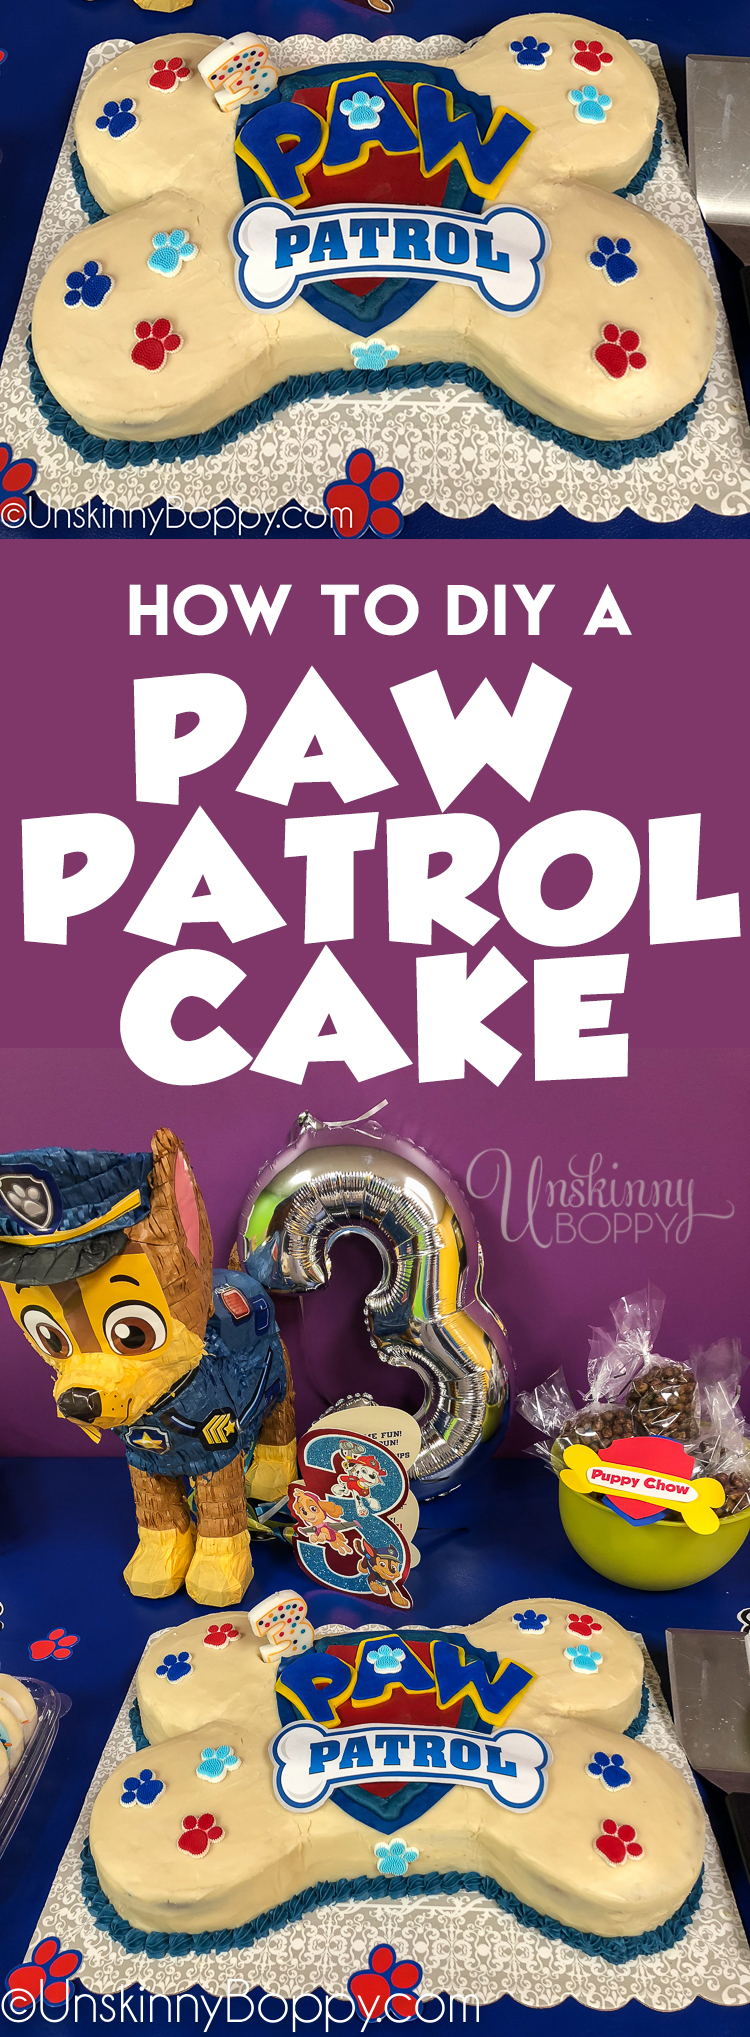
A few weeks ago I made Caroline a bone-shaped birthday cake for her Paw Patrol themed 3rd birthday party.
If you missed the post, you can see all the fun Paw Patrol party ideas here, but here is the cake I made:

I love baking my kid’s birthday cakes. I took a Wilton cake decorating class at Hobby Lobby WAY back in 2006 (And yes, I was blogging back then) and I have been baking cakes ever since. I don’t get too fancy, but if it’s a simple design I can definitely handle it.
Since I have most of the supplies to do it myself, I figured a bone-shaped cake would be pretty simple. I watched a few Youtube videos and just kind of figured it out as I went along. In this post, I’ll share what I learned to take some of the guesswork out for you guys.
Cake Decorating Supplies I Own:
- 9×13 rectangle cake pan
- 6″ round cake pans (preferably with straight sides)
- Wilton Cake Leveler
- Wilton Cake Decorating Kit with icing tips
- Wilton Gel Icing Colors set
- Watkins Caramel Extract (bought at Walmart)
Supplies I Bought for this Cake:
- 14×20 Wilton Cardboard Cake Board (I had to cut 1″ off the end to fit in the box)
- 14×19 Sheet Cake Box
- Wilton Primary Color Fondant
- Wilton Primary Colored Sugar Sheets
- Paw Patrol paw-shaped sugar decorations
- X-Acto knife
- Paw Patrol Alphabet and Logo .PNG files (printed off on my computer)
Directions
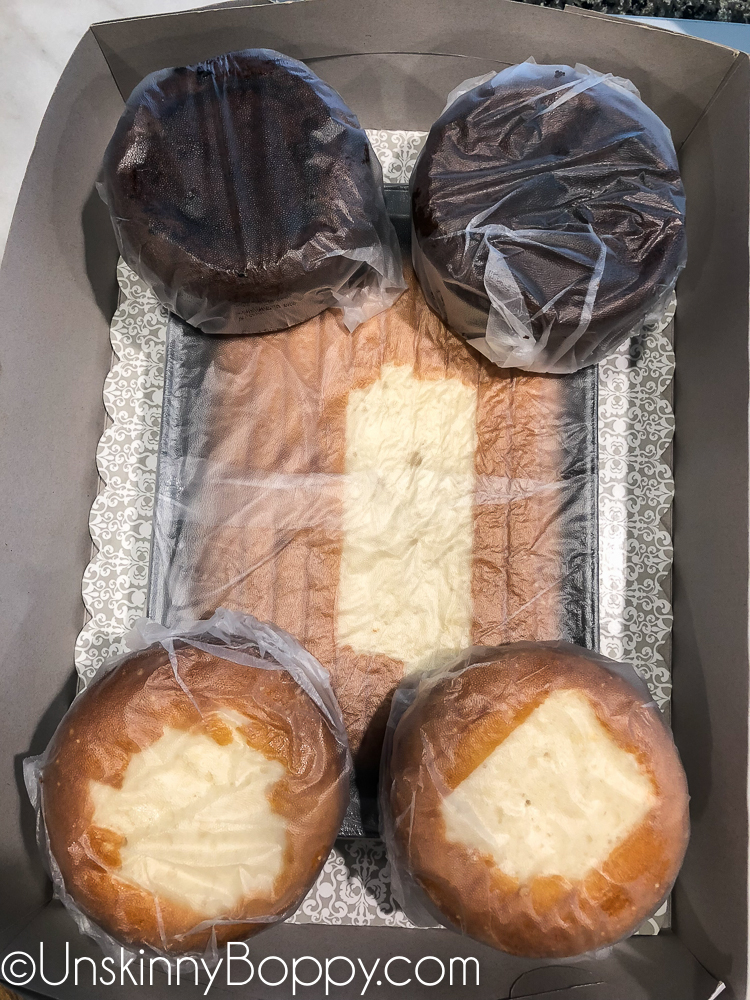
For the cakes, I made a double batch of the famous White Almond Sour Cream Cake (WASC cake) that is SUPER delicious and cheap using two white cake mixes from Aldi. I also made two chocolate round cakes using a Chocolate cake mix. So, three cake mixes from Aldi at about $1.00 each plus a few extra ingredients made this cake pretty cheap. (And heads up- Those amazon affiliate links above are higher Walmart so definitely check in the stores if you’re planning to buy supplies).
I added caramel flavoring to the cakes and the icing and it was SOOOOOOOO good. Everyone seriously raved about how good these cakes tasted. If you’ve never tried the Sour Cream White Cake recipe, you HAVE to give it a whirl. It’s truly amazing.
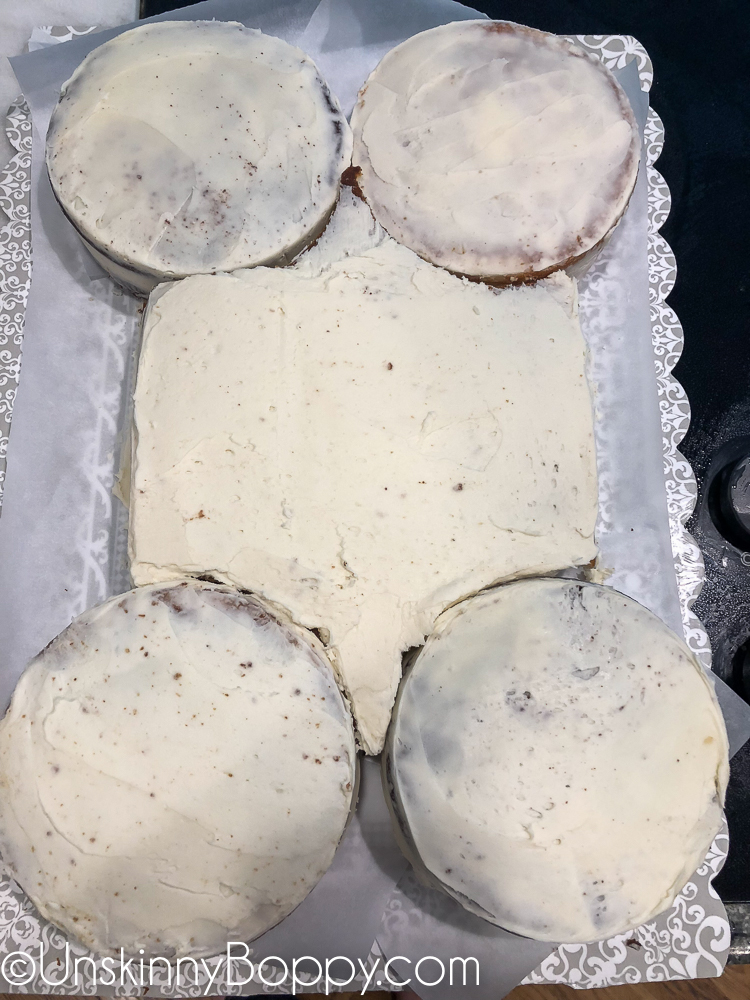
The icing was just a homemade vanilla buttercream recipe with a teaspoon of caramel extract added in addition to the vanilla.
To Create the Bone Shape
You can see here how I carved out the rectangle cake to make the bone shape work. It doesn’t have to look pretty because it’s all getting covered in icing anyhow.
I did a crumb coat first and froze it for a few minutes before I put on the final icing layer.
I bought some premixed primary colored fondant and Wilton Sugar Sheets at Walmart to create the Paw patrol logo and shield.
I printed off the Paw Patrol logo and alphabet shapes and used an Xacto knife to cut out the fondant around the outline of the letters.
The white bone that says “patrol” is actually a printed piece of paper with some plastic taped to the back of it to keep it from getting messed up.
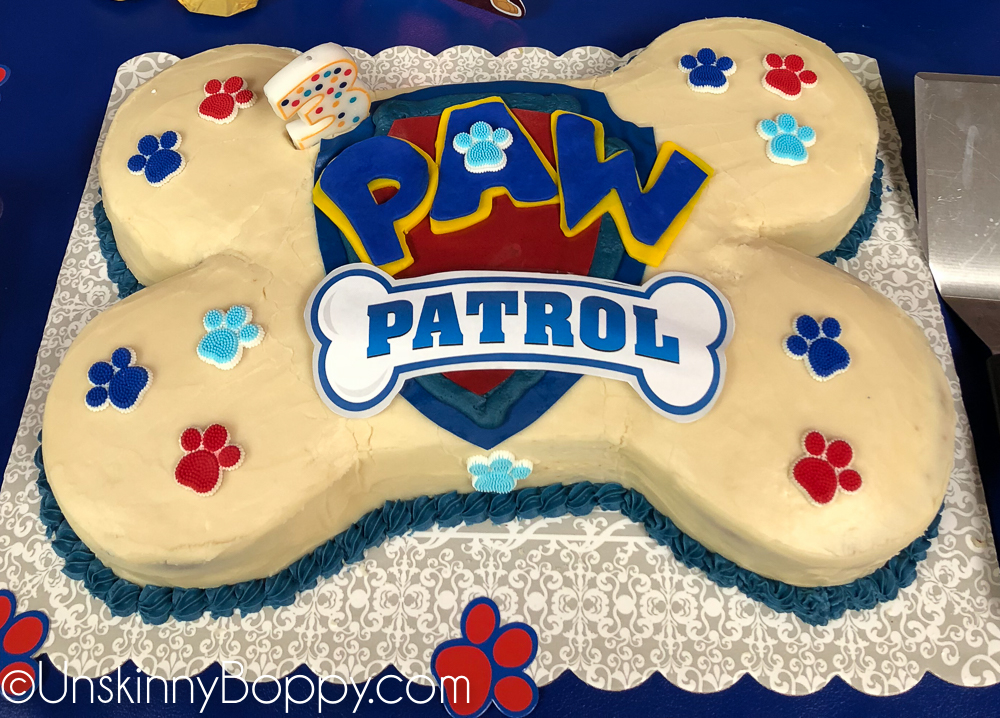
I finished it off with a package of red and blue paw prints and piped a blue border using my #21 Icing tip.
And it was done! Here’s the finished Paw Patrol birthday setup on the day of the party:
If you’ve got a Paw Patrol lover like me who wants a birthday cake, this is a simple way to make a HUGE impact for very little money.
Have fun baking!

What a cool tip I love to know, I’ll try to do it here. I’m very excited after this post.
I think it is a good idea, I have thought of it but not as detailed as you.
Hi there,
Where did you get the paw prints from?
Either Publix or Walmart cake decorating section! 🙂
How many do you think the above will serve? I need a cake to serve 25 for my 4 year old grandson’s birthday party in 2 weeks.
Also, I’m nervous I won’t get it all baked and decorated in one day. Can you bake one day and decorate the next? Would it need to be refrigerated after baking?