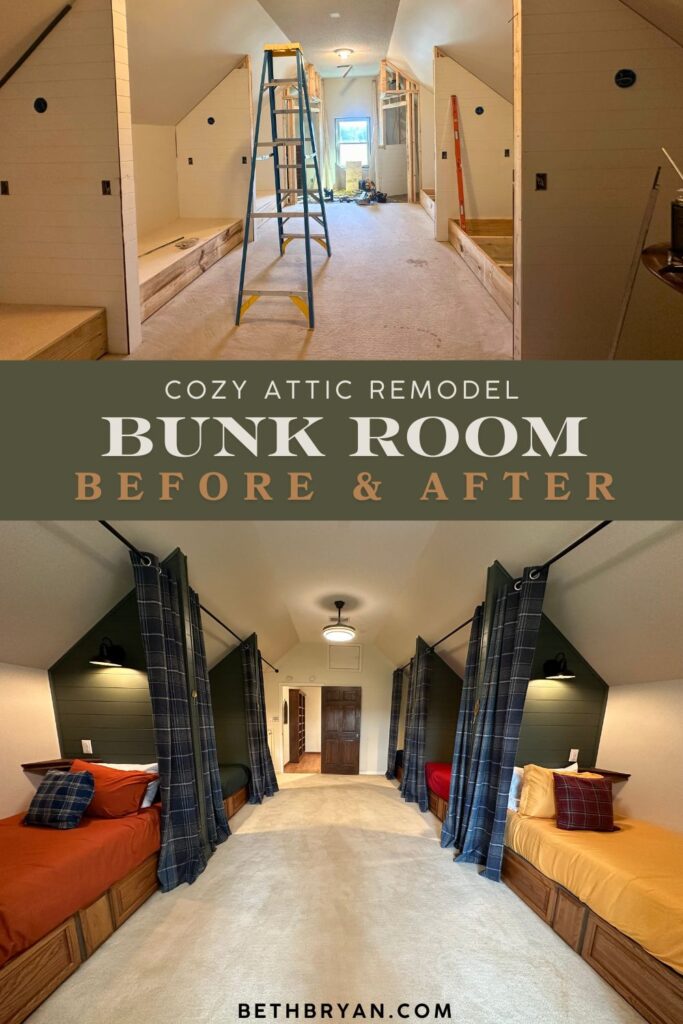
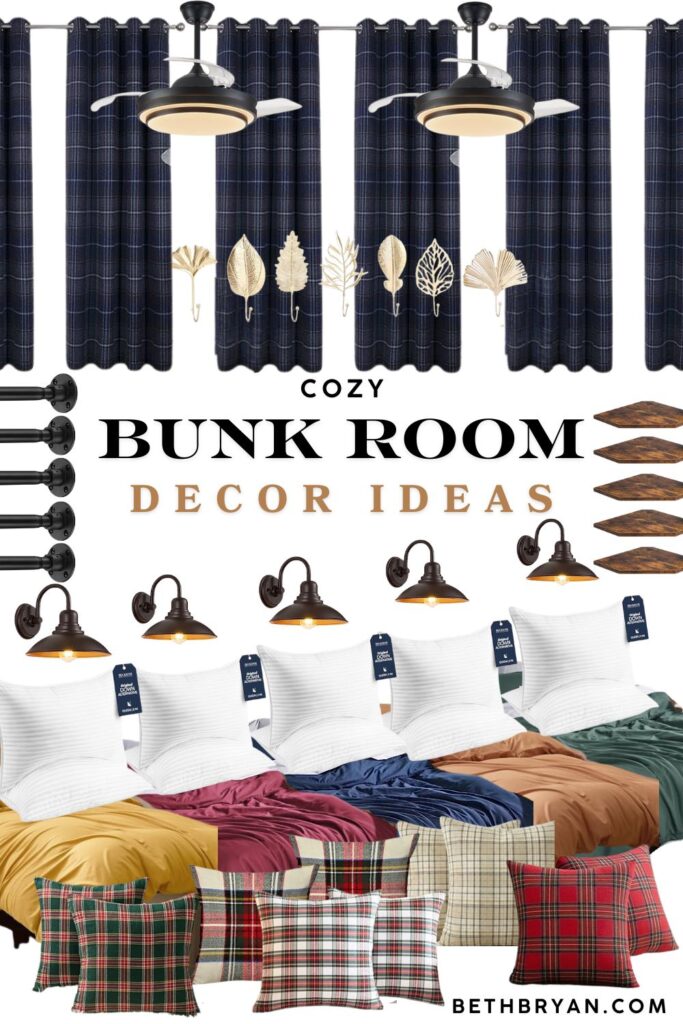
Tartan curtains, Pewter Green walls, and built-in bunk beds that make every guest feel like they’ve checked into somewhere very special. Here’s a step-by-step of how I built it at the AirBNB so you can copy it in your home for your kids or grandkids!
When my dad asked me to decorate his AirBNB and help him figure out how to get more sleeping areas, the first place I knew we needed to change was the attic space. Here is what it looked like when he bought the house:
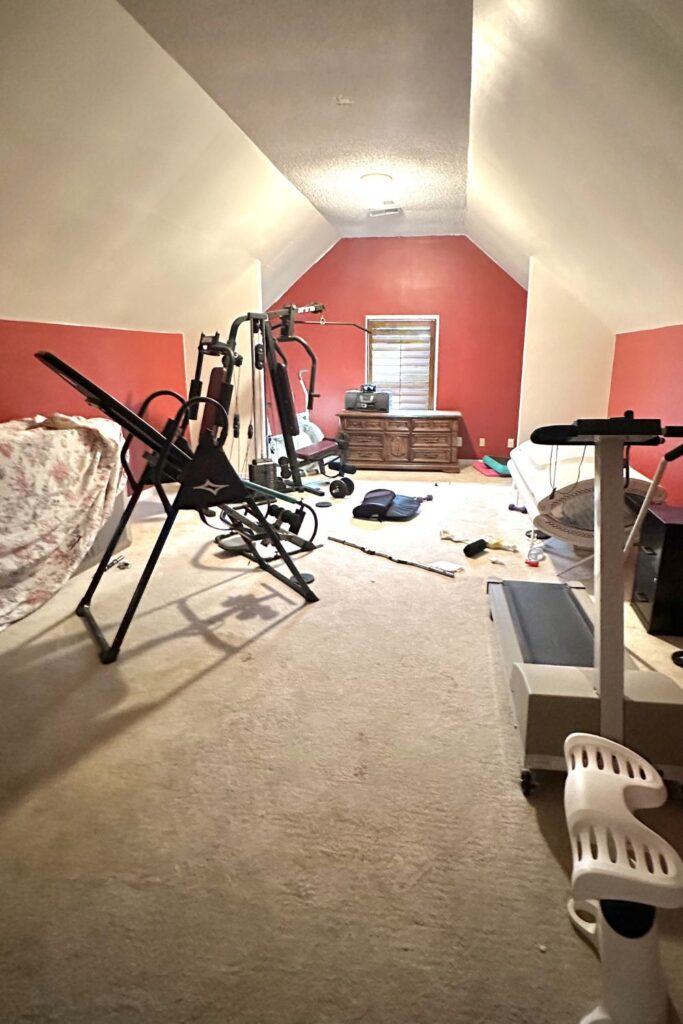
Many people would have a hard time seeing past the workout room (and check out that old-school tanning bed!!) But I saw something else entirely. I envisioned a bunk room that could sleep six, a half bath tucked under the slope of the roofline, a walk-in closet, and the kind of space that would make every kid who walked in feel like they had just found a secret room.
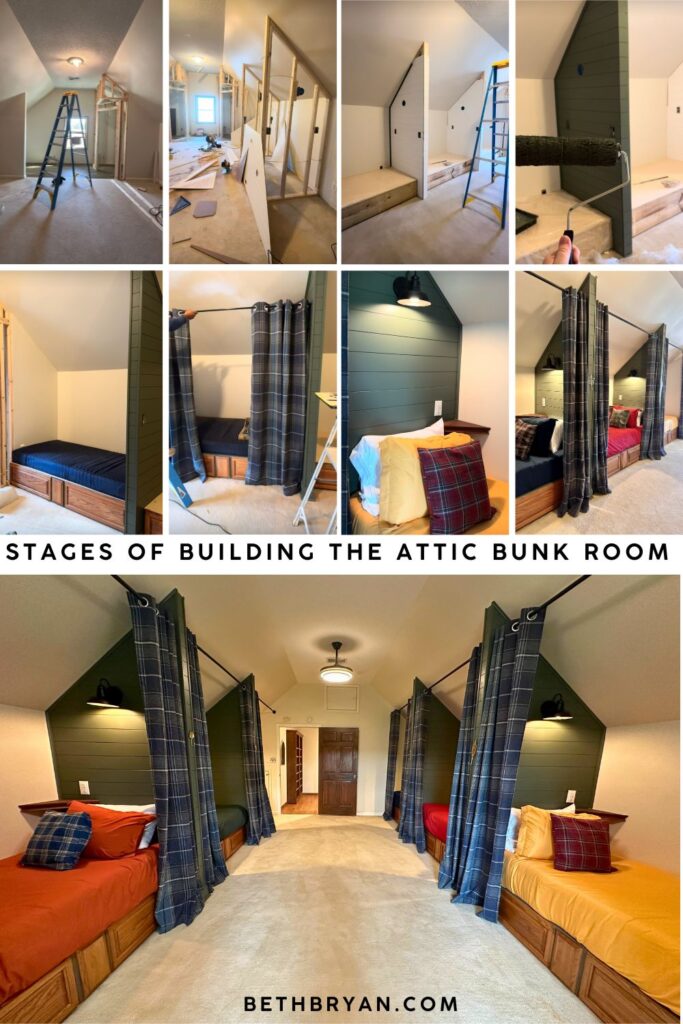
Getting from that vision to the finished room you see today was not a quick weekend project. It was a full construction undertaking done in stages, and I want to walk you through every single one of them because if you are planning something similar, the sequence matters as much as the design.
Here is exactly how we did it.
How to Build an Attic Bunk Room Step-by-Step
Step One: Plan your Blueprint Around The Bedding
The first step was measuring the mattresses we planned to use. We used XL twin mattresses that measure 38″ x 80″, and I wanted them to fit like a glove without gaps. The room worked out perfectly for three mattresses to fit end-to-end with standard 2×4 divider walls between each one. I also wanted each divider wall to extend about 6″ past the side of the mattress platform to give the curtains a proper place to hang, so each nook needed to be 44″ wide.
Here is my sketch of the room. You don’t need to be an architect to do this. Just measure everything out, including existing doors and windows (don’t forget attic access doors!) and draw out your floor plan.
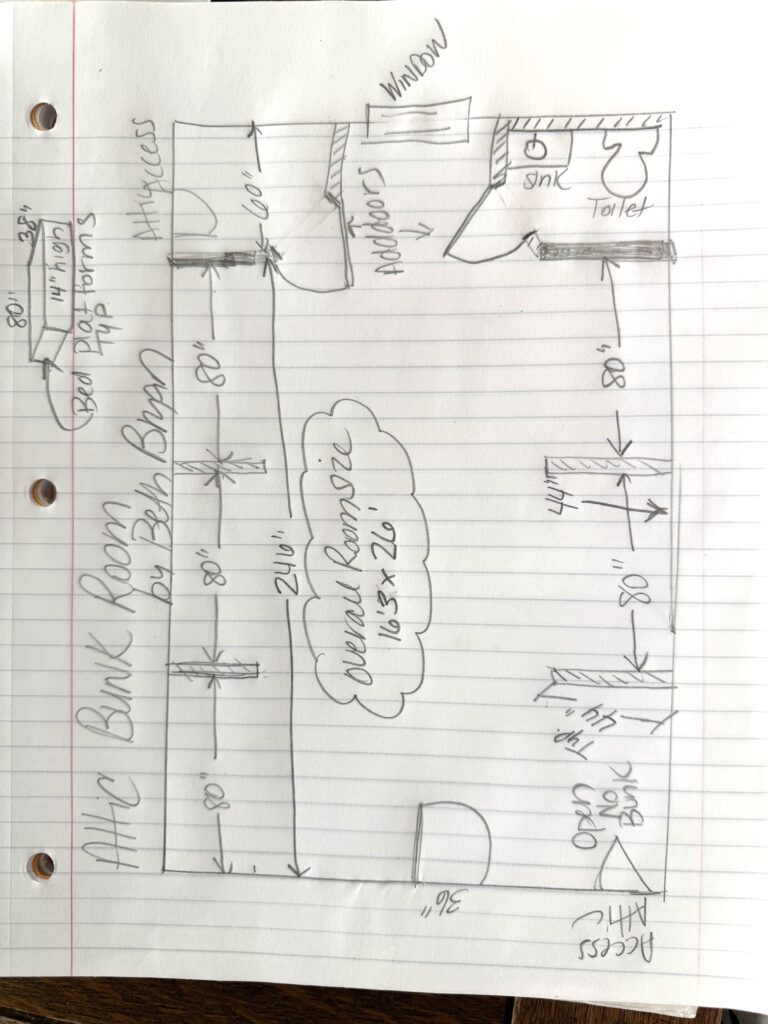
Our overall room size was 16’3″ wide x 26′ long. There were already 2 walls built at the end of the room we used as enclosures for the bathroom and closet.
Pro Construction Tip: If you are planning this in your attic, keep in mind the minimum center walkway should be at least 36″ wide, so your room needs to be at least 10′-4″ wide to build a double bunk. (44″ + 36″ + 44″= 10′-4″) If it is any less than that, I would recommend eliminating the curtains or only building a single row of bunks on one wall.
One thing worth paying close attention to is your wall thickness. We used 4×8 Shiplap Wall Panels that are only 7/32″ thick, but if you plan to use sheetrock, always account for the double thickness of 1/2″ sheetrock on each wall. That adds an extra 1″ per wall, which would have added 3″ across the total length of the room that we simply did not have. Do your math before you frame anything.
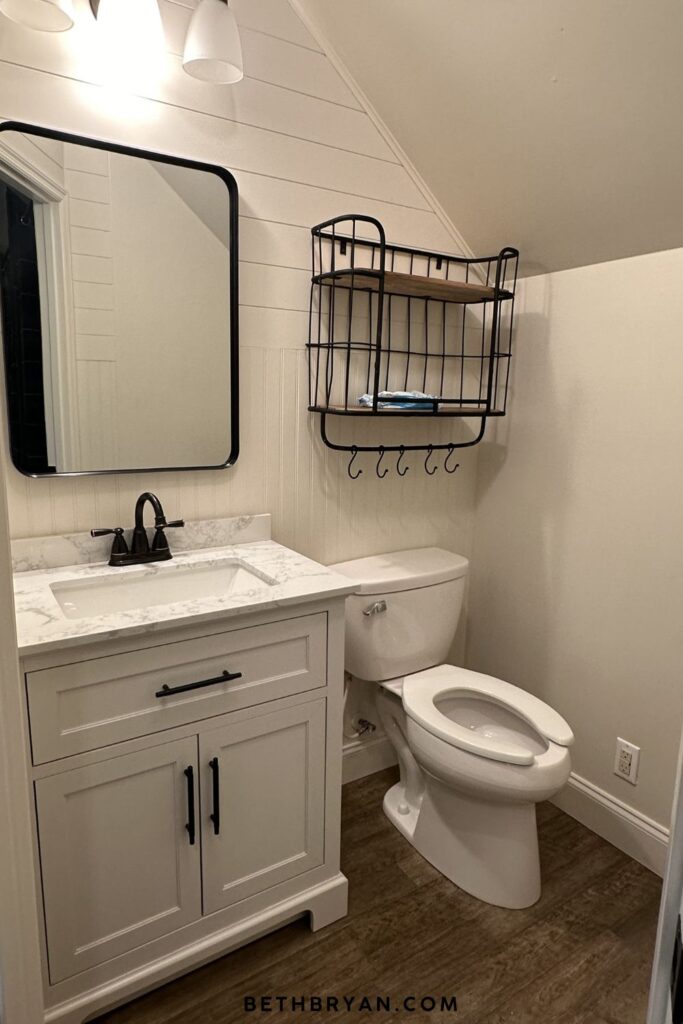
We also added a half bath and walk-in closet at the end of the room, but that part is completely optional. Honestly, I would NOT recommend adding a bathroom unless you are prepared for the complexity. It was by far the most involved part of the entire project. A half bath in an attic requires a plumber to rough in drains, cold and hot supply lines, and a VTR (that is a vent-through-roof pipe that allows septic gas to escape safely). We were fortunate that there was already a bathroom directly below this space, so the plumber was able to tie into the existing pipes and extend the supply lines.
A few hard-learned lessons in the bathroom: frame the plumbing wall first, then have the plumber come in and measure for the drain locations before anything else is set. We almost ended up with a toilet that did not fit because the floor drain was set too close to the wall. Also, if you live anywhere north of Alabama, think carefully before running plumbing along an exterior wall. We can get away with it here where extended freezing temps are rare, but a frozen pipe inside an exterior wall is not a repair anyone wants to deal with.
Ok, back to the lesson at hand.
Step 2: Frame out the Divider Walls
Alex, my carpenter, built the walls using standard 2×4 construction set 16″ on center. He didn’t even cut the carpet– just drilled the bottom board right into the subfloor on top of the existing carpet. I admit I was worried about this, but it was a non-issue.
He doubled up the end boards for extra support, and the bed platforms will hold everything securely in place.
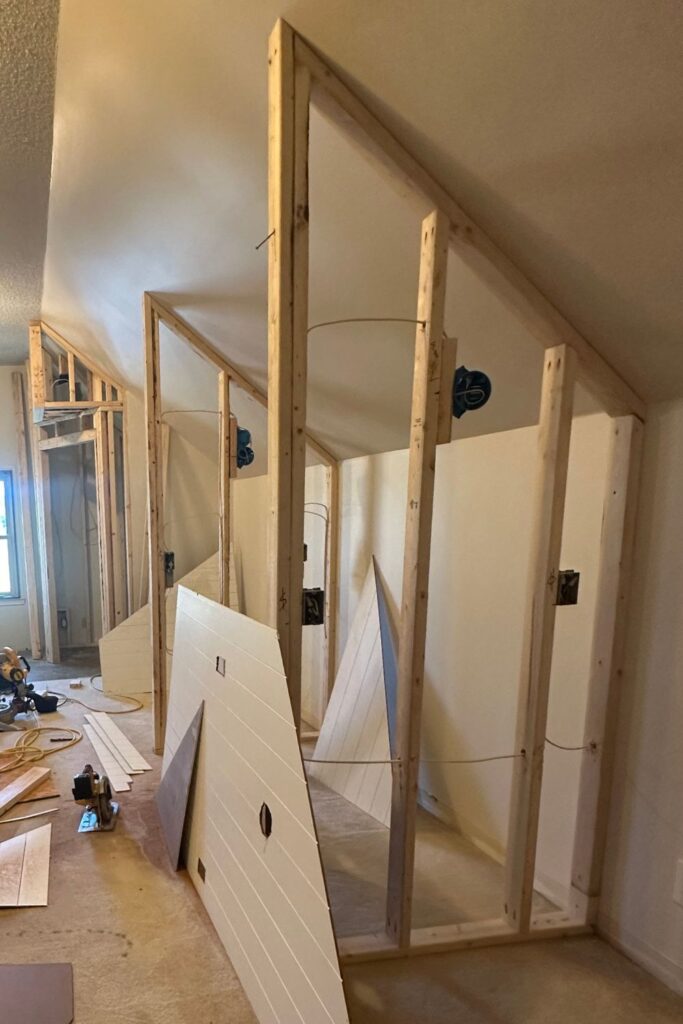
Step 3: Add the Electrical Wiring and Junction Boxes
This is the stage that separates a bunk room from a truly livable bunk room. We brought in a licensed electrician to run all the wiring before any shiplap went up, and I cannot stress enough how important this sequence is. Electrical first. Wall coverings second. Always.
Here is what the electrician roughed in for us:
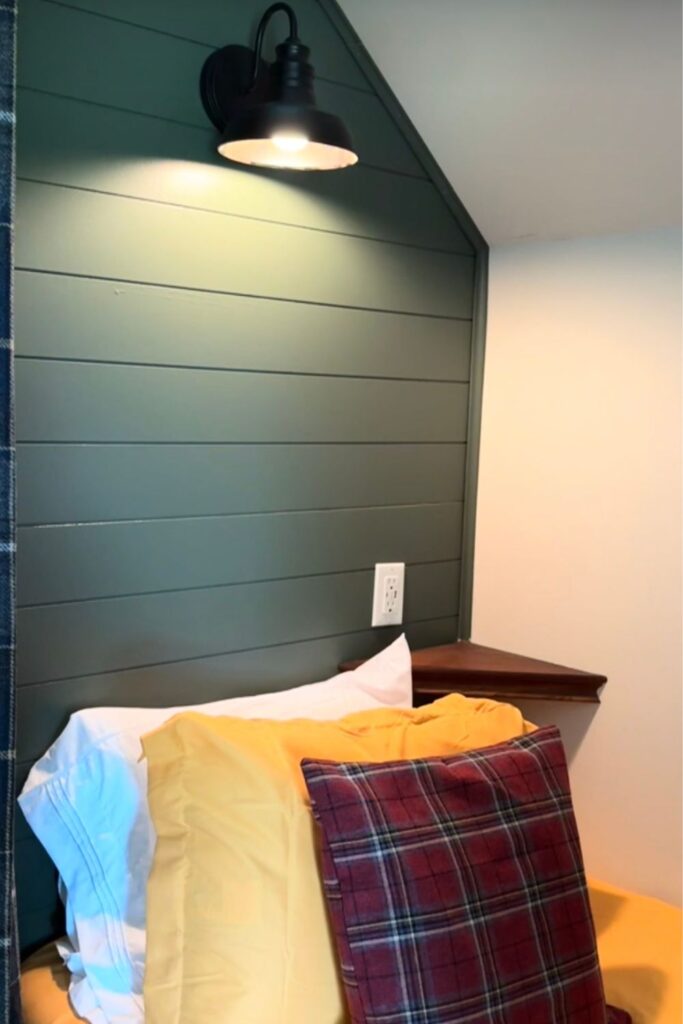
Each bunk got its own hardwired wall sconces. This is the little detail that makes each nook feel like its own room. We added a light switch near the walkway so they can turn off the light without leaving their bunk.
Each divider wall also got electrical outlets with extra USB/USB-C plugs wired in. Someone sleeping in a bunk will need to charge a phone, so having outlets on the divider walls means nothing is being plugged in across the room and cords are not running across the floor.
The half bath got its own electrical as well, with a vanity light wired above the mirror and a GFCI outlet at the vanity. Working under a roofline on electrical is more complex than a standard wall and I was glad we had a professional handle every bit of it.
Do not try to DIY the electrical install. Local codes are all different, and you want someone who knows what they are doing. None of it is worth the risk.
Step 4: Add Shiplap Paneling
This is the stage where the room started to feel real. Once the electrical boxes were roughed in, the paneling installation began, and the transformation was immediate and dramatic.
The shiplap covers the full surface of each nook wall, which required careful cutting to follow the pitch of the ceiling. Every board had to be measured and cut individually for those angled runs and junction box openings. It is tedious work, but the finished result is exactly why you do it right.
For trim, we used outside corner and inside corner mouldings. This is the stage that most DIY tutorials undersell, and it is the one that makes the biggest difference in the final look. Raw shiplap edges at corners look unfinished. Trimmed corners look like a room a designer built.
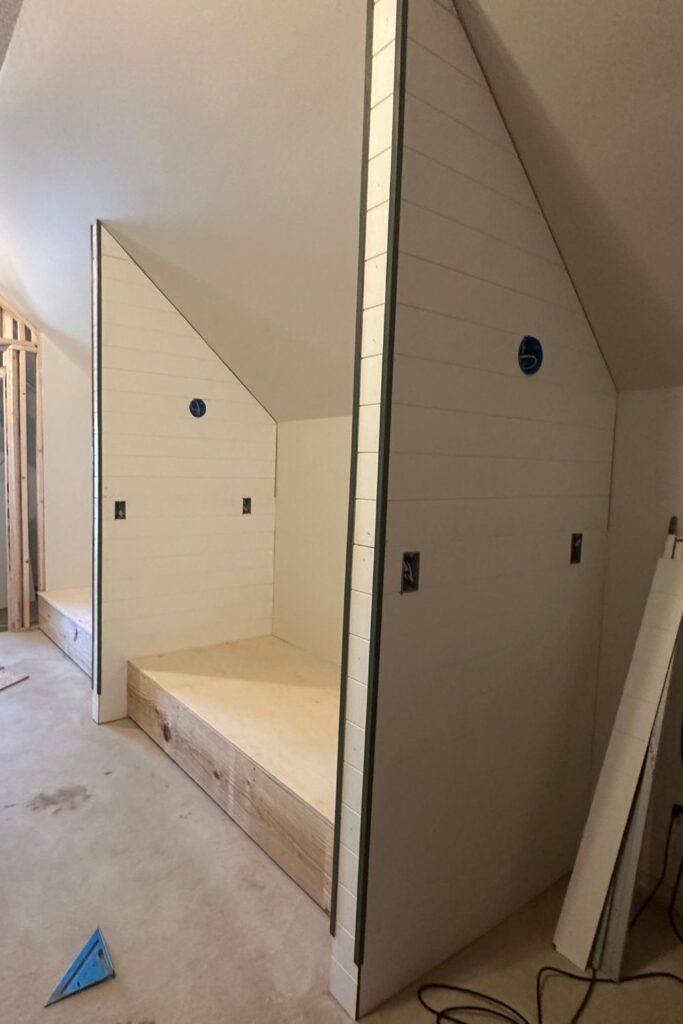
Step Five: Build Box Platforms for Mattresses
This stage sounds simple and it is the one people skip over when they talk about bunk rooms. Do not skip this. The bed platforms were built to fit specific mattress sizes, and if you get this measurement wrong, you either end up with a mattress that does not fit or a gap that looks sloppy and collects lost things forever.
We measured each nook carefully to accommodate a twin XL mattress exactly. The platform height was also deliberate, raised enough to allow someone to stand up easily from the edge of the bed and not be too tall for little ones to get in. If you’re feeling fancy, you could build in storage drawers, but we were on a time constraint, so we skipped that part.
The platforms themselves were built around a 2×4 frame with sturdy 3/4″ finished plywood and each one leveled individually because attic floors are not always as flat as you want them to be.
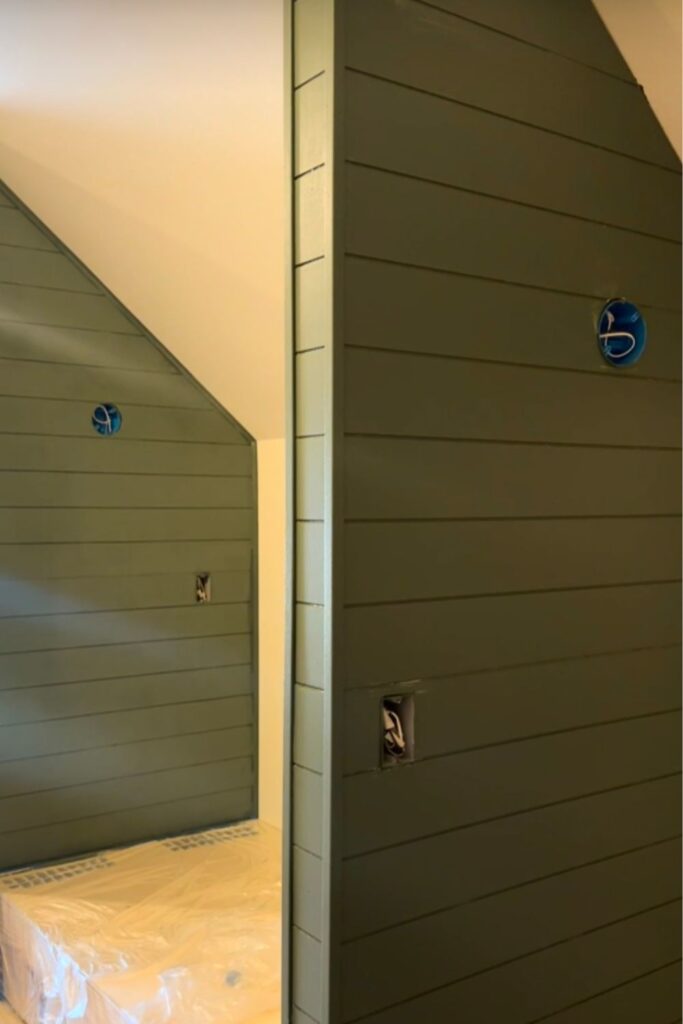
Step 6: Paint it All
All the divider walls got two coats of good-quality paint. I chose Sherwin Williams Pewter Green 6208 (Sheen:eggshell), and it is a perfect moody green. For a lighter companion wall color, SW 7042 Shoji White works beautifully as a backdrop and keeps things brighter.
We glued oak cabinet doors to the face of every single bunk.
Side note: My dad happens to be a platinum-level hoarder, which means he has barns full of STUFF, including pallets of old cabinet doors. Originally, I thought I would paint them to match, but the 1980’s polyurethane stain had other plans and the paint would not stick… so I gave up and just embraced the Golden Oak. It adds to the ambience of the room. Alex glued them onto the face and added a few trim nails to hold them in place. This part is totally optional, of course.
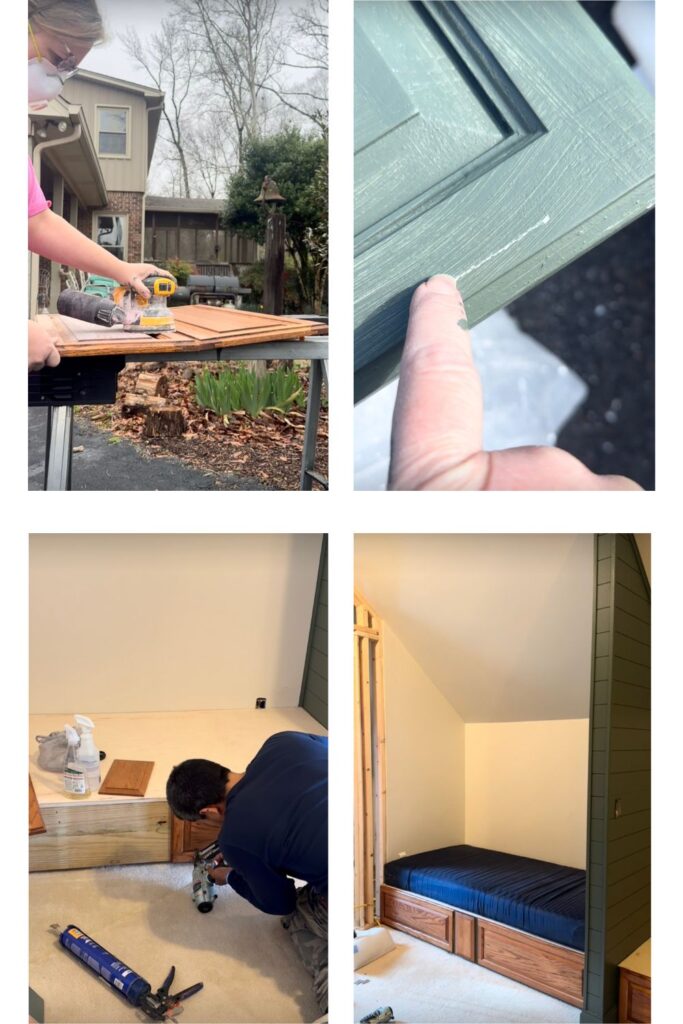
Step 7: Install Outlets, Switches and Fixtures
The electrician came back and installed all the plugs, switches and light fixtures. They also installed these ceiling fan/light combos with hidden blades that retract when not in use.
Since this is an attic over an open carport, it gets pretty warm here in the summer. We installed these fans to help circulate air. I LOVE the way these look! Watch my full video review here.
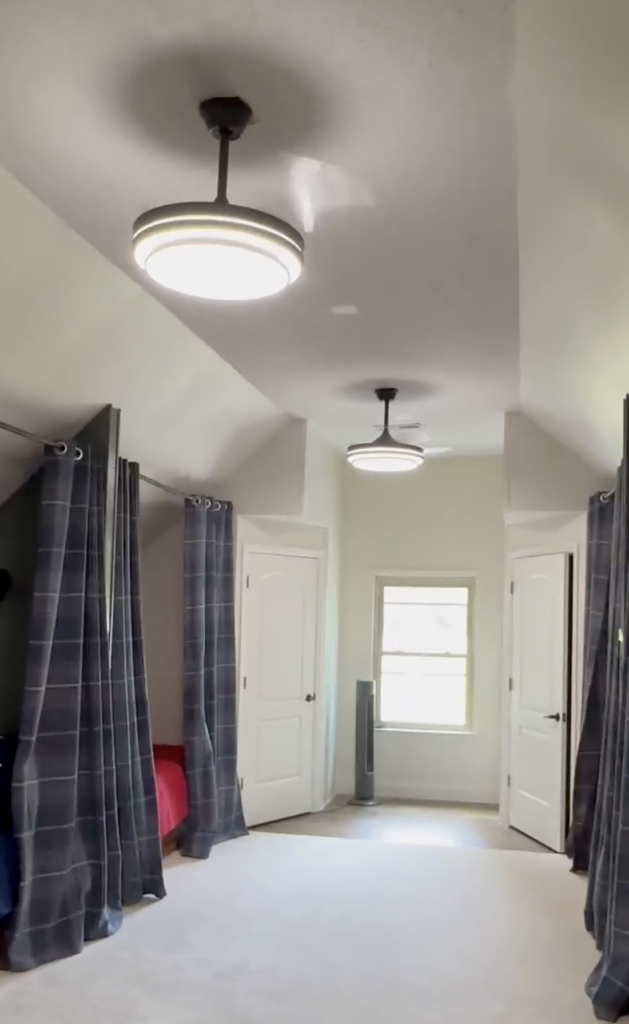
Eventually, we had to add a mini-split air conditioner to this room to keep up with the Alabama heat, but it’s not shown in these photos.
Heads up, Electrictions are THE WORST about leaving behind a big mess which leads me to…
Final Clean up and Final Touch Up Paint
Everything was covered in a layer of paneling dust, so I went around on my hands and knees and vacuumed every crack. I wiped down all the surfaces. No one ever talks about how much time construction cleanup takes, but it is a huge job. There was also mud tracked in all over the carpet, so we had to hire a pro carpet cleaner to steam clean it.
We also added corner shelves so someone could have a spot to put their phone, glasses or water at night. Then we had to go back and touch-up the paint around the shelves.
Hang Curtains and Add Bedding
After paint dried, this was the stage that felt like exhaling. Every stage before this one was construction. This one was finally the fun part.
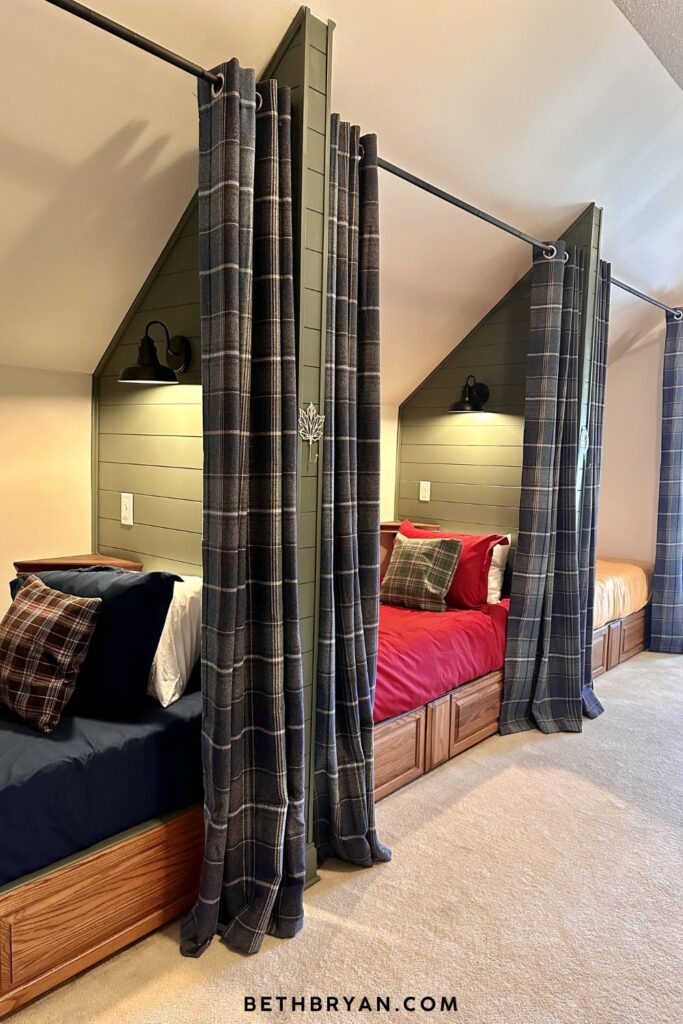
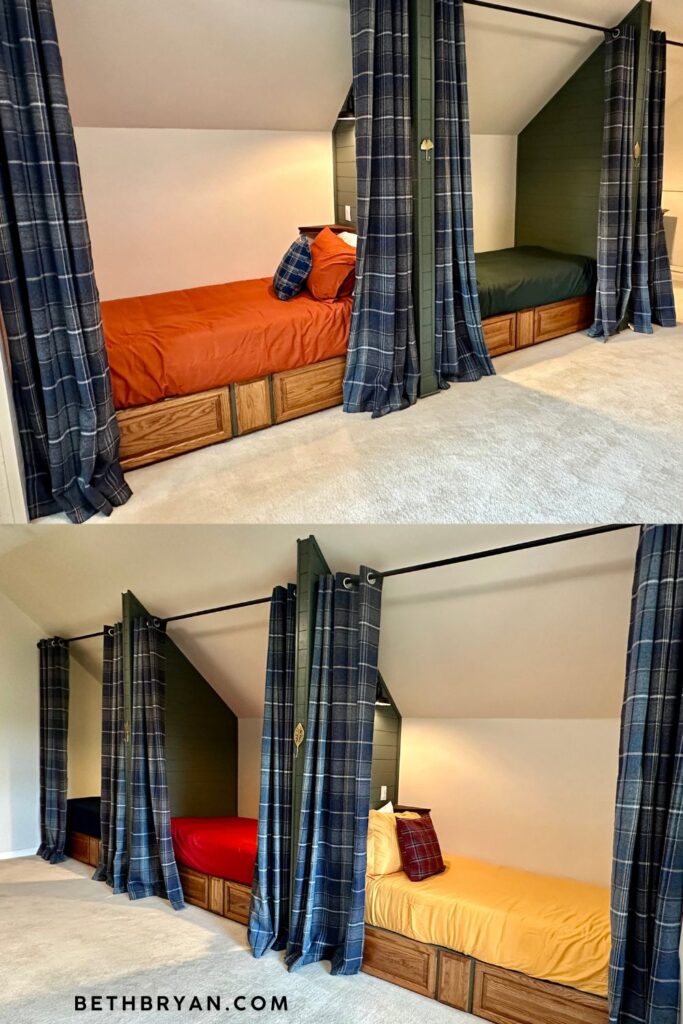
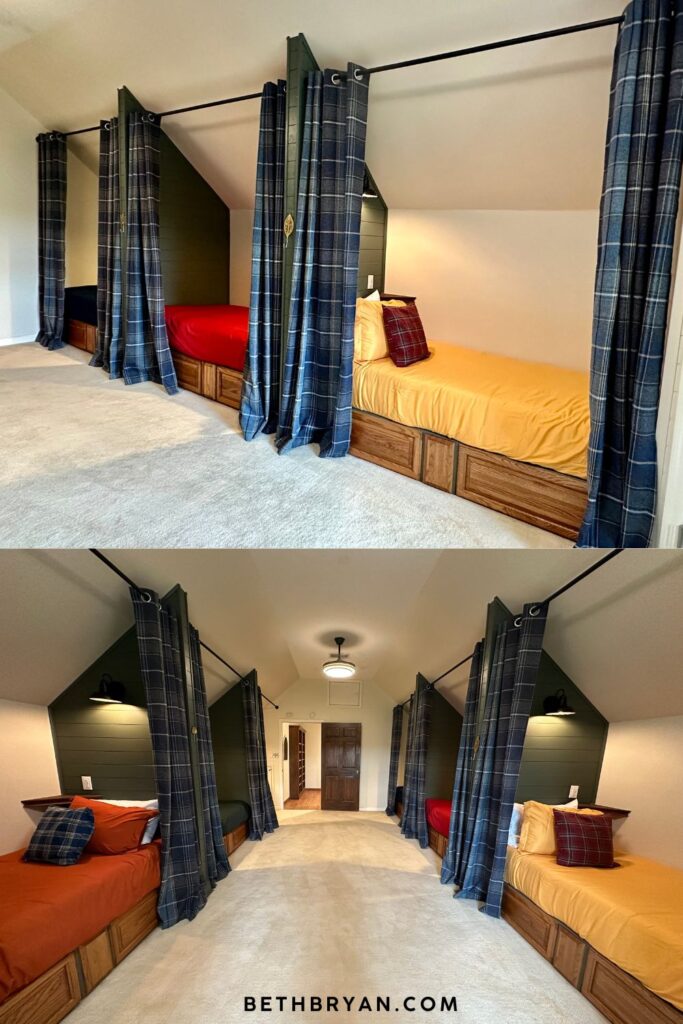
The mattresses went on the platforms first, and the fit was exactly what we had planned for. Then came the duvet covers in bold jewel tones, rust orange, red, deep green, and golden yellow, each nook getting its own color so every sleeper has their own identity in the space.
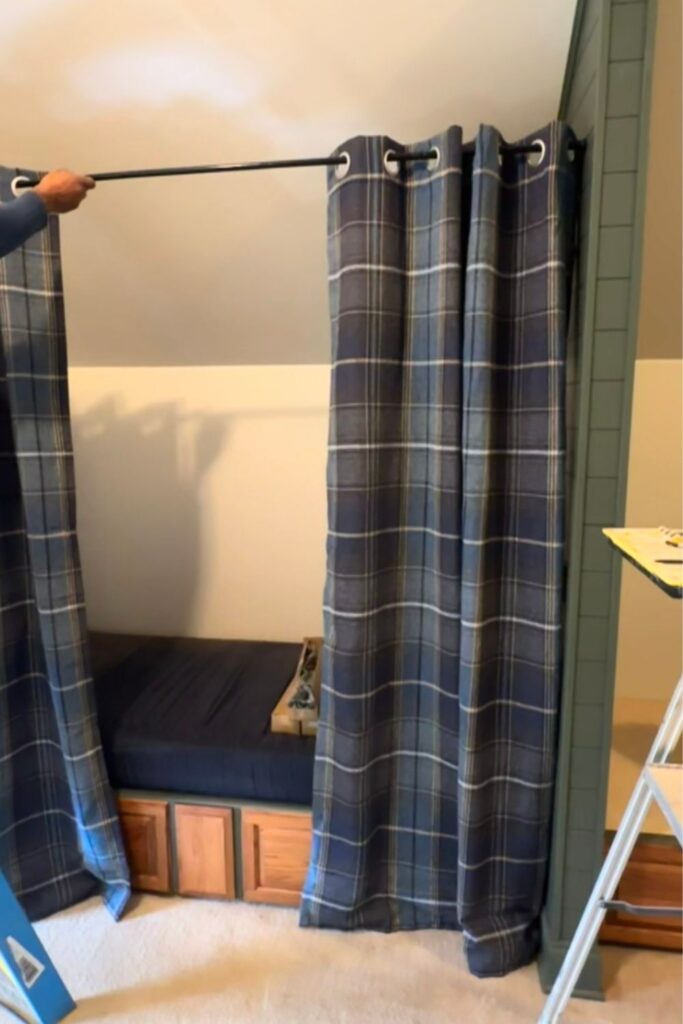
The plaid tartan curtain panels went up on their black iron rods, and this is the moment the room transformed from a very nice renovation into something that genuinely felt like a destination. We hung them so the bottoms just barely touch the floor. That is an important little detail that makes a room look so much better. Never hang high-water curtains!
The wall sconces were finished and the warm light they throw at night is exactly what this room needed, soft and warm at reading height in every nook.
And then we stood in the doorway and looked at what had been a big empty attic, and it was exactly the room we had pictured from the very beginning.
How to Decorate a Bunkroom that Will Blow Them Away: Shop the Look
All links below are affiliate links. I only link things I have actually purchased, *in this case, six times over!!
Shop All the Decorative Items:
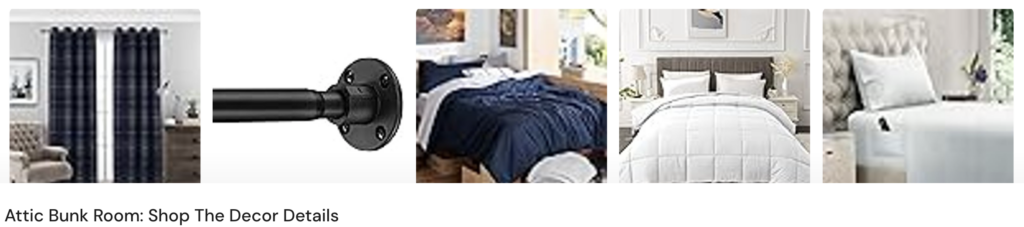
Navy Blue Plaid Woolen Look Tartan Curtains — These are the exact ones. Navy blue, (54″ Width x 95″ Length) grommet top, these are not blackout curtains, but they are surprisingly effective at blocking light. You can find the blackout version here.
Black Iron Curtain Rods — Matte black, sturdy, and minimal. Perfect against the Pewter Green walls.
Twin Size Jewel Toned Duvet Covers + Pillow Shams — Bold solid colors (I used red, blue, yellow, orange and green) that anchor the plaid without competing with it. These also included matching pillow shams.
Duvet inserts with corner tabs — when buying duvet inserts as bedding, you always want to make sure there are tabs on the corners to tie the duvet cover onto. This prevents them from shifting inside the cover.
Cooling White Sheet Sets — White is always the best color for an AirBNB, so you can bleach them. Cooling sheets will help your guests stay comfortable, especially in an attic in July in Alabama.
Comfortable Pillows — If you want your guests to be extra comfy, don’t skip on this step! Get these Beckham Hotel Pillows and watch the reviews roll in. They are THE BEST!
Plaid Tartan Accent Pillows — The Assorted colored plaid pillows tie the whole color story together beautifully. I alternated red plaid, green, yellow, etc.
Floating Corner Shelves — Every sleeping nook needs a landing spot for a book, a water bottle, a phone.
Bathroom Mirror above Vanity — Sturdy black metal framed mirror with rounded corners 30″hx22″w
Matte Black Bathroom Hardware Set-– Because you need a place to hang hand towels and toilet paper
Shop Construction Material Needed for Attic Remodel
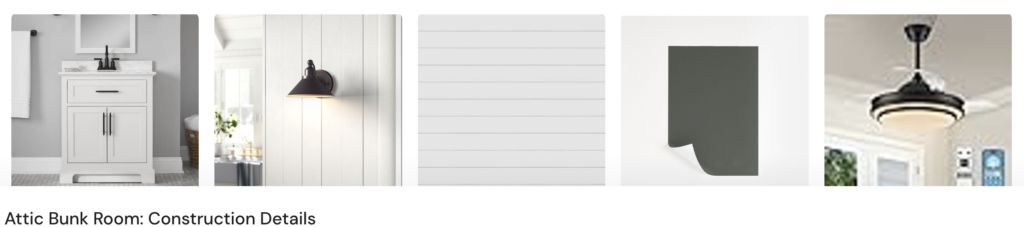
4×8 Shiplap Wall Panels — Painted in Pewter Green, this creates the room within a room effect.
Electrical outlets with extra USB/USB-C plugs — Each bunk got a special plug so guests can charge their phones and other items.
Black Wall Sconces — Matte black with warm bulb. The detail that makes each nook feel like its own room. Each nook got its own light switch right by their pillow so they can turn off the light without leaving their bunk.
42 Inch Retractable Ceiling Fan/Light Combos– These look like standard pendant lights, but they are hiding a secret! You can turn on the fan, and the blades retract out from a hidden compartment on top, then fold away once you turn it off. Perfect lighting for anyone who doesn’t like the look of ceiling fans.
Pewter Green SW 6208 by Sherwin-Williams — Available at Sherwin-Williams stores and can be color-matched at most paint counters.
Shoji White 7042 by Sherwin-Williams — Available at Sherwin-Williams stores and can be color-matched at most paint counters.
Doveton 30 in. Single Sink Freestanding White Bath Vanity with White Engineered Marble Top — A great half-bath vanity that was small and compact but still usable.
The Curtains: The Stars of the Show
Let’s talk about these curtains , because I think they are the main reason this room works. They are a wool-look plaid in a navy tartan pattern that could have been pulled straight from a Scottish country house. Even though they are not blackout curtains, they block light remarkably well. They look and FEEL like real wool, but are actually 100% polyester (which makes them machine washable.) I was genuinely surprised by the quality of these curtains, and even bought another pair for my lake house!
I styled each bunk with two panels per opening. Pulled back during the day for that dramatic moment when you walk in. Closed at night, each child has their own private little sleeping cave. This is the single most requested design detail from every AirBNB guest who has stayed here, and now you have the source.
The Vision: Cozy, Traditional, and a Little Magical
The inspiration board for this room pulled from a few very specific places. First, the Pullman train car aesthetic: dark green paneling, warm sconce light, a sense of enclosure that feels safe and cozy rather than cramped. Second, the vibe of a Hogwarts common room and dormitories, minus the blatant OSHA violations, and finally, Ralph Lauren’s classic tartan and plaid interiors, where wool textures, and jewel tones like rich forest greens, navy blues, mustard yellows, and crimson reds create something that reads as timeless rather than trendy.
The result is a room that functions like a bunkhouse with multiple sleeping nooks that give each guest their own little world, but looks like a destination. Whether this is a lake house, a vacation rental, a grandkids room, or an attic conversion, this bunkroom decorating formula works.
In the end, we had to go with five bunks instead of the original six, because there was an attic access door that we couldn’t cover. My need for symmetry is screaming, but it is what it is.
And here is the finished bathroom. It was a labor of love that I probably wouldn’t attempt again.
FAQs about Bunk Rooms
We used XL twin mattresses that measure 38″ x 80″, and I wanted them to fit like a glove without gaps. The room worked out perfectly for three mattresses to fit end-to-end with standard 2×4 divider walls between each one. I also wanted each divider wall to extend about 6″ past the side of the mattress platform to give the curtains a proper place to hang, so each nook needed to be 44″ wide.
Each bunk nook is 80″ long by 44″ wide. This accommodates the mattresses and allows 6″ of space for the curtains to hang.
Your attic needs to be at least 10 feet 4 inches wide to build a double-sided bunk room with curtains. The math is 44 inches for the left bunks, plus 36 inches for the center walkway, plus 44 inches for the right bunks. Our attic was 16 feet 3 inches wide by 26 feet long, which gave us enough room for 3 nooks on each side with a large open area between plus a half bath and walk-in closet at the far end.
The minimum center walkway width in a bunk room is 36 inches. Going any narrower makes the space feel cramped and creates a safety issue if someone needs to exit quickly in the dark. If your attic is narrower than 10 feet 4 inches total, either build bunks on one wall only or eliminate the curtains to reclaim a few inches.
For a Twin XL mattress with curtains, space your divider walls 44 inches apart. That gives you 38 inches for the mattress width plus 3 inches on each side for curtain panels to hang freely. If you are not using curtains, you can go as tight as 40 inches and still have comfortable clearance around the mattress.
Our platforms were built tall enough for someone to sit up on the edge of the bed comfortably without hitting the ceiling, and low enough that children could climb in without difficulty. A good general range is 18 to 24 inches of platform height, which also gives you enough clearance underneath for storage if you want to add drawers. We used 3/4 inch finished plywood for the platform surface.
You need enough clearance at the center of the room for an adult to walk through comfortably, which means at least 7 feet at the peak. The sleeping nooks themselves can have lower clearance since people are lying down, not standing. Our roofline sloped down over the bunks which actually added to the cozy, enclosed feeling of each nook.
We used 4×8 shiplap panels that are only 7/32 inches thick applied over standard 2×4 framing set 16 inches on center. If you use 1/2 inch drywall instead of shiplap panels, remember that drywall goes on both sides of the stud wall, adding a full inch per wall. In a room where you are fitting three bunk lengths end to end, that adds up to 3 extra inches across the room that you may not have.
Yes, and do not skip this. We had a licensed electrician rough in all wiring before any wall panels went up. Each nook got a hardwired wall sconce at reading height with its own light switch, plus an electrical outlet with USB and USB-C ports on the divider wall. The half bath got a GFCI outlet and a hardwired vanity light. Local electrical codes vary and an attic adds complexity that makes this a job for a professional, not a DIY project.
You can, but I would not recommend it unless you are fully prepared for the complexity. A half bath in an attic requires a plumber to rough in drains, hot and cold supply lines, and a VTR pipe. We were lucky that a bathroom directly below ours allowed the plumber to tie into existing pipes. Also frame the plumbing wall first and have your plumber set the drain locations before anything else is built. Our toilet almost did not fit because the floor drain was set too close to the wall. And if you live anywhere north of the Deep South, think twice before running plumbing along an exterior wall where pipes can freeze.
VTR stands for vent-through-roof. It is a vertical pipe that runs up through the roof and does two things: it allows sewer gases to escape outside the home, and it lets air enter the drain pipes to balance air pressure so water drains smoothly and stinky septic odors stay out of the living space. They are VERY important and required by code in most (if not all) states.
We used Sherwin-Williams Pewter Green SW 6208 in eggshell finish on all the shiplap panels and divider walls, and it is the single most asked-about detail in the room. It reads as a deep muted sage in low light and shifts toward a rich forest green in natural light. For the surrounding walls we used Sherwin-Williams Shoji White SW 7042 as a backdrop, which keeps the room from feeling too dark while letting the Pewter Green nooks do their thing.
Two panels per nook opening is enough. We hung them so the bottoms just barely touch the floor, which is non-negotiable if you want the room to look finished. High-water curtains ruin the whole effect. We used panels that are 54 inches wide by 95 inches long on black iron grommet rods mounted to the top of each divider wall. 54×2 = 108, which gives plenty of extra fabric to cover the 80″ width for privacy.
Costs vary widely depending on your market, whether you add a bathroom, and how much of the work you DIY versus hire out. The biggest cost variables in our build were the licensed electrician, the plumber for the half bath rough-in, and the carpenter for framing and platform construction. The finishes including shiplap panels, paint, curtains, bedding, and fixtures are the more controllable part of the budget and are all linked in the shop section of this post.
Bunk Room Ideas for AirBNB Vacation Rentals
Remodeling the attic at the AirBNB was such a smart idea. Guests LOVE the fact that their kids can all stay together happily in one space.
Bunkrooms also photograph beautifully, command higher nightly rates, and generate guest reviews that mention specific details. “The plaid curtains in the bunkroom” will show up in your reviews. I would stake money on it.
The color palette is also seasonally durable. Navy, hunter green, red, and natural wood are as relevant in October as in December. This is not a trendy room. It is a classic one, and it will not look dated in your listing photos three years from now.
If you love decorating, you may also enjoy these posts!
If you recreate any part of this look, please tag me. Drop your questions in the comments below. All affiliate links are current at time of publishing and I may earn a small commission at no additional cost to you.
