Wow, what a week it has been. TGIF, my peeps. Life has been so overwhelming lately that on a whim I ordered myself 10 hours of The Joy of Painting series by Bob Ross from Amazon last week.

That man has always been like Zen and Xanax for my soul. When I get home at night all I want to do is curl up and let his hypnotic voice lull me into oblivion. Luckily my husband likes watching him too. Even Garrett is asking to watch “that poofy haired artist man” now. We all need our Bob Ross fix.
Anyone else a huge Bob fan like me?
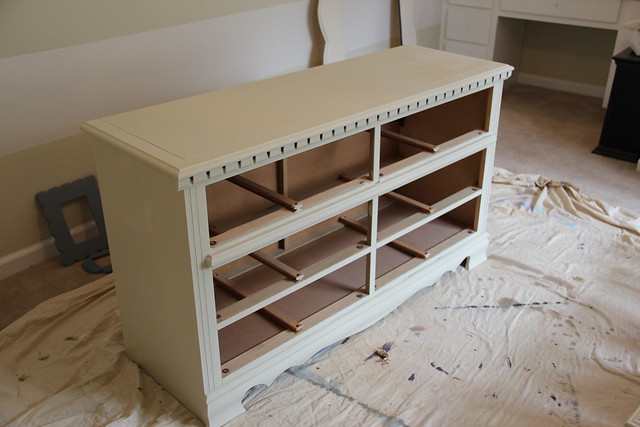
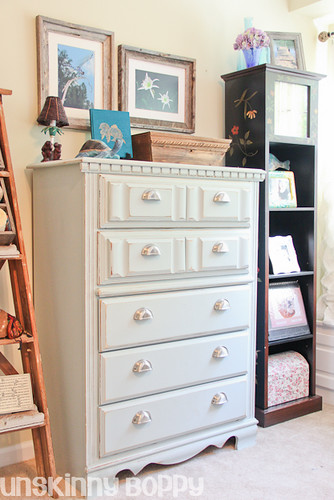
Since I have painting on the brain and I’m going on two weeks without a post (bad blogger!) I wanted to share the Before and Afters of the dresser and chest that I painted for my home office makeover earlier this month.
Here are good photos of both pieces before paint and after on the chest of drawers.
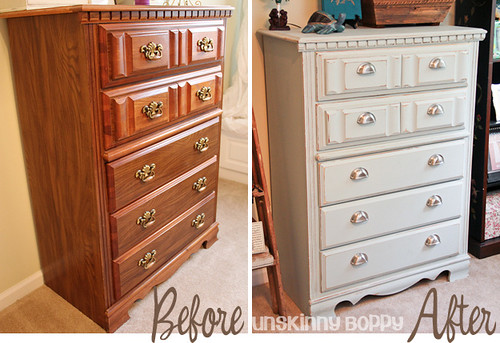

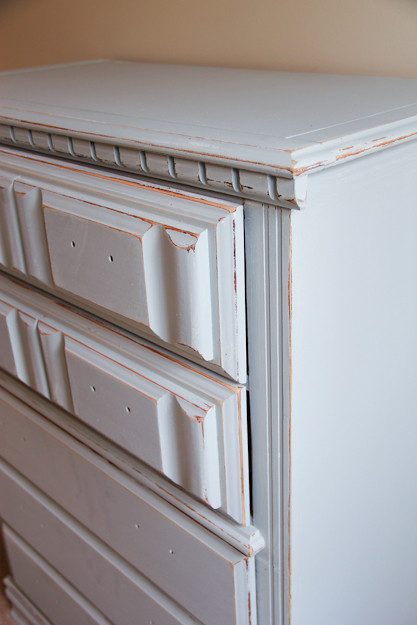
I’ve had this bedroom furniture since I was fourteen years old. It was a complete matching set when my parents bought it for me but along the way I’ve lost a nightstand and the headboard and foot board. When I was considering an office makeover I thought about buying some new furniture for the room, but then I looked around my house at all the existing furniture (that is still in good shape) around my house and decided to breathe some new life into these old pieces. Since I painted the old dresser in my living room a happy shade of blue I wanted a more subdued shade for the office.
One of the paint samples that I had lying around was Benjamin Moore Beach Glass. This was the color I chose for the furniture. Unfortunately I only had enough of that paint color for the chest, so I wound up mixing up a bunch of other colors to get a similar color for the dresser. Surprisingly it came out very similar in appearance.

A friend of mine asked me this question a few weeks ago: “OK, what is the BEST kind of paint to use once you sand furniture? It always ends up sticky!”
She’s right. Latex paint is very sticky. So here’s my time-tested advice on painting furniture with latex paint.
As far as regular house paint goes, Glidden was the best one I’ve used so far. I always sand and use Kilz first to prime furniture, then paint it with regular old latex. Glidden Robin’s Egg Blue is what I used on the blue dresser in my living room and it hasn’t chipped or stuck to anything at all so far. It’s holding up fabulously. I used Benjamin Moore paint on the chest of drawers and Sherwin Williams on the dresser. So far the Ben Moore is holding up really well, and the Sherwin Williams is AWFUL. It’s sticky and chips off with very little effort, so I’m declaring now that I will never use it for furniture painting again.
I realize that Annie Sloan Chalk paint is The Thing right now, but it’s $$$$$… Instead of that, I say try a small quart of Glidden or Benjamin Moore that you might have lying around first and see how it comes out. Worst case is you repaint.
Ok, so on with the pictures of the process!
The very first thing I did was plug in my Octosander and give the furniture a really thorough sanding to remove the top layer of sheen.
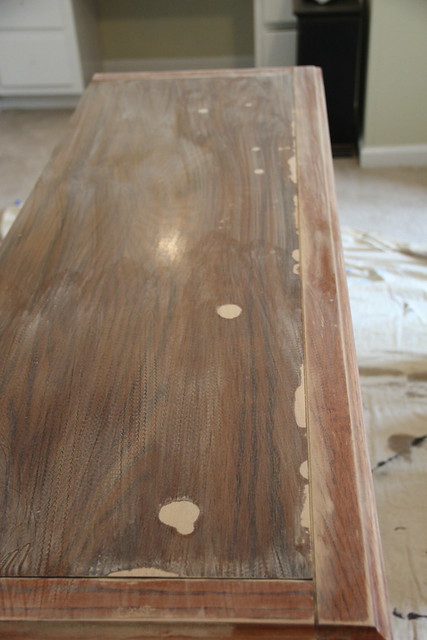
The top had water damaged bubbles that needed some extra sanding time to smooth out so I gave them some extra attention.
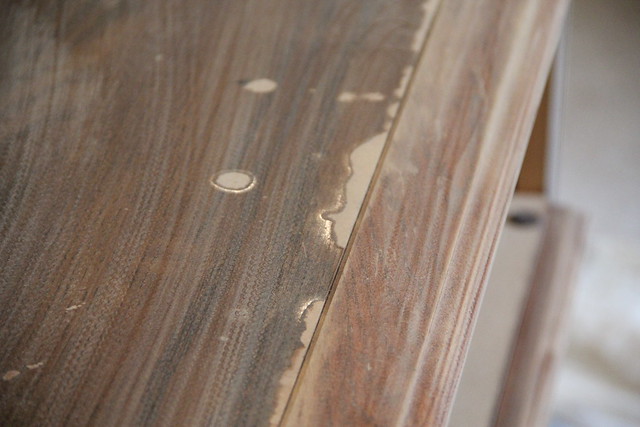
Once I got it good and sanded down I wiped off all the excess dust with a damp cloth.

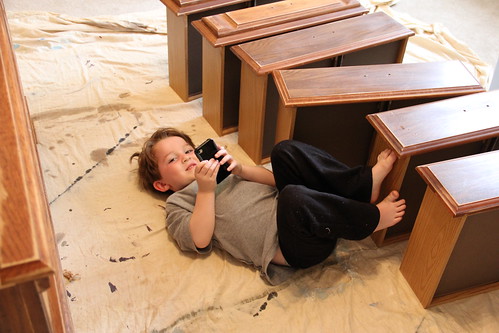
As a sidenote, it helps to have a cute kid in the floor beside you as you go about your painting business.
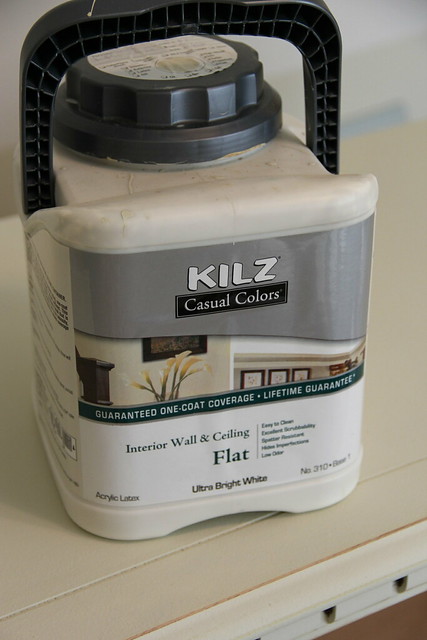
Then I Kilzed it.
I had this bucket of Kilz left from the previous owners. It had a yellow tint to it, but I didn’t mind that for my furniture.
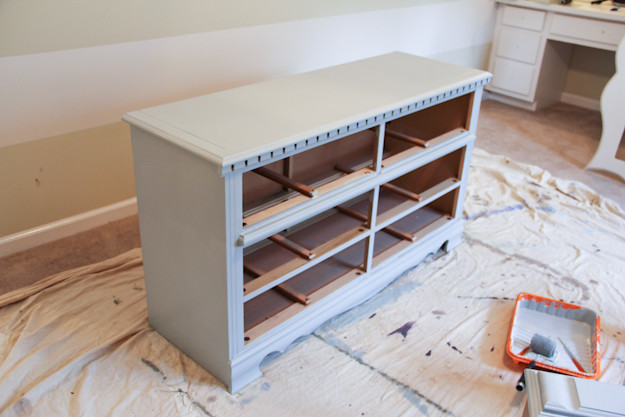
After the Kilz I didn’t sand- I just put on the top coat of paint. I used a small nappy roller for the large flat areas and a brush to get into all the cracks and crevices.
Then came more sanding.

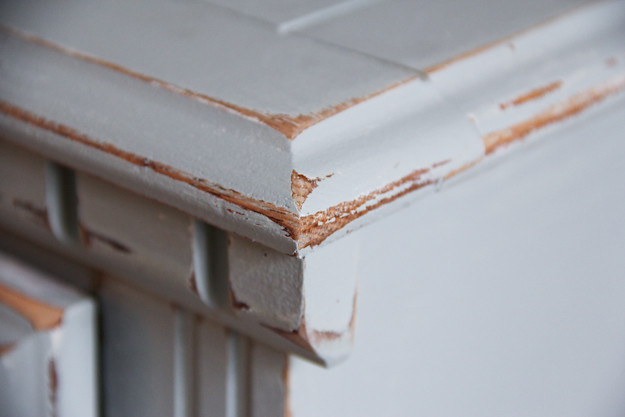
Every drawer face, every corner, every angle, every edge got sanded. I don’t sand the flat areas. I only focus on edges and corners.

There really is no right or wrong way to sand, in my opinion. Whatever you want to do, do it. Barely graze the furniture or give it a hard scrub. I let the Octo sander do the work and don’t press too hard if I want a finer edge.
If I want a more heavily distressed edge I give it a little bit more pressure until it looks right.
After you sand, wipe it down once more with a damp cloth.
Here is a side by side comparison of sanded vs non-sanded edges on the drawer fronts. If you like the distressed look (which I obviously do) then don’t be scared of the sander. But on the edges only! The sanded edges help to define all the interesting details on furniture. It’s what makes the edges really POP.
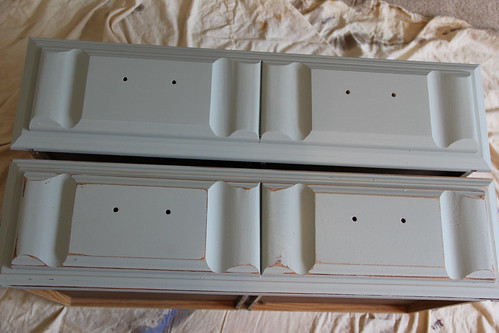
Just be sure to step back every few minutes and look at your edges and make sure you’re not going too far with it. It’s all a matter of preference. You might like little to no sanding, or you might prefer very heavy handed sanding. It’s your furniture. Figure out what you like and go with it. Do you like how I channeled my inner Bob Ross to show y’all how to paint furniture?
Wait, do I need to show you my inner Bob Ross?

Yep. That’s really me. Dressed as Bob Ross.
Halloween 2006, people.
I’m not making this up. He’s in there.
So, that’s it! There isn’t really some mystical secret to painting furniture. Anyone can do it.
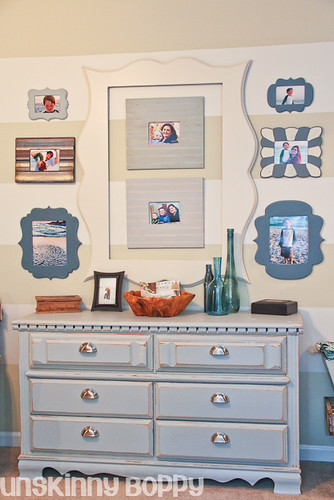
Oh! Before I forget, the final touch I added to really transform the pieces was new hardware. I ordered the brushed nickel bin cup pulls from Ebay seller woodcarvingsandmore. They shipped fast and looked great.
Just remember… It’s your happy little furniture. Do whatever you want. It’s just that easy. That’s the great part of paint.
Remember that we don’t make mistakes, we just have happy accidents.
So from all of us here, I’d like to wish you happy painting, God bless, and goodbye my friend.
Want to learn more about painting furniture?
My friend Danielle wrote an AMAZING e-book all about it!
CLICK HERE TO BUY (affiliate link)

I love Bob Ross~my mom took some of his classes (not by him-just his methods). You rocked the BR look!! I love your happy little techniques! Love it!
Debbie
I was wondering where you’ve been! Glad to know everything is alright! That Halloween costume is hysterical!!!
This is a GREAT tutorial!! Thank you so much for sharing your knowledge and experience. You’ve inspired me to tackle painting two maple dressers that I’ve been putting off. I love the color you used, the amount of distressing, the hardware, everything. Simply gorgeous!
Girl, I want to get in your glazed drawers.
Beth- You did a beautiful job on these pieces! I’d love to know the story on that gorgeous clock in your office. Maybe you could post some pictures sometime- maybe a little show and tell on your favorite pieces (assuming the clock is one of them). 🙂 Thanks for the fabulous blog, as always.
I love Bob Ross! I blogged about him a few months ago. Your dresser turned out beautifully and it does help to have cute kids laying around while painting.
Oh yay! You gave a step by step for people like me! The color is great! And it’s good to know that I am doing my furniture painting right…I never know. Your furniture is so vastly improved…it’s genius!
OH MY GOODNESS YOU DRESSED UP LIKE BOB ROSS I LOVE YOU!
So SO happy I found this…It just made me smile!!!
Now following you!!
Love me some Bob Ross….I think I may have just found my next years halloween costume…IF I can remember…:)
Hugs,
Karin
So SO happy I found this…It just made me smile!!!
Now following you!!
Love me some Bob Ross….I think I may have just found my next years halloween costume…IF I can remember…:)
Hugs,
Karin
LOL…I love your inner BOB! Anyways, you have been one busy lady. Your projects look wonderful. Thanks for sharing….Blessings Paula
So funny. My son just begged me for a Bob Ross Tee shirt that says “Think like a tree”.
You’re dresser came out great!
What a fun post and the best post on furniture painting I might add!
Jeff loves Bob Ross so I was giggling reading this the entire time.
Have a great weekend!
Love this tutorial and the results are amazing!
Oh and I heart Bob Ross.
Now I have to find out who this Bob Ross guy is…
The dresser and draws are fantastic now.
LOL!! ur the grooviest bob ROsS i’ve ever seen!! 😀
thanks for sharing ur happy little transformations!
Beth – I just saw your Bob Ross photo now, oh my gosh TOO FUNNY!
LOVE this tutorial!
And where did the awesome giant frame above the dresser come from?
Beth, my goodness, I loved hearing about your love for Bob Ross! I would watch him with my kiddos when they were little. My middle, who has turned out to be quite an artist, would get really upset if I didn’t call him in from playing outside when Bob Ross came on (we’re talking six years old). Thanks for the memories — and for the painting tips, too!
LOL! Great job on the painting and LOVE the photo of the painter!
Fun blog. Glad I found it. Im about to paint an old dresser for my daughters room. Whats the difference in using Latex paint rather than Water based?
Thanks! Latex is a water based paint– it’s oil based that is different than latex. I am going to try to get a guest post together all about the best types of paint to use for furniture. I will share it here when I get it done!
I was wondering if you ever considered changing the layout of your website?
Its very well written; I love what youve got to say.
But maybe you could a little more in the way of content so people could connect with
it better. Youve got an awful lot of text for only having one or 2 pictures.
Maybe you could space it out better?
[…] a smoky blue color to match another blue end table I have in my sunroom. During my Bob Ross phase I painted my entire childhood bedroom suite a pretty shade of light dusty blue for my craft room. Then there was that other time when I painted the back of my china cabinet […]
I know it’s been a few years since this was posted…but what sand grains do you use to remove the finish and distress the paint?
Hey, just ran across your post while looking for painted dresser examples. Yours is beautiful! Interesting about your Bob Ross videos. Are you familiar with ASMR (Auto Sensory Meridian Response)? Bob Ross is kind of the hero of those of us who have it, and I have to get my fix of ASMR videos on YouTube every day.
i LoVed your Bob Ross outfit! Your a hoot. I can’t wait to try this technique when I get a chance. I’ve been wanting to redo something. Just need the time and sander to do it. Thanks chicky.
[…] to watching ASMR videos on camera. I was just recently introduced to them by a reader after I said Bob Ross videos are like zen and Xanax for my soul. Once I discovered that they give me tingles I was […]
This is the first tutorial I came across and love it! I have a project to do with my old dresser and will use your tutorial, I’ll let you know how it comes out! Also love your quick helpful hints!
[…] Click here to see my best furniture painting tips! […]
what is the meaning of the word “distress” ? I am from Europe, NL and new to the technical paint terms 🙁
Thanks
Hi! When you “distress” furniture you make something new look old, used or well-worn. There are distressing techniques that sand down the edges and add scratches to the paint on purpose so it looks old. Hope this helps! 🙂
Hi, Beautiful makeover!
To save money and get the look of chalk paint, it also means you don’t have to sand or prime…i make my own using recipes from the internet. I’ve done several pieces and after waxing, they look great!
It also gives you the freedom to make your chalk paint any colour you want.
Cheers & Happy Upcycling!