The last few weeks have been a flurry of activity around our house, with our attic remodel in full swing. Our awesome builder is Heath Pender of HP Painting and Remodeling from Hoover. He and his son, Nathan, have been knocking it out of the park up there!
At the end of two weeks, and SO much progress has been made on the room. It is moving right along, and I could not be happier with the way it’s shaping up. I’ve learned a few things along the way and thought I’d share the wisdom with you in case you’re interested in remodeling an attic space in the future.
So, here is where we started–just a big empty attic space over the garage. If you need to catch up, you can read all about the original plans for the room in this post.
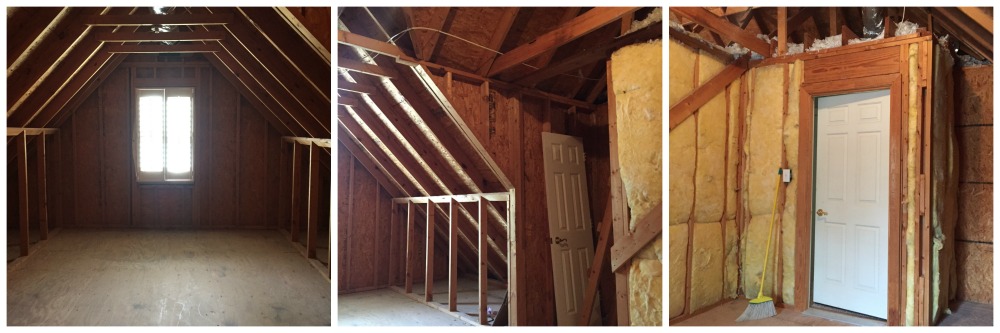
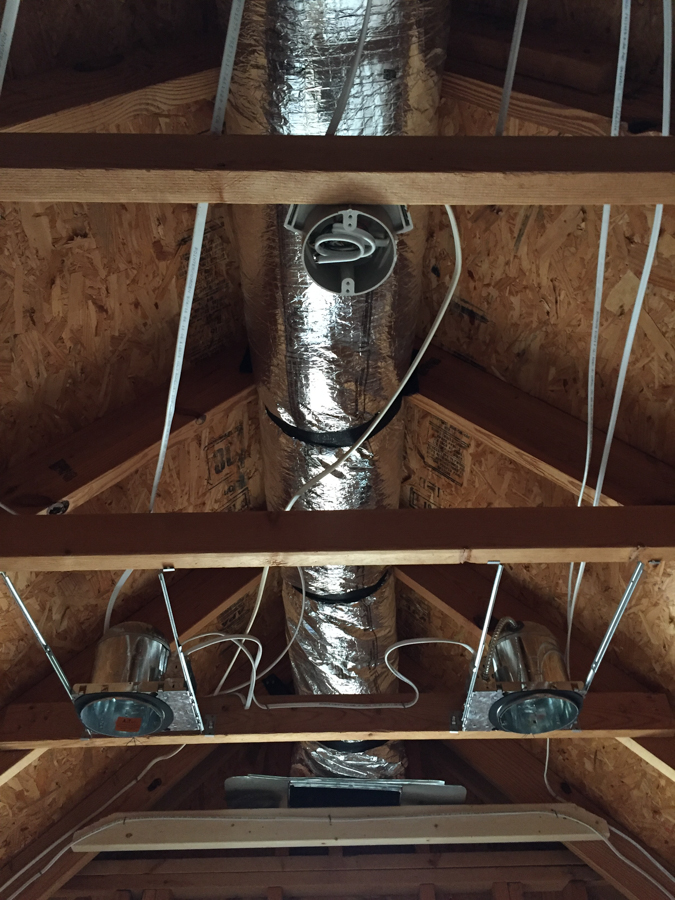
First things first, the electrician and HVAC guys came and installed all the wiring, junction boxes and flex air duct into the ceiling.
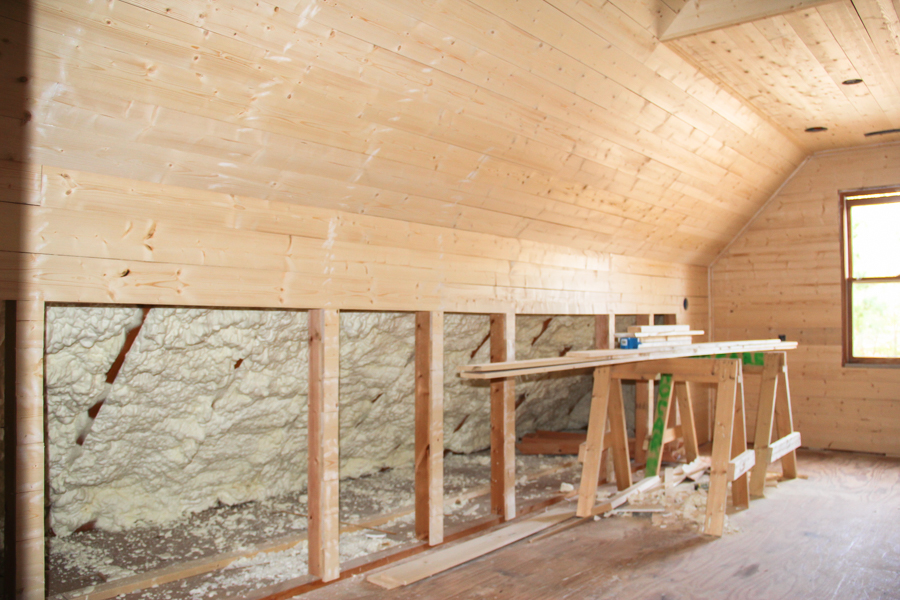
It was important to do this step first, because we went with the spray foam insulation, and that stuff coated everything like a thick layer of frosting. Look at this!!
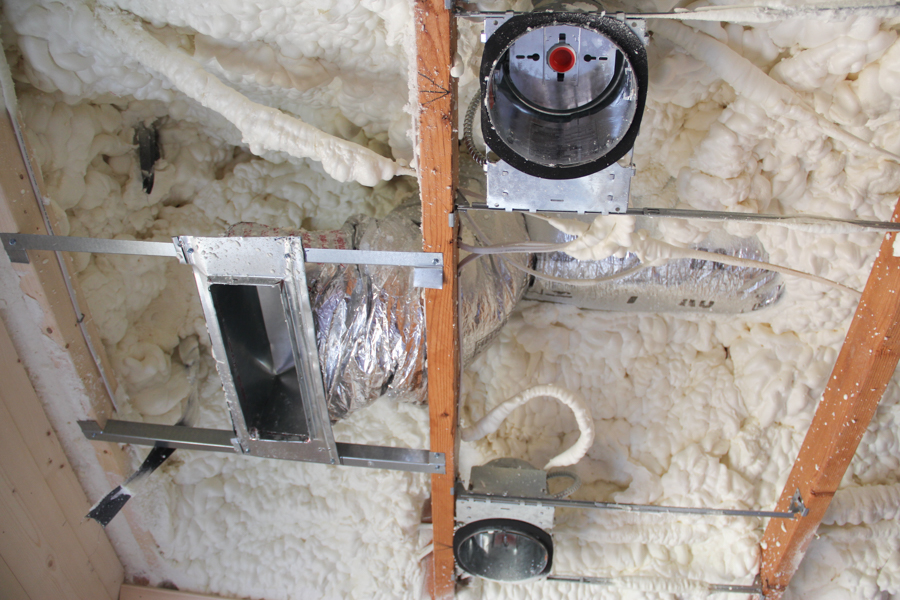
Doesn’t it look like somebody came in here with some cake icing and just went to town? It’s awesome.
Since we live in the South and don’t have terribly cold winters, we used the open cell spray foam. If you lived in say, Wisconsin, you might wanna consider the closed cell type. The rafters were 6″ thick and they had to shave the foam down to stay inside of them, so it’s that thick all they way around the room with 4 inches on the end wall.
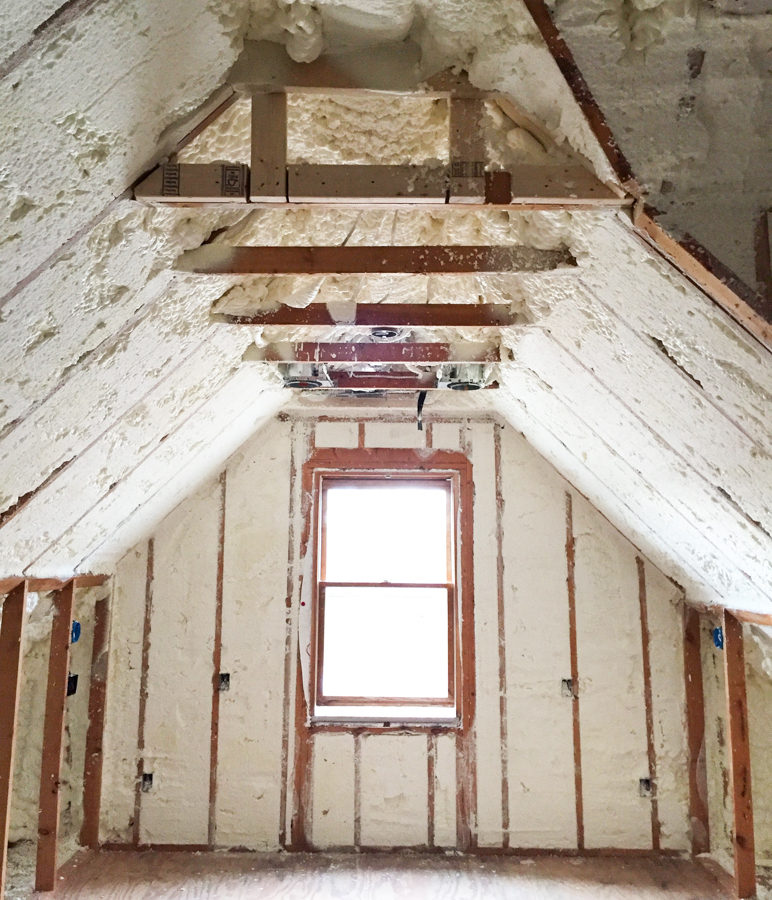
This room is completely encapsulated in insulation. I’m so excited about this in the summer AND winter! Our old attic playroom was never a consistent temperature, and I hope this will take care of that issue.
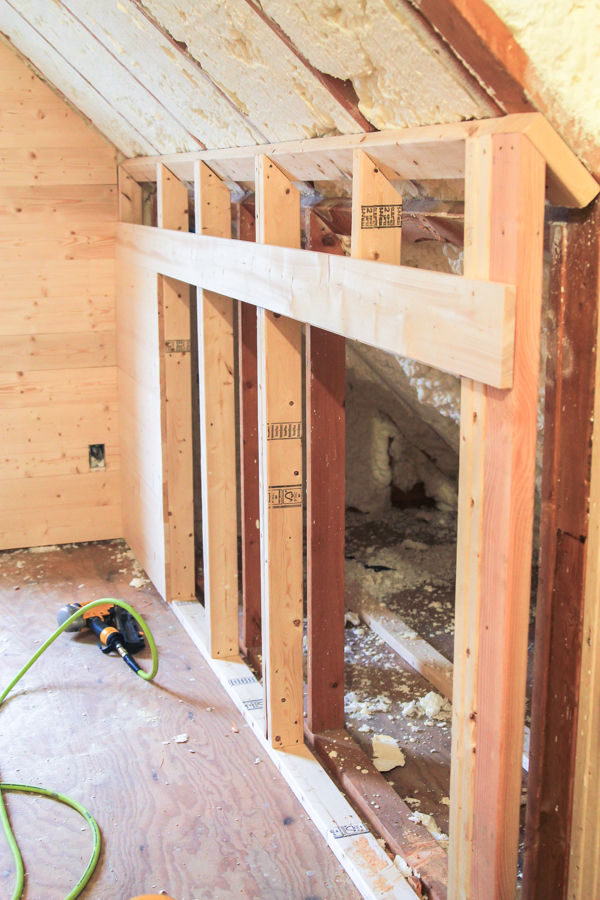
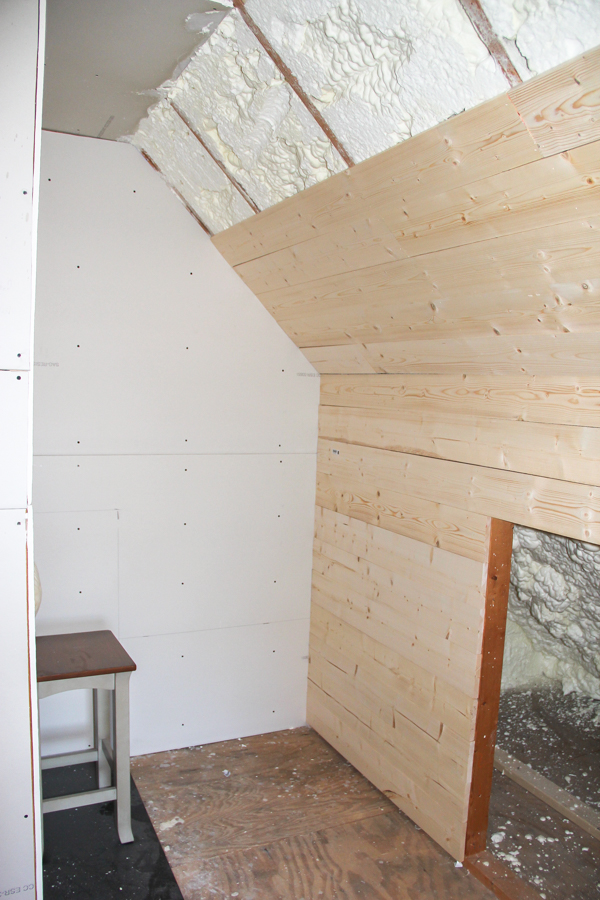
I don’t know if you can tell in the photo above, but the right hand wall was about 5″ lower than the left wall. I noticed this when I was sketching the elevation drawings and pointed it out to the builder.
In order to keep the desk area symmetrical, Heath built out a new knee-wall that matches up the two sides exactly. This made life way easier when he started putting up the shiplap siding.
And here is what this area looks like right now!
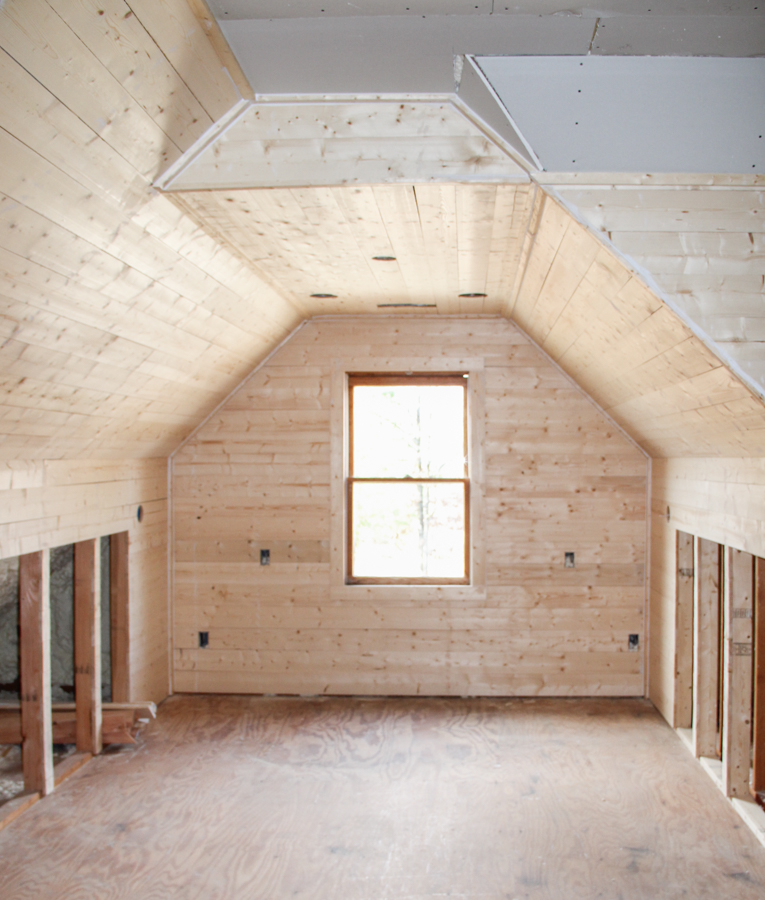
Look at that symmetrical wall where my new office desk will go! And check out all these open spaces in the kneewall where cubby storage will hide all my crap! I am so excited!
He had some tough roof angles to work around but he did a great job getting them all matched up. What doesn’t match will get covered up with mud and tape so it will look great once it’s finished.
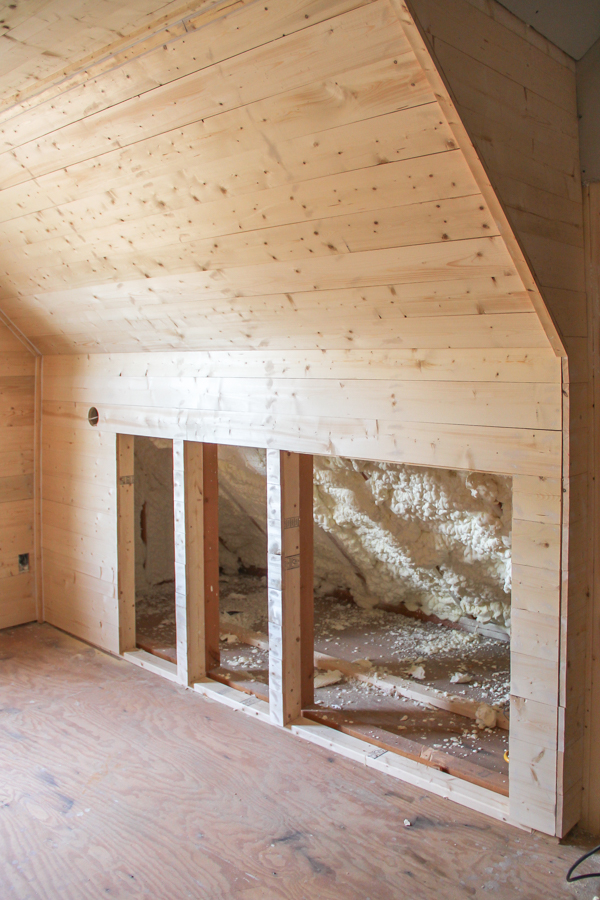
Follow more cubbies over to the other side of the room. These will be stacked with toys for the kids playroom area…
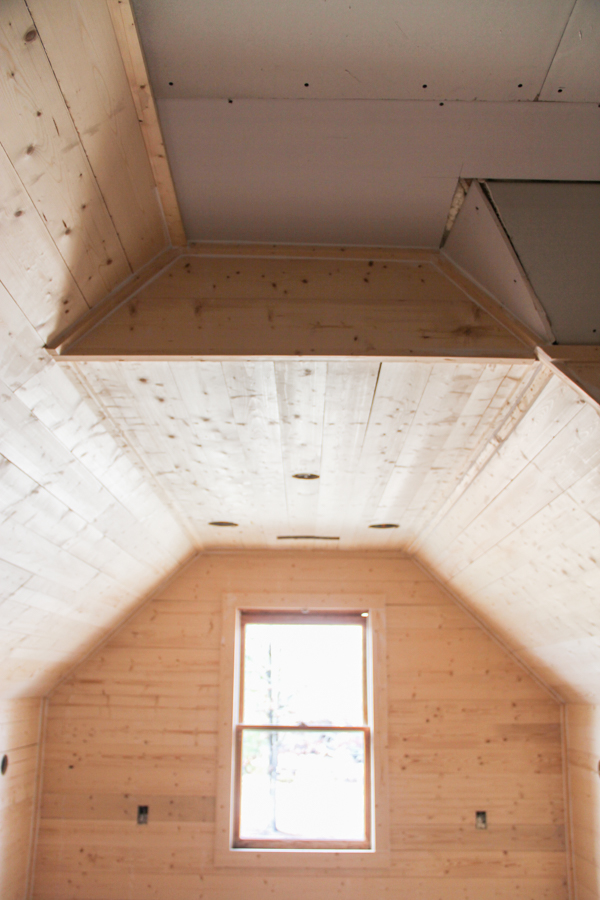
And back here in this little nook we have some special plans. A built-in “book nook” bench area will hide laundry chute in the wall where the stool is sitting now. I’ll be back later with a much more detailed look at how the laundry chute is being built in a future post.
I have been a busy bee picking out fixtures, flooring and paint. I have decided to go with Sherwin Williams Westhighland White (SW7566) for the majority of the room. It’s a nice creamy white color that will look great on the shiplap.

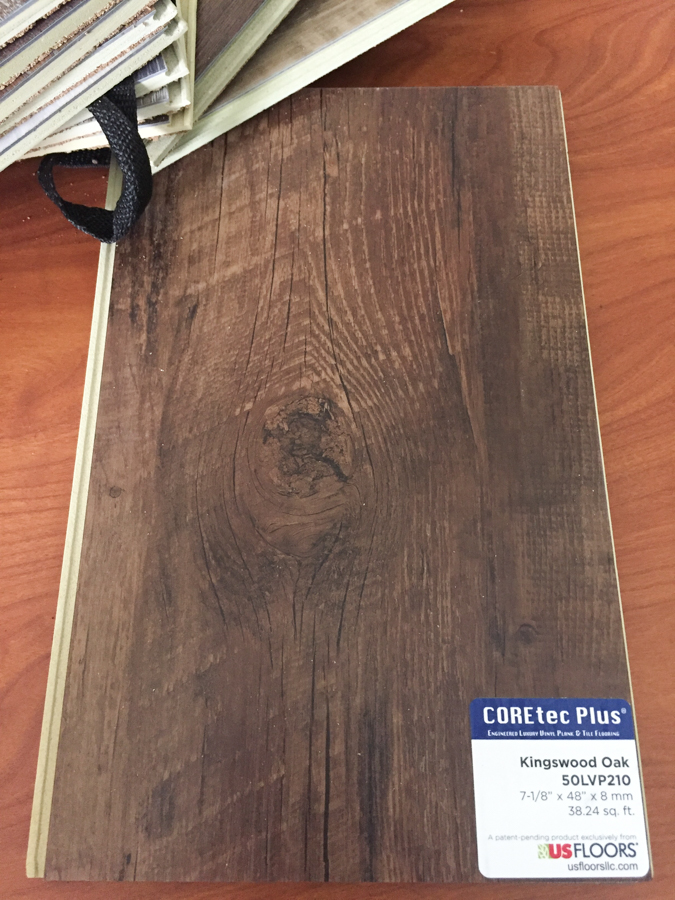
Here is a sample of the flooring I’ve picked out. COREtec Plus in Kingswood Oak from Carpet Express is a glueless 7″ vinyl plank with a cork backing. It’s supposed to be waterproof and dang near indestructible. I cannot wait to see how it looks in this area!
It is all coming together so nicely, but Christmas will put a slow down on some of the progress from here. I have lots more to show you in a few weeks though! This is my dream attic space, and I cannot WAIT to see how it turns out!

I’m sorry but somewhere in the past I read laundry chutes were fire hazard and perhaps a safety issue with young children. Have you check with local building codes?
I’ve never heard that before, Thelma.
Our previous home had a laundry chute and I got the idea for mine from a Parade of Homes that was built last year so I don’t know of any local codes against them here in the Bham, AL area.
The chute is being fabricated out of galvanized steel by my HVAC contractor because it is, in effect, exactly the same idea as an HVAC return air vent. But instead of a filter grill on the wall there will be a door for the clothes to go down. Air returns definitely travel between floors of houses all the time, so I have a hard time seeing the difference here.
Thanks for pointing that out, though. If they are outlawed in certain parts of the country I’d like to know more so I can put that in my upcoming blog post. I wasn’t aware of that.
Your room looks beautiful. I just wanted you to be aware there may be issues. My best to you and your family. Merry Christmas.
Thank you, Thelma! Merry Christmas to you and yours, as well!
Oh, Beth, everything is beautiful. I love the cubby areas, and know they will be perfect for crafting and toys. And that flooring?! Incredible. I love the step-by-step process that you sharing… can’t wait to see the finished product!
Thanks so much Kelly! I am in LOVE with all the cubby spaces! I need a gazillion baskets to fill them all but it will be so convenient when it’s done!
Love!
I can’t wait to see the fnished product too. Wonderful space.
It looks amazing already. Looking forward to seeing more. Merry Christmas.
[…] Attic Turned Office/Playroom: Construction Begins! All I Want for Christmas is some New Shiplap Attic Updates: Paint and Cubby Progress A Light {or seven} In the Attic Craft Room Organization in […]