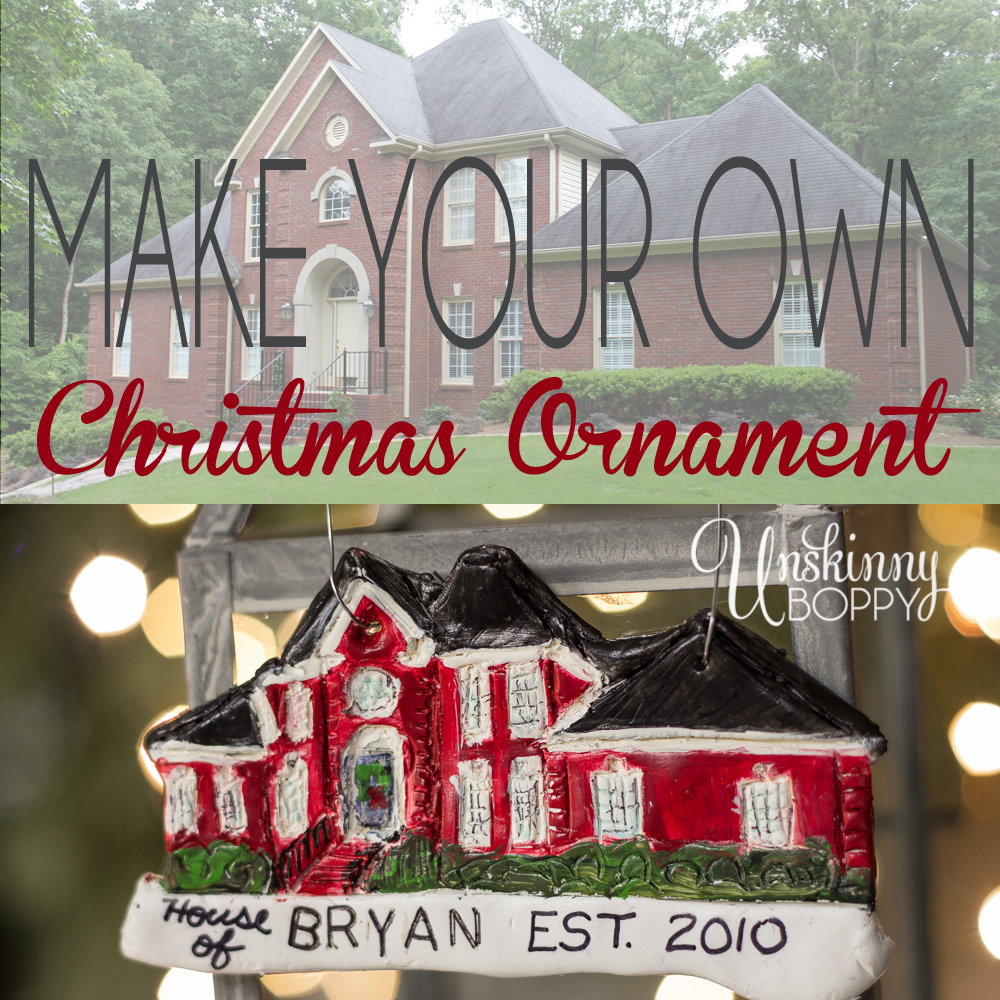
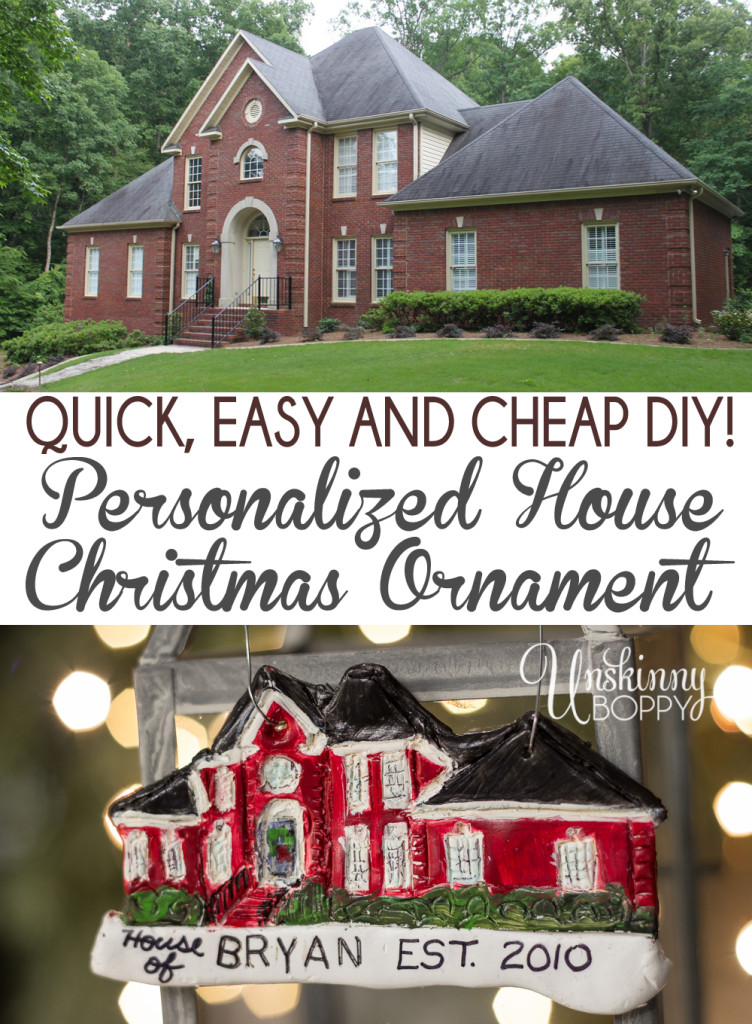
Many Pinterest moons ago I spied with my little eye this personalized Christmas ornament that was an exact replica of a house. The link took me to an etsy shop that listed the ornaments for about $1,000 a pop, and stated that she was booked out until 2057 or sometime in the distant future. I was so sad, because that personalized ornament was just about the most perfect gift for my sister (and myself) that I had ever seen. Of course now that I check etsy I see that there are plenty of options available, but those prices are way more than I would every pay for a Christmas ornament.
When in doubt, DIY it out.
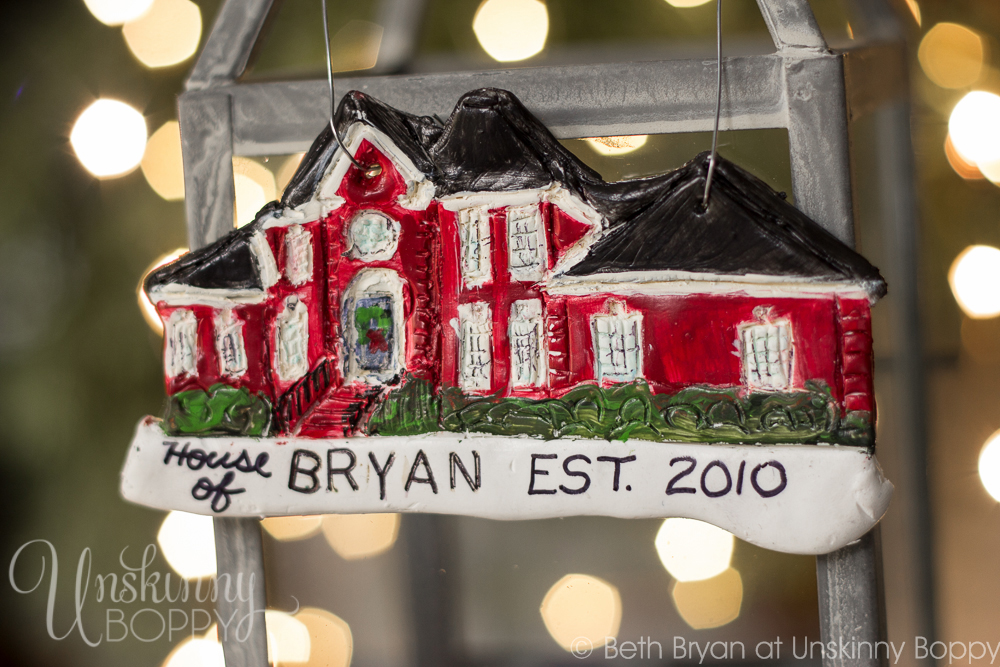
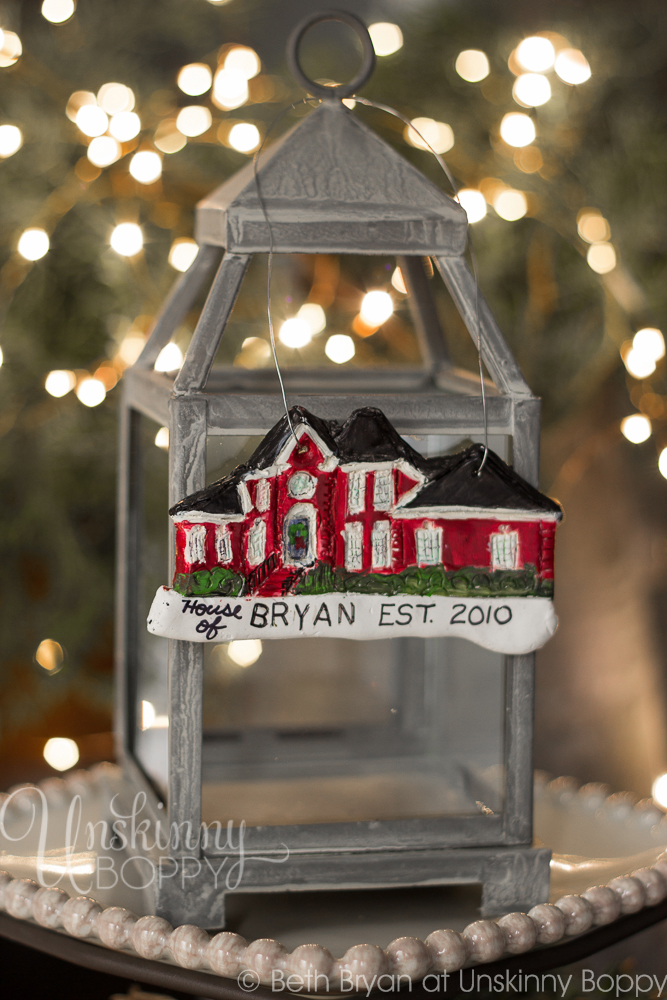
Here is how I made a homemade knockoff of those super expensive personalized house ornaments for a fraction of the cost.
Step 1: I grabbed my trusty Sculpey polymer clay and got to rolling and flattening and shaping and twirling until I flattened it out into a semi flat shape. I didn’t use a pasta machine on these ornaments like I did on the gold leaf polymer clay ornaments. This is a money saver if you don’t have a pasta machine, but wow is it a ton of work to roll out polymer clay by hand.
Brace yourselves, biceps… you’re in for a workout.
You’ll get there eventually. The heat from your hands makes the clay more pliable. Heck, sit on it and warm it up if it helps! Maybe pop it in your bra and do some laps around the neighborhood. Anything to get that clay warm and pliable, but DON’T use a microwave or oven or hot water here… That won’t help. Body heat is the trick. I wonder if a blow dryer set to low would work? Maybe. If you happen upon a piece of super crumbly clay, just keep rolling and warming and maneuvering it all around until it’s semi-conditioned and is able to be cut and smoothed out and traced over. You want to work with pliable, glossy clay here, folks. I aimed to roll it out flat to somewhere between 1/4” to 1/2” thickness. Remember it will shrink a bit in the oven and you want it to be sturdy, not breakable.
Step 2: Print and cut out a photo of your house. The size doesn’t matter too much, but if you want to keep all the details that make your house unique then go for a photo that is at least 4-5 inches wide. Make sure to use a regular (read: thin) printer paper that can be traced over to leave an indention in the clay. Cut around the outline of the house, leaving some bushes in the front.

Step 3: Get the clay positioned under the paper so that there is enough excess for you to trace and cut around. Leave a little extra at the bottom for your name and date (or address) if you’d like.
Step 4: Start tracing. I used a pencil to trace on top of all the lines of the house. Just trace away until you’ve covered all the roof lines, windows, doors, corner detail, bushes, front steps… all of it. Don’t press so hard that you rip through the paper (or worse, through the clay!) Just a nice even pressure that gives you some detail. Once you have it all traced out, remove the paper and give it a thicker once over again with something sharper like a toothpick or a straightened paper clip or a fondue fork (my weapon of choice) or a used hypodermic needle. No, not really. Don’t use the bio-hazard for this project. Just use something pointy and sharp that won’t leave any smudges like a pencil. If the clay is well conditioned it will kind of ooze back into place a bit and your indentations might begin to fade away, so dig deep with this second pass at it and really get some trenches of clay dug out to create shadow lines. You might have to brush off the excess clay at times. Just keep smoothing it out very lightly with your fingers when you make an indention. Remember not to press all the way through the clay—keep it surface level. Once you have it nice and deeply grooved it should look something like this:

At this point go ahead and hollow out a small hole all the way through it so you can add some string to hang it later. A toothpick sized hole works well. You can also add your name, date or address at this point. I used my metal stamping tools which are covered in grease to stamp my name. Whoops. Not my brightest idea. Please do a better job than I did!
Step 5: Bake the clay according to the package directions. Original Sculpey clay bakes at 275 °F (130 °C) for 15 minutes per 1/4 inch (6 mm) thickness. When it’s done I take it outside to cool off so it doesn’t stink up my house with the chemical plastic smell. Let it cool down completely.
Step 6: Paint it! I painted mine using Decoart Americana craft paint, found at any local craft store or Amazon. I didn’t try to be a perfectionist with the painting. I think it looks a lot more awesome with a messy handpainted feel to it. If you want to try to get it perfect go right ahead, but it’s a lot easier to go through life with a imperfectionist’s attitude, I can promise you that. Use a fine tip Sharpie marker to get into the fine lines and any detailed stamped areas. Let it dry completely, then give it a spritz of clear spray sealer. Old fashioned Aquanet hair spray will work in a pinch.

Step 7: String it up with fishing line or ribbon and pat yourself on the back for creating some AWESOME personalized Christmas gifts this year! Unless their address is on Amityville Lane or Elm street, every homeowner is sure to love this personalized house ornament! And HOORAY for saving tons of money by doing it yourself!
If you like this easy, quick and DIY Christmas gift idea, please give it a repin!
I’m joining a big group of talented bloggers to give you the Scoop on a Handmade Christmas for this post. The blog tour has been happening since December the 6th and will continue through today! Be sure to check out all the amazing handmade Christmas ideas in the links below!

Friday December 6
Saturday December 7
Sunday December 8
Monday December 9
Tuesday December 10

So clever!
I LOVE this idea! I’ve also been coveting those really expensive ornaments on etsy for a couple of years, but just couldn’t justify the cost. Thanks for the DIY tutorial.
These are just so adorable, Beth!! I must get my hands on some clay… I’ve never used it before but with all the inspiration out there… I must give it a try!! Thank you for sharing!! Pinning now!!
LOVE this, Beth!
I love this idea, Beth. Wondering if it’s too late to make these as neighbor gifts? And it sounds like the pasta maker is a lifesaver — or at least a bicep saver! Pinning and sharing this on FB and G+.
This is awesome and I’m pinning it.
Super cute idea, Beth! I am definitely pinning this for future use!
What a super cute idea!!!
This is amazing! What a clever idea, and it turned out great! Pinning for sure!
Beth,
Thanks for the great instructions. This looks like such a great idea for many occasions…new house, wedding, birthday, not just for Christmas.
So glad to be on The Scoop tour with you,
Judith
This is brilliant, Beth! What an awesome way to make a one of a kind gift! Can’t wait to make these!
Oh my gosh Beth this is so fantastic! What a perfect gift too, a house warming gift, a Christmas gift,…. I would LOVE to do this of my childhood home for some of my siblings. You are amazing!!!
I wish I had your go-getter spirit. 🙂 So cute!
Holy rusted metal, beth! this is amazing!! i’m totally going to do this!
Love this! This is such an adorable idea, and seriously, I think my kids would appreciate seeing their home(s) they grew up in on the tree for posterity.
These are so cool. I was anxious to see how you got the lines so perfect – love the tracing idea. Never would have thought of that!
Pinning.
That is such a clever way to make them, Beth. I would have never figured it out. Way to go for saving 1000 bucks!
I love this idea! You’re so good.
What a fun idea…and so unique! Wouldn’t this make a fabulous gift, too! Thanks so much for sharing with us! Hugs…Debbie
Hey beth- love this ornament and your humor. I am chuckling through the post. Happy holidays!
Okay first off….your home is gorgeous! And second I love your beautiful home ornament.What a cool idea!
xx
Anne
So cute Beth- it turned out darling and what a beautiful house you have!
What a great project! My daughter did a million polymer clay projects over the summer so maybe I can “borrow” some of hers – lol. What a fun idea!
[…] How To Turn Your Home Into a Personalized Christmas Ornament […]
[…] How to make a personalized Christmas ornament that is a replica of your home: […]
[…] used the tutorial here: https://bethbryan.com/2013/12/turn-home-personalized-christmas-ornament/. The tutorial jokes about popping the Sculpey in your bra to warm it up and make it easily pliable. […]
Link exchange is nothing else however it is just placing the other person’s
website link on your page at appropriate place and other person will also do similar in favor of you.
I just couldn’t leave your website before suggesting that I actually loved the usual information an individual supply to your guests? Is gonna be again continuously to check up on new posts.
[…] was floored when I saw this replica of Unskinny Boppy’s house that she MADE!!!!! It is a. maze. […]
Personalized Ornaments Our Little
[…] u can also add your name, date or address at this point. I used my metal stamp […]
Personalized Ornaments Just Like
[…] name, date or address at this point. I used my metal stamping tools which are […]
Personalized Ornaments Her Little
[…] ized hole works well. You can also add your name, date or address at this poin […]
Home Tweet Home Ornament Kit
[…] hpick sized hole works well. You can also add your name, date or address at th […]
I like the house ornament but to me it looks like a child did it. It doesn’t look like the house.Do you have anything that if I were to send you a picture could you put it on a Christmas ball.