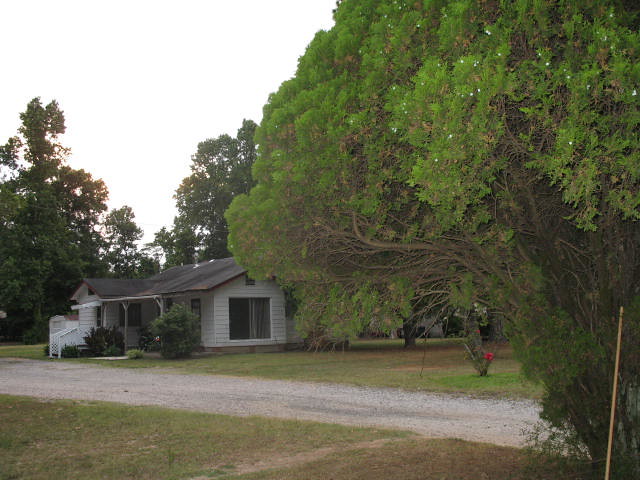
In 1959 my grandparents bought this small three bedroom house where they lived until they both passed away. My Pop died in 1983, and my Granny in 1999. Since then my aunt and uncle have owned the house as a rental property. Recently when they put new siding on the house and updated the inside, they salvaged a lot of the wood from the window and door trim. For years it’s been on my mind to create a reclaimed wood sign that said “Glory Be!” in honor of my granny’s favorite expression. “Glory Be!” It was said an exclamation of surprise, or happiness or disgust that she used all the time. If she saw someone that she hadn’t seen in years…. “Well, Glory Be!” If she drew a red three while playing Canasta… “Well, Glory Be!” If I went out on her in Canasta… “Well, Glory Be!” and then she would stick her tongue out at me. It was one of those all-encompassing phrases where the inflection defined the intent, much like “Bless your heart.” It’s all in how she said it to you.
When the opportunity presented itself to create a sign using boards from her actual house, Glory Be! My idea came to fruition pretty easily. I knew exactly what to do it! Now let me show you guys how to do what I did with it.

I started with various widths and lengths of reclaimed lumber that was taken from the walls, door and window trim of my Granny’s old house. None of the wood was the same size, so I just started laying it out on a big folding table until I found a few color combinations that looked good to me.
")
I decided to make a sign for each of my aunts, my mom, my sister and myself to give them for Mother’s Day this year, so I knew I needed to make the wood stretch as far as it would go. I decided to cut them so they made about an 18″x18″ square shape. I used our compound miter saw to cut the boards and tried not to breathe in any of the lead paint dust.
")
Then I cut lengths of 1×2 hard maple about 16” long and ran them in the opposite direction from the other boards. Unfortunately, the first 1×2 split right down the middle when I drilled straight into it, so I had to pre-drill all the holes before I could put a screw into each of the pieces of lumber. Predrilling kept my boards in tact without splitting them. I made sure to buy screws that were long enough to go through the 1×2 and bit into the reclaimed wood, but not SO long that they stuck through the front side of the boards. I found that 2 1/2″ screws worked great.
")
I used a caulk gun full of PL Premium construction adhesive between each piece of reclaimed wood and on the back of each 1×2 to stick it all together. Every time I ran a bead of glue between those boards I thought about those old Polydent denture commercials, and Glory Be! That reminded me of my Granny.

After all the boards were screwed and glued together I left them to sit and dry in my basement for a few days while I worked on the signage part of the project. Then I added a heavy duty hanging kit to the back of each one using D-rings and picture hanging wire.
")
Ever since I won the encaustic wax dipped photo of Garrett at an auction a few years back, I have wanted to try to the technique of dipping paper in wax. I printed out the words “Glory Be!” on regular sheets of vellum paper using the “Freebooter” font. Then I tore the edges of the paper to help the wax stick to the edges better.
")
On my stovetop I placed a pan of water that I heated to a boil, then I sat a square aluminum tray containing plain soy wax into the boiling water which created a double boiler.
")
It didn’t take long for the wax to melt down to liquid, and after that I turned the heat down to a simmer.
")
Then I just dipped the vellum into the wax, letting the excess drip off into the pan of wax. I had another aluminum pan to the side where I could let the wax drip while it cooled.
")
After MULTIPLE dips ( I lost count) I finally started getting that nice thick edge that I was trying to attain on the vellum. This drippy, ragged edge was my goal, although I don’t think it had as much impact on the plain white vellum as it did on the picture of Garrett from my other piece of artwork.
")
Once I got all the signs dipped, I used thumbtacks to attach them to a ragged piece of burlap to “frame” them. Nothing about these pieces were perfect, so I didn’t try to measure or anything. All of this was simply eyeballed.
And here is the final result! One of a kind reclaimed lumber signs from my Granny’s house with her favorite expression on them. The layers of paint and the years of wear are evident on every sign, which is exactly what I wanted. I love the decades of memories that are etched into every piece of wood.
")
My mom, sister and aunts LOVED their Mother’s Day gifts. I’m so grateful to my aunt and uncle for taking the time to salvage all that wood and allowing me to chop it up to create these signs. Since the future generations will have no idea where the signs came from, I added a small description to the back of each one that gave my grandparents names, the location of the house and the dates that they owned it. Hopefully these will be passed down to family members who understand the importance of remembering your roots and honoring your ancestors.
")
And also understand that old-fashioned expressions like “Glory Be!” are important Southern semantics that we need to celebrate instead of burying with our Granny’s.
I hope you had an excellent Mother’s Day!

I love the story behind it.
Thanks Mrs Lucky! 🙂
These signs are SO cool and I have never seen that wax dipping technique!
Thanks Keri! I had never seen it, either until a few years ago when I won an auction item that introduced me to it. A photography looks so much cooler dipped in wax than this regular paper. I highly recommend trying it out!
Wow! How great! I am sure they really appreciated them.
They loved them! It was a special Mother’s Day for all of us! Hope you’re doing great, Kirby!
I love it, great project and the textures are fabulous 🙂
Agreed. You can’t DIY that kind of chippiness. That comes from 50+ years of paint layers!
so cute!!!! Great job!
xox
Thanks Anne!
Well Glory Be! Granny would be so pleased.
Bliss
I agree. She would LOVE the attention, that is for sure. 🙂
How cute! Love the story and the saying!! New to you and your blog and I just love it!~~Angela
Aw, so glad you joined us here! Welcome to the blog and thanks for your sweet comments!
How wonderful! I love how all the components came together and the meaning behind them. What treasures!
Thanks Christie! 🙂
Great project! The sentiment is the best, Happy Mother’s Day!
Happy Mother’s Day to you, too, Deneen!
That’s a great idea! I love the signs.
Thanks Amanda!
These signs are great! I love the idea of dipping the paper in wax!
It looks so much cooler on a photograph, but this turned out pretty nice, too. It wasn’t as hard as I thought.
Beth, I think these signs are just the coolest things! You have created some family treasures that will be around a long time. And I agree that we shouldn’t bury our southernisms. My go to one is “Reckon’ so.”
I say “I reckon” all the time! 😀 Thanks for your sweet comment, Jane!
What a fun story! I’ve never heard of wax dipping for a paper treatment before. Well, “Glory Be!” you learn something new every day!
These turned out beautiful! I love the story, too!
Those are just fabulous and such a sweet honor to your Granny! LOVE them, Beth!
Beth, I love the signs and the story. My grandmother and great grandmother’s favorite saying was “well my goodness”. thanks for bringing back good memories.
Such lovely wood for such a lovely memory!
Love your signs – so sentimental! Love!
how cool! I wonder what it would look like to dip some fun fabric in wax and make a banner?!
So funny to find this today. I too had started a project using old porch wood for some family members but will be painting on them. We’ve heard our share of “Well Glory…”, “Well Glory Be….” and the such. I’ll be painting Faith, Family and Friends and using door hardware from the house also. Thanks for letting us peek at your project and family. Glory be….
cute!!!
I admit, I visited this post for the art aspect. I had no idea how meaningful this post would actually become. AMAZING thought behind this one, Beth! I adore the fact that you left a description on what the sign meant on each one. I’d bet every time one looks at their sign, they can hear your Granny’s voice!
🙂 You made my day with your feature(s), Donna! Thank you SO much!
Those are great signs. Love how big they are.
Vanessa
Well, I’ll be!! Love the saying and the memories!
[…] wooden sign is one that I made for myself using the wood salvaged from my Granny and Pop’s house. The top piece is the threshold from their kitchen. Love, love, love the fact that I have this […]
[…] Glory Be Reclaimed Wood Sign at Unskinny Boppy […]
[…] May the sun was shining again, and I was getting back in the power-tool saddle by making these reclaimed wood signs with scrap wood from my Granny’s house. I gave my mom, sister and aunts one of these signs for Mother’s Day in remembrance of my […]
[…] I need to show you this SUPER cute burlap and slate photo frame that I created to decorate the wooden sign that I made with reclaimed wood from my Granny’s house. Also, there’s a huge announcement at the end of this post so be sure to stay tuned all the […]
I love this, the idea of making these signs from the wood of your grannys house is so sweet. I could only wish I had something so meaningful from my grandparents. Thank you so much for sharing your project with us.
Really cool technique! I found this post over at Donna’s I Love That Junk!
Bought A Reclaimed Wood Heart Sign
[…] my basement for a few days while I worked on the signage part of the project. T […]
About The Reclaimed Wood Red Heart Sign
[…] duty hanging kit to the back of each one using D-rings and picture hanging wire. […]