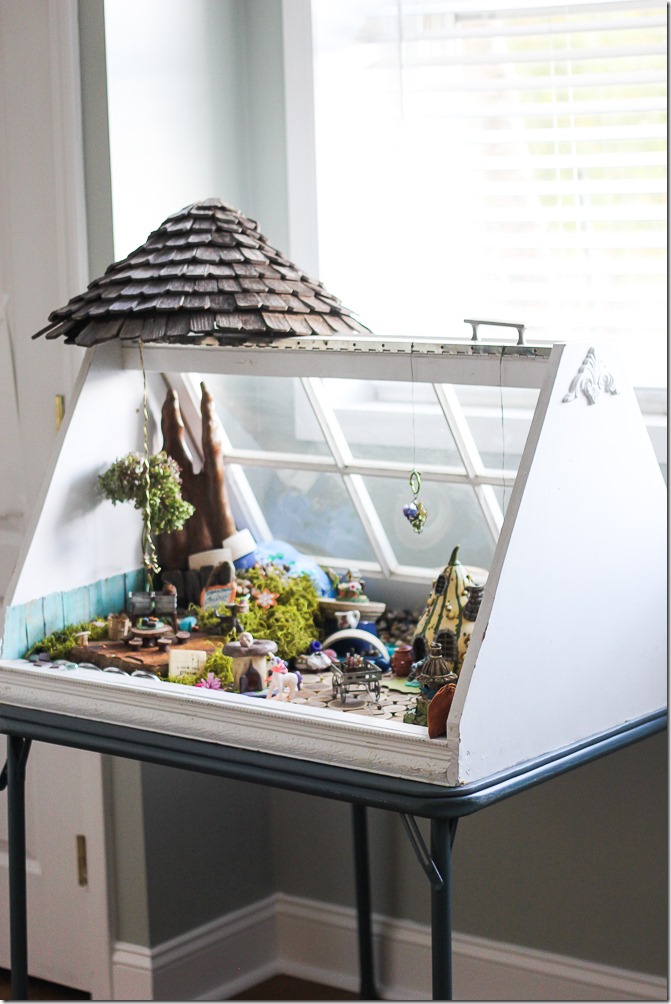
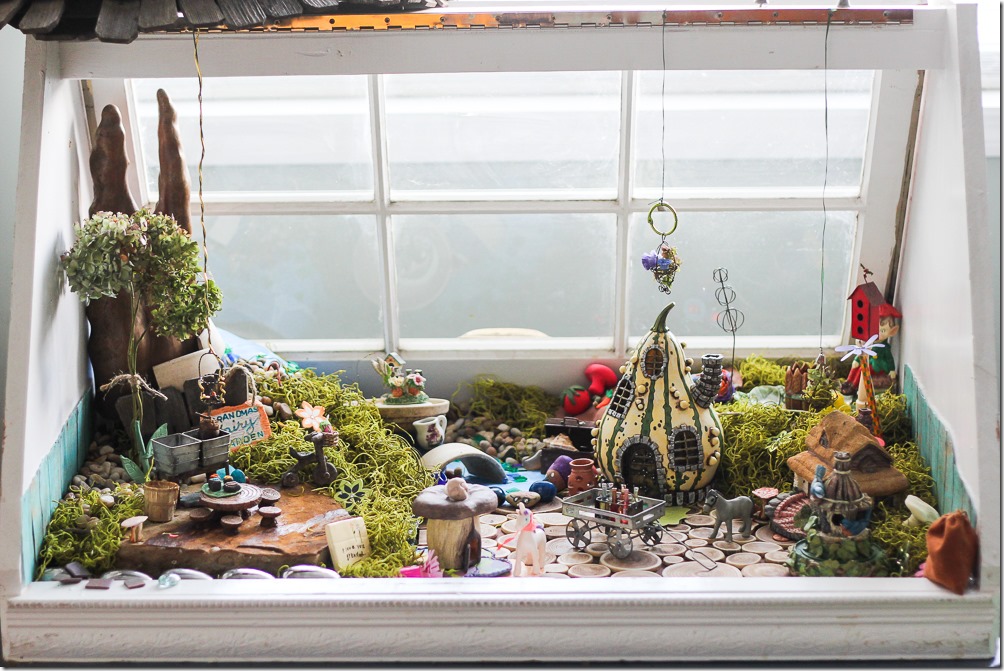
Anyone else out there have a fondness for fairy gardens? The Epic movie was one of my very favorite cartoons released this year. Every time I wander around our yard with Garrett we point out little humps of moss or gnarled knots in trees that could hide a fairy lurking underneath. I love the imagination behind it all, and the magical wonder of the possibility of a tiny world that exists right underneath our noses. Every time a bug splats our window Garrett asks if it was a Boggan. If you haven’t noticed… fairy gardens are all the rage on Pinterest right now, and seeing all of those cute ideas inspired me to create one of my own. With the help of my mom and my son, we transformed this greenhouse that my husband built from wooden windows and MDF into something pretty magical.
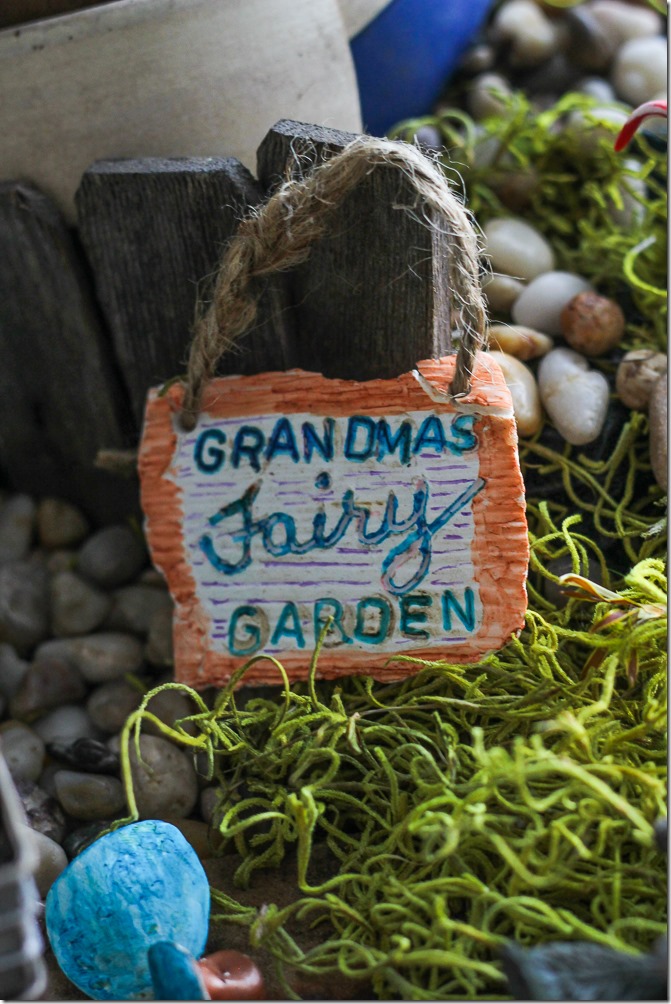
Welcome to Grandma’s Fairy Garden. Come along and I’ll show you how we created this mini-wonderland.
The whole thing takes up about a three foot square area in a sunny corner of my mom’s scrapbooking room. The back window is hung on a piano hinge to make the back of the garden accessible as well.
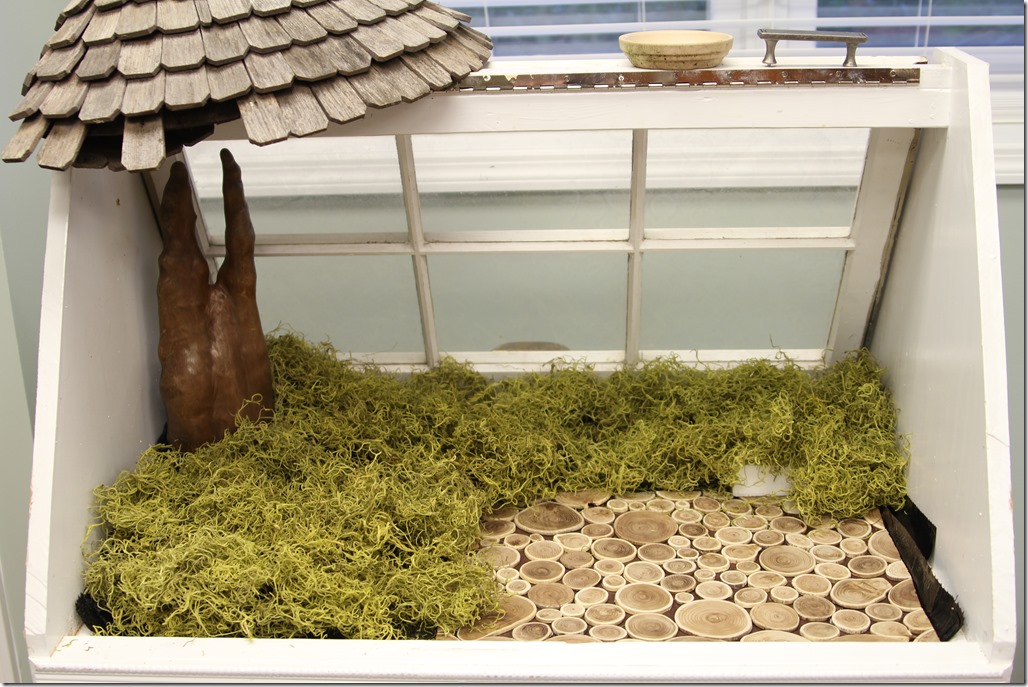
Here is a behind-the-scenes look at building the foundation before we added all the decorative pieces. I removed a lot of the moss after this photo was taken to make room for the waterfall and lake, but this gives you an idea of how to build your foundation first, then add the pretty stuff later. See the cone shaped thing on top? That used to be the roof of a birdhouse. I found it at a junk store, and even though it was falling apart I couldn’t resist the way the weathered cedar pieces formed the dome shape. Plus, I was able to build a fence with the pieces that fell apart while I was moving it around.
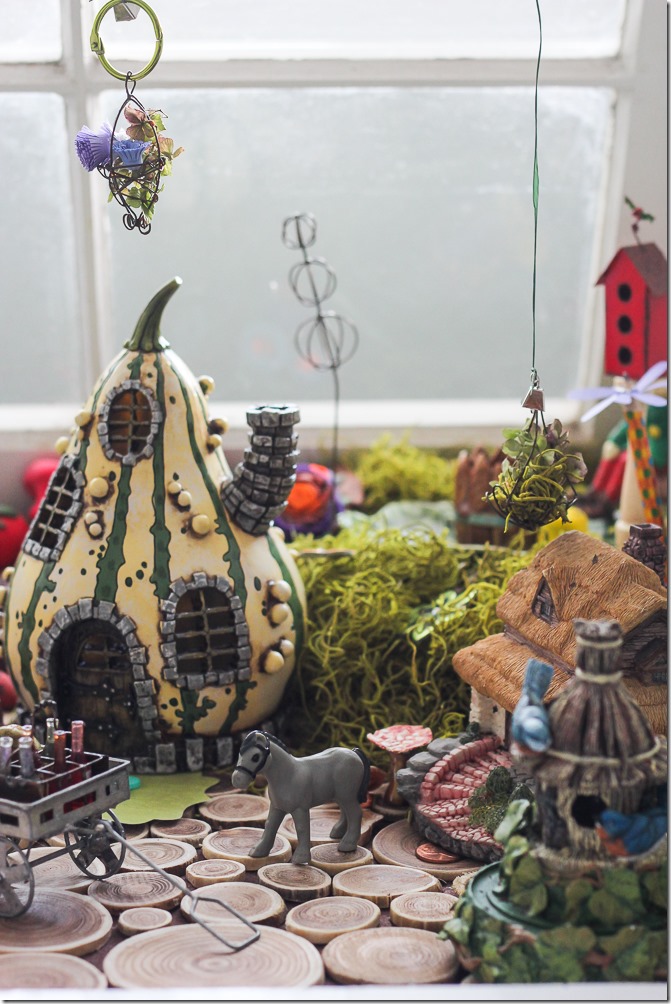
I was able to find plenty of fairy garden houses and accessories at local nurseries and other shops. We took a recent vacation to Helen, GA, where I discovered a shop called The Pickled Peach that had some of the CUTEST fairy houses I’d seen. I had to buy this one shaped like a gourd, along with the sliced wood placemat that is serving as our foot path through the village. If you’re looking for a similar fairy garden gourd house, you can find them on Amazon as well. 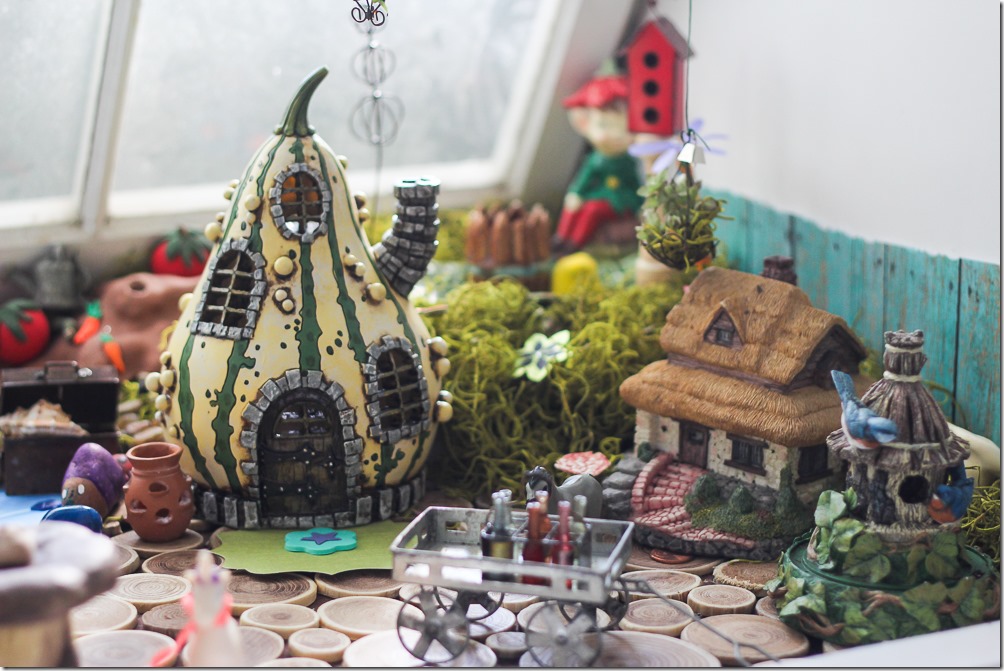
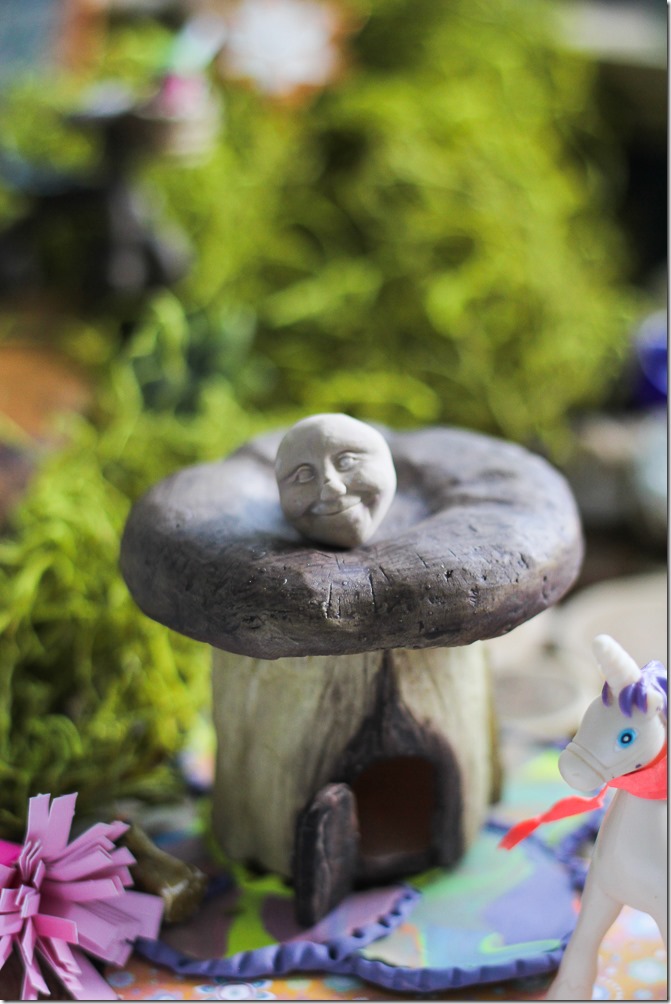
We wanted the garden to be whimsical, so my mom added fun little details like this polymer clay face on top of a mushroom house. Garrett added the paper scarf around the unicorn’s neck. There were no rules here. We just kept it fun.
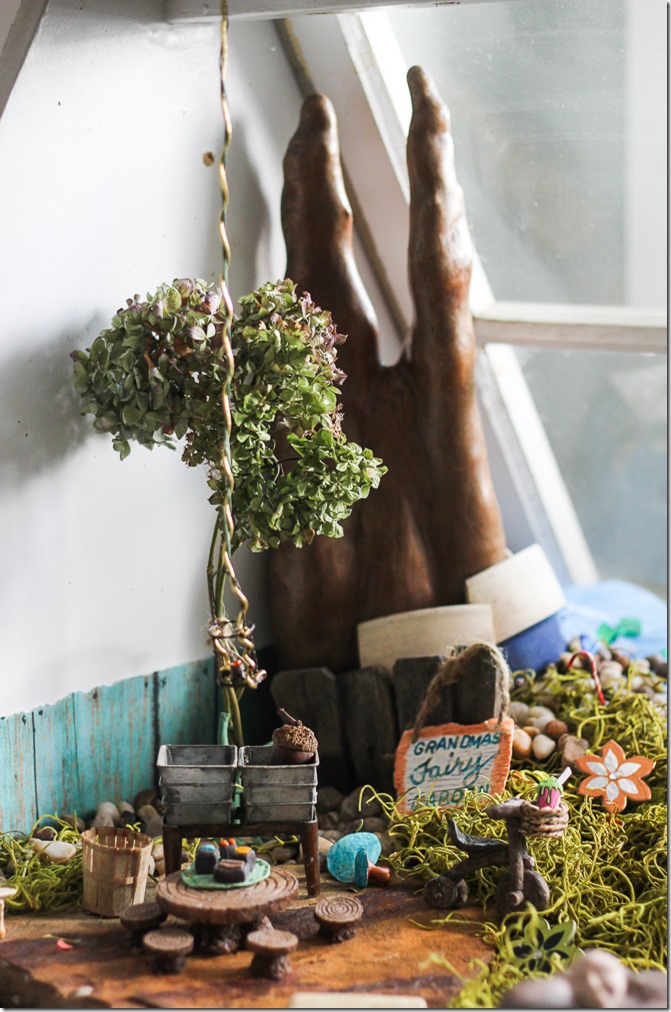
I brought in a big rock from outside my mom’s house to serve as a raised picnic spot above the village. The dried hydrangea “tree” gives them some shade, while the brown cliffs of Stalagmite Mountain loom in the distance. Please don’t ask me to tell you what that weird poop shaped thing actually is or what it was used for. We found it at a thrift store. It’s made of wood. I thought it looked cool. I don’t have any further info besides that.
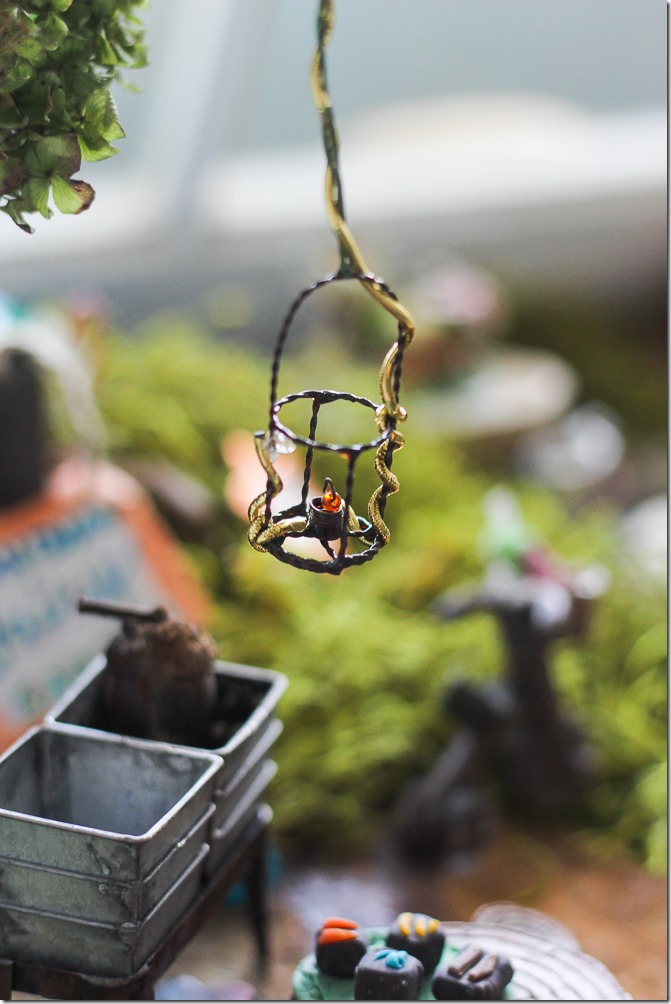
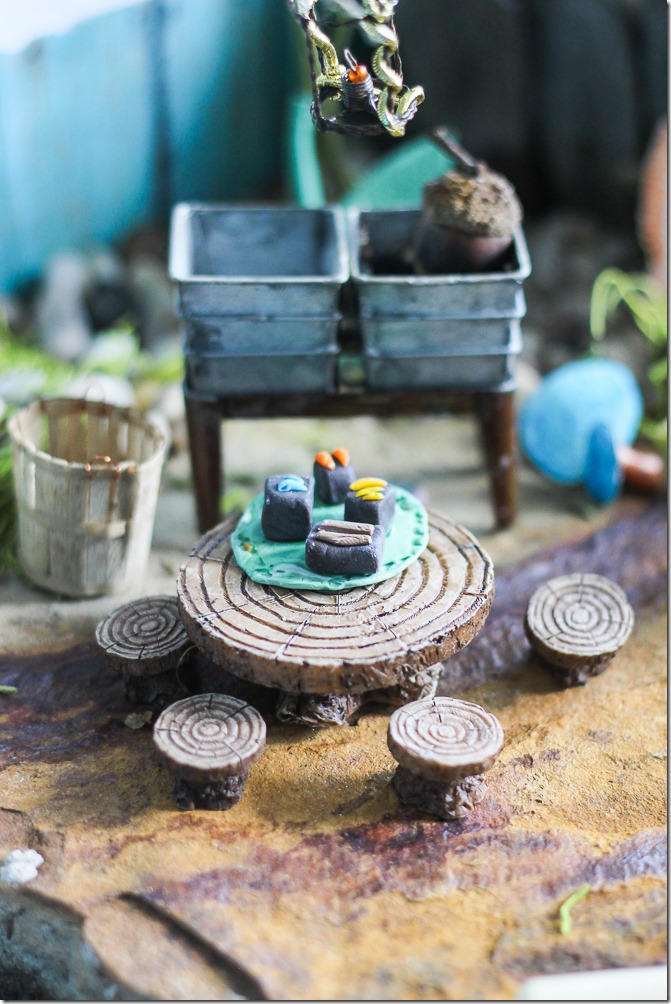
We twisted golden cord along with green twine to form a hanging chandelier over the table. The cute metal chandelier with a glowing candle came from a local nursery that sells fairy garden supplies. I also loved the galvanized washtubs with acorn dishes piled up. Because even fairies have dirty dishes in their sink. Doesn’t that ease your guilt just a bit?
The woodland table with four stools was made by fiddlehead fairy village. They have the cutest little decorative items for fairy gardens I’ve ever seen! I could have bought out the store I think. The cakes on the table were made from polymer clay.
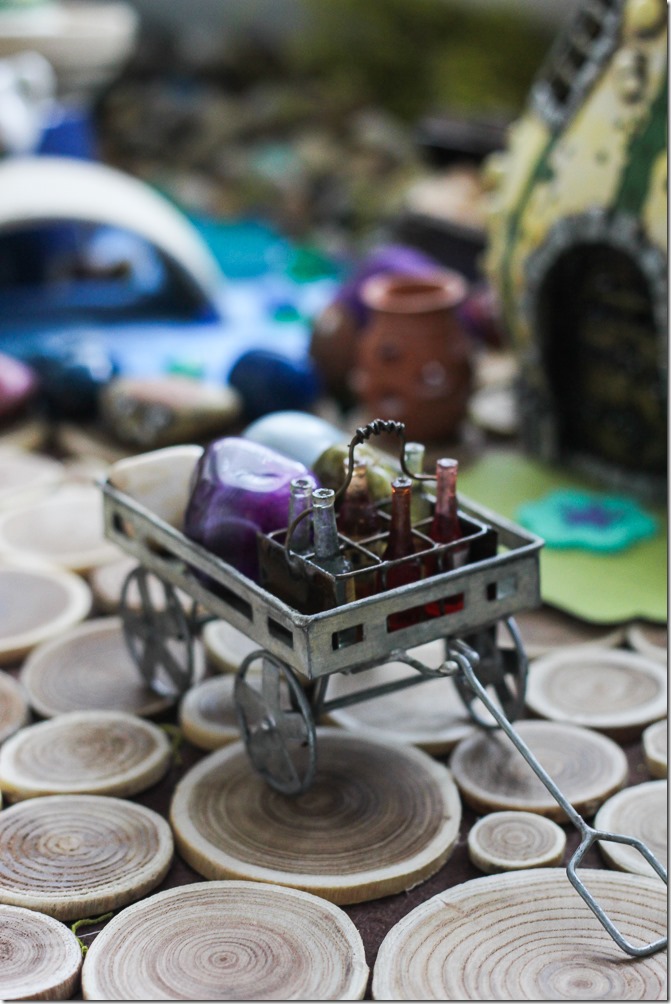
To wash down all that cake, a galvanized cart over in the middle of the village holds pretty polished rocks and tiny bottles of sodas in a crate. Or wine, if your fairies are of legal age. Which mine happen to be. Drink up, fairy friends.
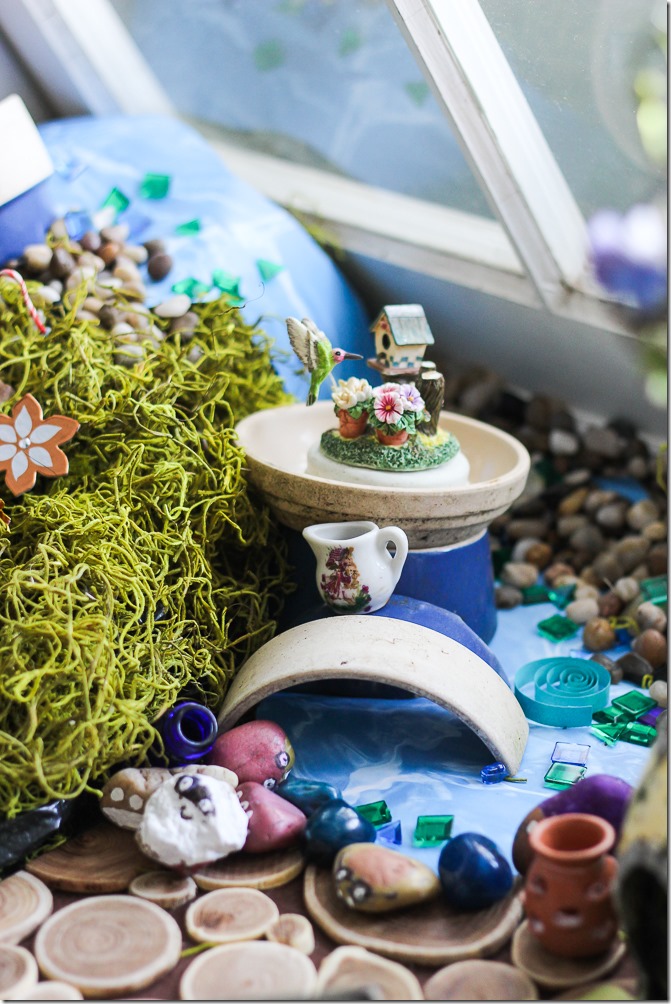
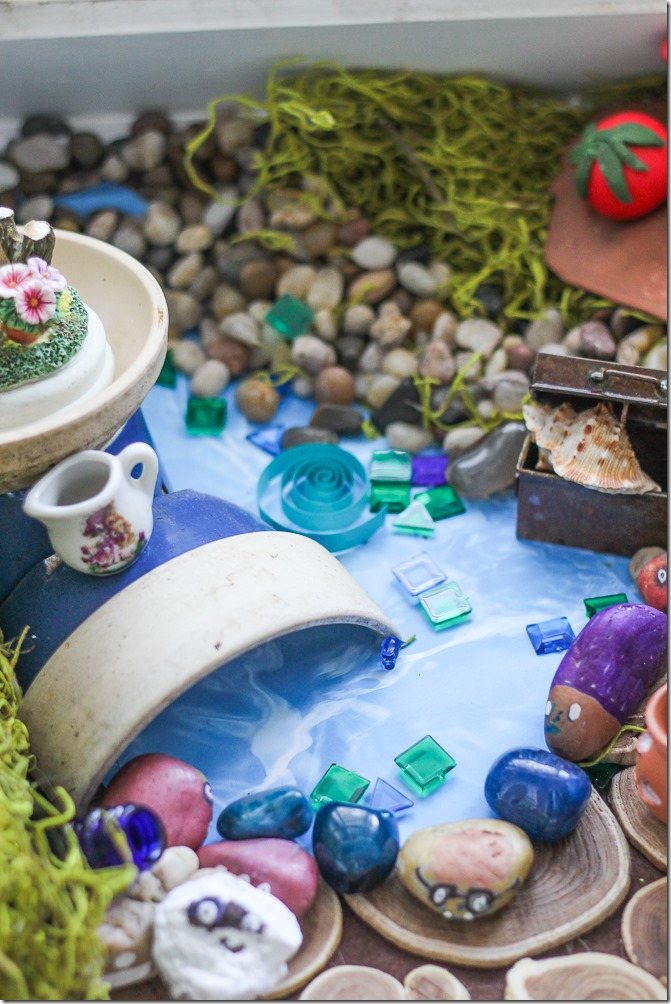
Even though I probably spent WAY too much money contributing to the delinquency of these tee-tiny winged winos, there were a whole bunch of elements that we didn’t spend a dime on. Like this broken flowerpot that I turned into a bridge over a lake made from scrapbooking paper and green and blue embellishments found in my mom’s old craft supplies. The little humming bird figurine and all the bags of river rocks came from the thrift store for less than a dollar each.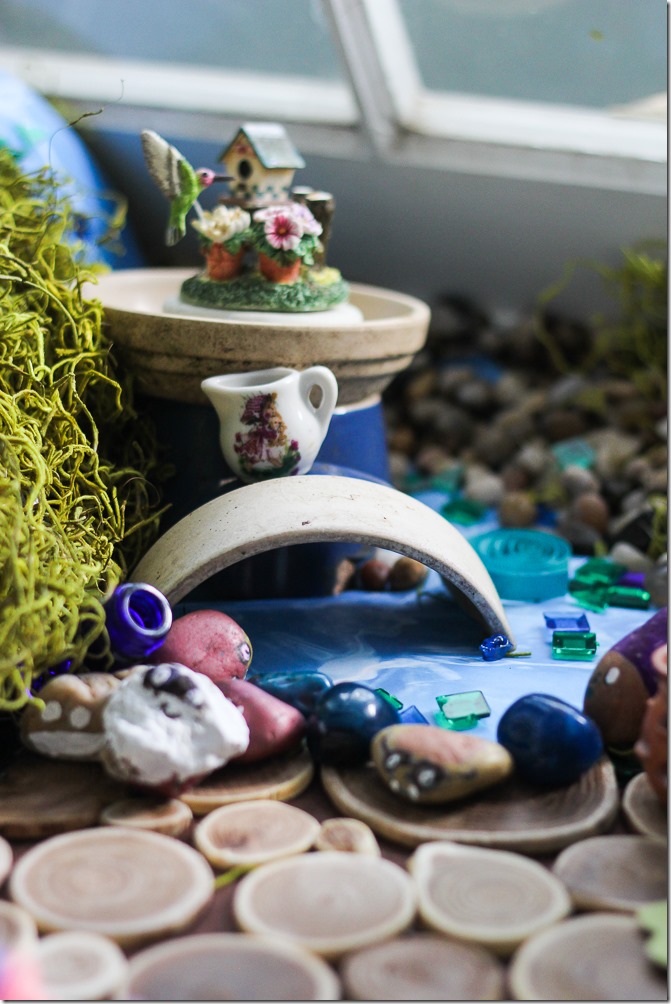
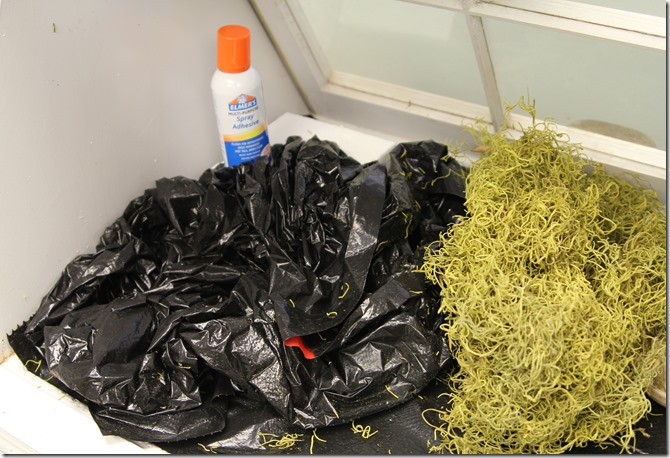
This was created using a 12×12 piece of scrapbooking paper that resembled water, I cut out a kidney shaped pool, then used a longer strip to create a waterfall flowing over a block of styrofoam covered in a wadded up trash bag to give it some irregular shape. Here’s a behind-the-scenes peak….
I sprayed the styrofoam block with spray adhesive to get the garbage bag to stick, then I sprayed the garbage bag with more adhesive to get the paper to stick, then I used more adhesive to get those little green and blue flecks to stick to the paper.
Super simple process here. Don’t overthink it!
A bag of moss and river rocks softened up the edges and held all of the garbage bag down in place. More scrapbooking paper resembling fence boards creates a border along the edges.
We even created a whirlpool at the bottom of the waterfall out of a strip of curled up blue paper. Look out! Also, don’t miss the painted rocks with faces that line the front of the lake. Do you get the feeling you’re being watched?
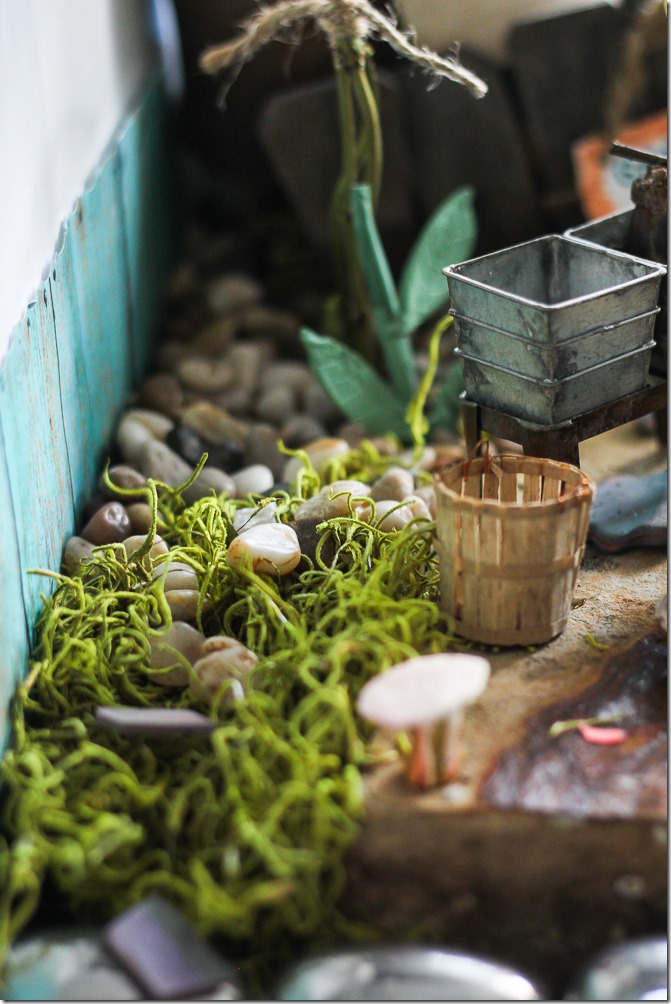
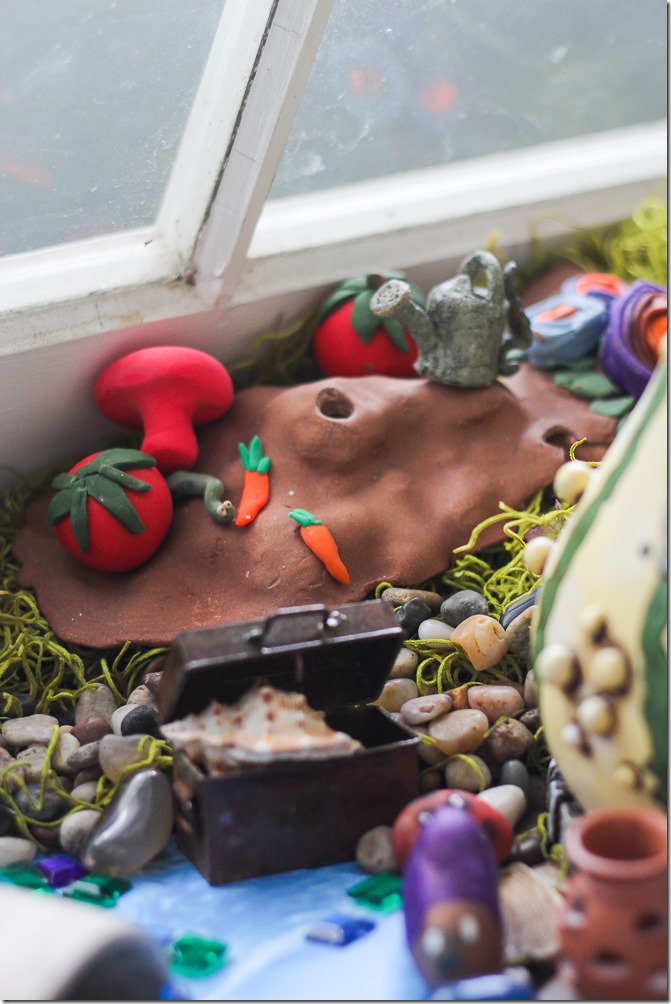
Behind the lake is the farmland, where the fairies can grow gigantic tomatoes and organic carrots and red mushrooms that look like they would take you on a very bad trip. Purple and orange cabbages are growing in the cabbage patch behind the watering can. Look out for those rabbit holes.
I love this little thatched roof cottage that my mom found at a thrift store to use as a fairy house. I dream of visiting a house that looks exactly like this one someday. Except I’d like to be able to actually fit through the door. 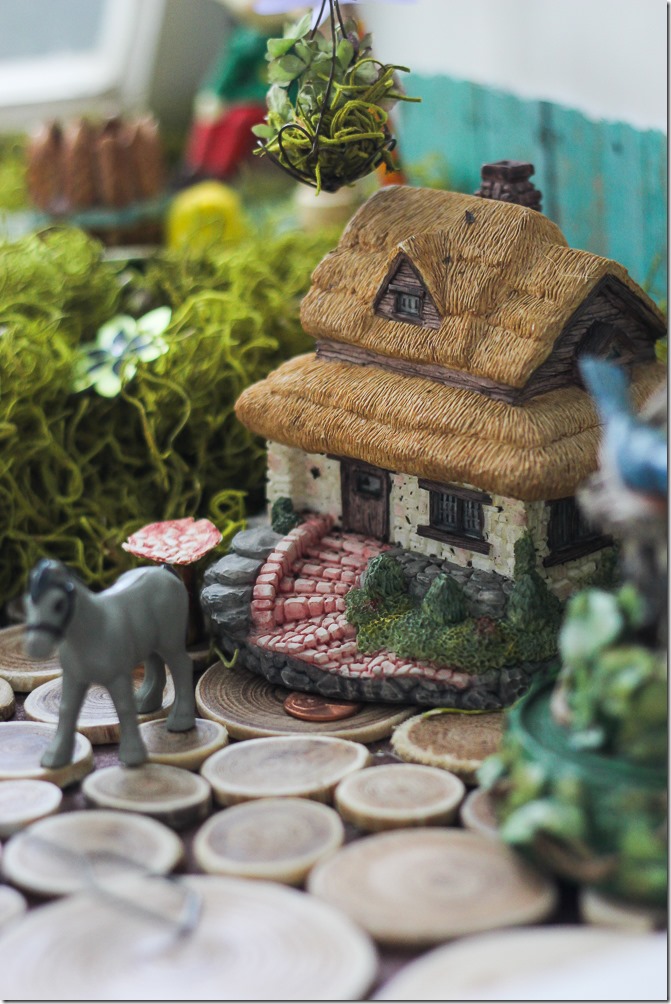
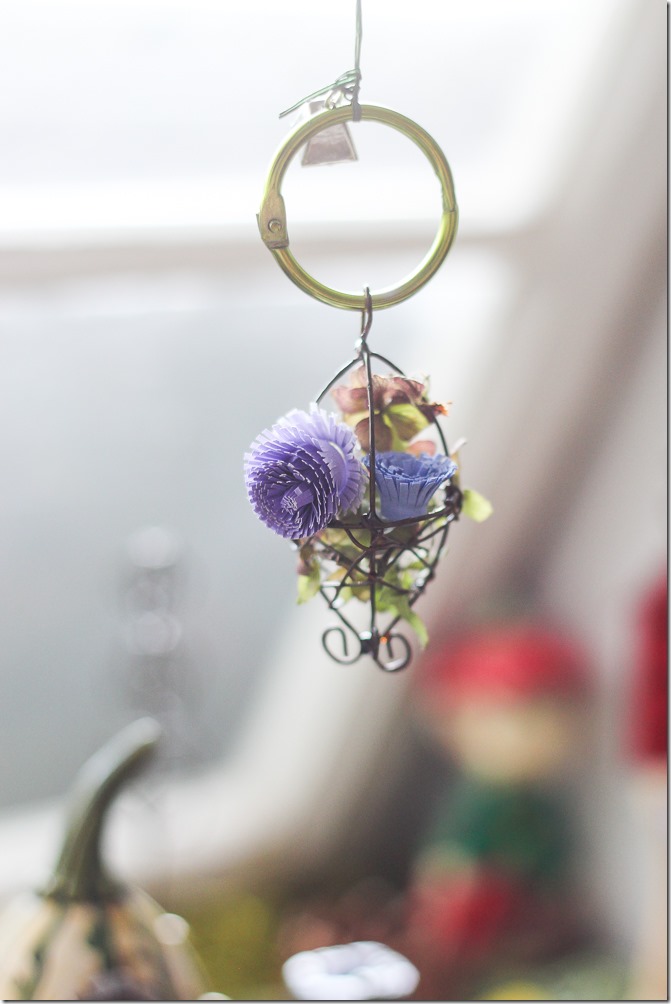
My mom liked the idea of using everyday “found” objects inside the diorama so that it looked like the fairies happened upon something left behind and borrowed it to construct their village. This round clip became the hanger for a basket full of quilled flowers and more dried hydrangea.
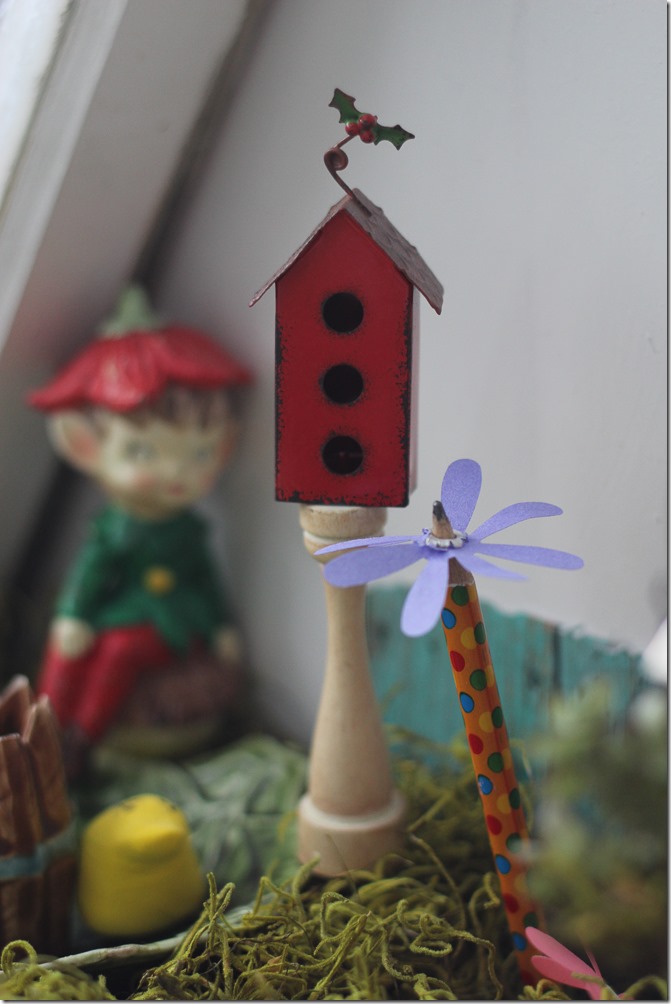
And this fun polka-dot pencil makes another garden accoutrement by becoming a fake flower with purple paper petals. Say that three times fast.
More thrift store purchases such as the elf in the back and the birdhouse up front complete the scene with so many fun touches it’s hard to see them all. We made a whole bunch of mushrooms out of polymer clay and scattered them around the scene. Paper cutouts in cute shapes make nice door mats outside all the fairy houses. Can you spot the penny in this scene?
This fairy garden was seriously SO. MUCH. FUN to create. It totally scratched my itch for anything fairy related after watching the movie Epic, plus that whole miniature dollhouse obsession that I have. My mom and Garrett and I had a blast shopping for all of this stuff and putting it all together in one big scene. Now that it’s finished, kids of all ages LOVE playing with it when they come over to my mother’s house. I’m happy to report that after I took these photos she bought four beautiful fairies who now reside in this village together. I would have gone back for more photos with them, but they were too busy flittering around the village, harvesting their ‘shrooms for tea and chug-a-lugging their Fairydine wine.
Maybe we’ll catch them later for an interview.
When they wake up.



LOVE. LOVE. LOVE THIS Beth!!!!!!!!!!!!!!!!!!!!!!!!!!!! Oh goodness, it is magical!!
🙂 Thanks so much Jennifer!! It was so much fun to create!
I love it each time I go down to my craft room, Beth. It scratched my itch, too, and was such a fun family project! Riley, Garrett’s cousin, loves pretend playing in it and at age 11, I know that won’t last much longer.
My favorite part was watching you build it! Then I loved pulling out trinkets that I’d made years ago like the tiny tray of chocolates and the Veggie Tales mound. I found four cute tiny handmade fairies on eBay so they moved right in. The seller had delicately bagged them in tiny golden pull string bags and named each one! Very special touch? They are small enough to ride the unicorn yet old enough to imbibe on your vinos. Garrett and I glued googly eyes on the spying rocks for even more cuteness. It’s evolving weekly. Bring your camera back for an interview anytime and thank you again for giving me the fairy garden of my dreams! Mom
I am super impressed! This is so much fun. And of course, the horse is my favorite. You are awesome!
What a wonderful little fantasy land ! I have seen fairy villages in yards and am always enchanted by them. This has given me the itch to start creating my own and what a great thing to do with future grandchildren 🙂
Thanks Beth!
Oh my gosh, what an amazing fairy garden! I love this so much!
OMG so cute, especially those little stools! 🙂 xoxo
Wow, Beth, incredible detail, and great little tale to go with it!
Oh Beth, when I just saw this on Pinterest, I almost stopped breathing: that’s how beautiful this is! Creating a fairy garden is on my to-do list, even bought a book about it, and yours is oustanding! And I love that you repurposed windows to make such a sweet setting! I’m gushing! (And pinning! LOL)
Hi! Cute! The “weird poop shaped thing” that makes your mountains is a cypress knee. Those knees on cypress trees help the shallow-rooted trees remain stable in wet soil, and also allow the trees to survive heavily flooded, anoxic conditions. Cypress knees are lovely, and using those as mountains is a great idea 🙂
Absolutely breathtaking! I wandered into our Goodwill store this morning to find some fun stuff, and didn’t really feel inspired. So I came home and started a list of what I have already, and I’m bursting to start without spending any money. Yippee! Thank you!
Yay! I hope you have as much fun as we did creating it!
Your fairy garden is delightful. The “poop-shaped” thing is knees from a cypress tree that lived in a swamp. I’m not sure of details but you can Google “cypress knees” and find out more. My parents had one like this back in the 1950’s or maybe 1960’s.as a table decoration!
Joan
Very good to know! Thanks Joan!
Love this whole thing! Looking for source of the double sinks or wash tubs.
The wood you used that you say looks like poop is actually a cypress tree root. They grow up out of the water in the south and they are called cypress stumps.
There�s no denying that we�re a much more mobile nation than we were four years ago.
Furthermore, we live in the edge of social media, which has a
direct impact on people’s mind. It’s worth looking at the top
app categories for Google Play and i – OS, since users
sometimes browse through category pages for apps to download.
The past performance of any buying and selling system or methodology will not be
necessarily indicative of future outcomes.
everytime I go to do a fairy house it never turns out as nice as yours, so I gave up on them. yours is lovely and I enjoyed reading the process of making it. well done
Carrol
How fun to be whimsical with your mother and your son! And your husband made it all possible in a practical way.
These ideas really inspired me in making my own fairy garden. Thanks for sharing this wonderful article.