Caroline turned 4 years old in August, and her one request was to have an Elsa (aka Frozen) themed birthday party.
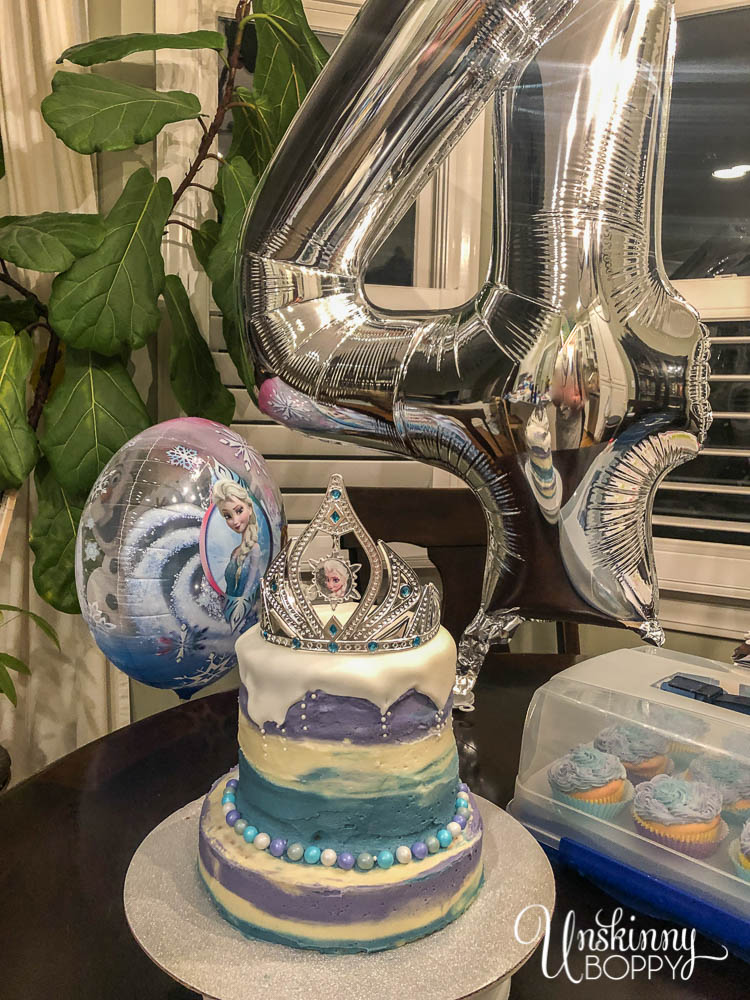
No problemo, kiddo. Frozen themed birthday party decor is super easy to find and I’ve never been one to shy away from a theme. It makes my mama-life way easier to get plastic tablecloth covers with giant cartoons printed on them. Let’s do it.
I might skimp on the decor, but I usually try to make my kids’ birthday cakes from scratch to save some cash. This Frozen cake turned out SUPER cute and was fairly simple to make, so today I’ll share with you how I made it!
I used my White Caramel Wedding Cake recipe for this birthday cake. It uses a box of White Cake Mix that you doctor up with a little extra to make it taste amazing.
I cannot even begin to tell you how DELICIOUS this cake tastes. Your party guests will be seriously impressed that you made this cake, both in looks AND taste (which is most important, imo!)
The Cake & Icing Recipe:

White Caramel Wedding Cake with Caramel Icing
Ingredients
WHITE CARAMEL CAKE RECIPE
- 1 box White Cake Mix I used Aldi brand
- 1 cup All-purpose flour
- 3/4 cup white sugar
- 1/4 tsp salt
- 8 oz sour cream
- 3 eggs (use egg whites only if you want a whiter cake)
- 1 cup water
- 1/4 cup vegetable oil
- 2 tsp Watkins Caramel Extract
- 1 tsp Vanilla extract
CARAMEL ICING RECIPE
- 8 oz salted butter, softened to room temp I like Kerrygold
- 4 cups powdered sugar
- 2 tsp Watkins Caramel extract
- 2 Tbsp milk add more if needed for a thinner consistency
Instructions
TO MAKE THE CAKE
- Preheat the oven to 325 degrees.
- Grease two round cake pans. I used two 6" circular pans and also made 12 cupcakes.
- In the bowl of your mixer, add all dry ingredients and whisk to combine.
- In another bowl, combine sour cream, eggs, water, oil, & flavorings. Add the wet ingredients to the dry and mix on medium speed for 2 minutes.
- Stop after a minute to scrape the sides and bottom of bowl then continue to beat on high for another minute to make sure everything is well combined.
- Pour the batter into prepared pans and bake for 30 minutes.
- Bake until a toothpick inserted in middle of cake comes out clean.
- Turn out onto a cooling rack and cool cakes completely before icing. To get even layers, level off the domed tops of the cakes with a large knife and stack them upside down before icing.
TO MAKE THE ICING
- Wash mixing bowl and beaters thoroughly before using them again to remove the raw egg.
- Whip softened butter for at least 1 minute or longer if you want a whiter shade of icing. The longer you whip the butter, the lighter the icing will be (although the caramel extract will tint it beige regardless.)
- Add 1 cup powdered sugar at a time on a low speed. Cover the mixer with a towel to keep cloud of powdered sugar from exploding in your kitchen.
- Once all the sugar is incorporated, turn speed on med-high to mix thoroughly.
- Add milk 1 Tbsp at a time, until you get a frosting consistency that is easy to spread and pipe.
- Make sure to cool cakes completely before icing. To get even layers, level off the domed tops of the cakes with a large knife and stack them upside down before icing.
Instructions for Assembling the Cake:
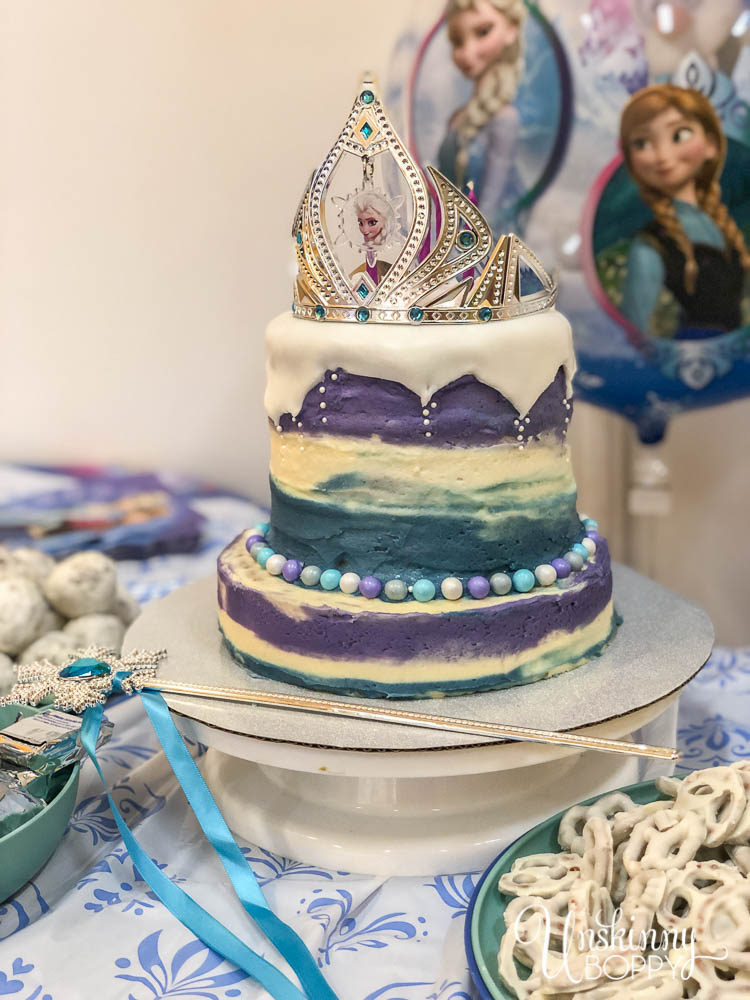
Bake your cakes according to the recipe above and set them aside to cool. I used both 6″ and 9″ straight-sided round cake pans for this cake. NOTE: Straight sides are important for getting a nice-looking, tall stacked cake. I even had enough batter leftover for cupcakes to take to her classmates at preschool.
Make the caramel icing according to the recipe above.
Divide your icing into three bowls. One will stay white (a bigger portion), one will become purple and one will become blue. I used about 1/2 cup each of blue and purple and the remainder stayed white.
To get the colored icing: Using a clean toothpick, scoop out a tiny amount of Wilton Gel Food coloring and stir it into the colored icings. Add more food coloring until you get the desired blue and purple hue. ALWAYS use a clean toothpick when you add extra color so your containers stay clean.
When the cakes are cooled completely, use a cake leveler to remove any domed tops and make all the layers even. You can divide the cakes in half with the leveler also.
Using an offset spatula, ice the cake layers with a crumb coat and chill in freezer for a few minutes to harden up.
Stack the layers, adding a layer of buttercream between each one. To get a nice top edge, flip one of the cakes upside down for the top layer.
I used wooden dowels hammered down through the center to hold them in place.
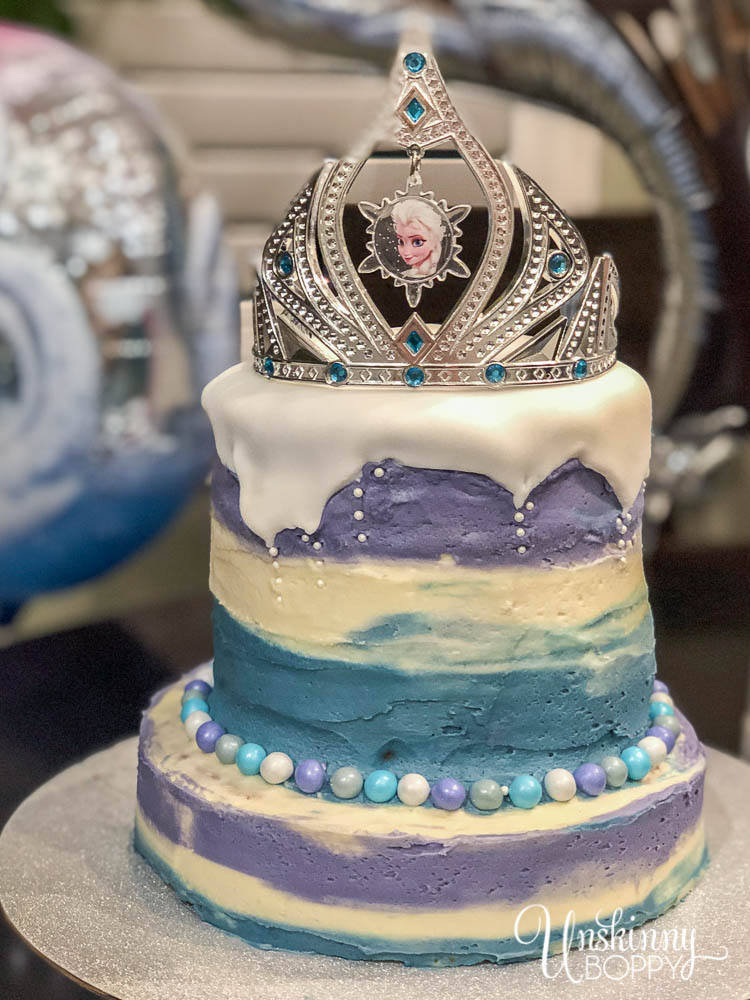
Add another thick layer of white icing to entire cake, then mix in a bit of purple and blue to create the watercolor effect.
Using an offset spatula and a lazy susan, spin your cake around as you mix the purple and blue in with the white icing.
Roll out a sheet of white fondant to create the look of “snow” on the top layer. Mold it into points so it looks like it’s dripping down the sides. Add white pearl non-pariels (aka Sprinkles) below to continue the dripping effect.
Add a mixture of blue, purple, silver and pearl colored sixlets around the base of the cake layers to finish the edges.
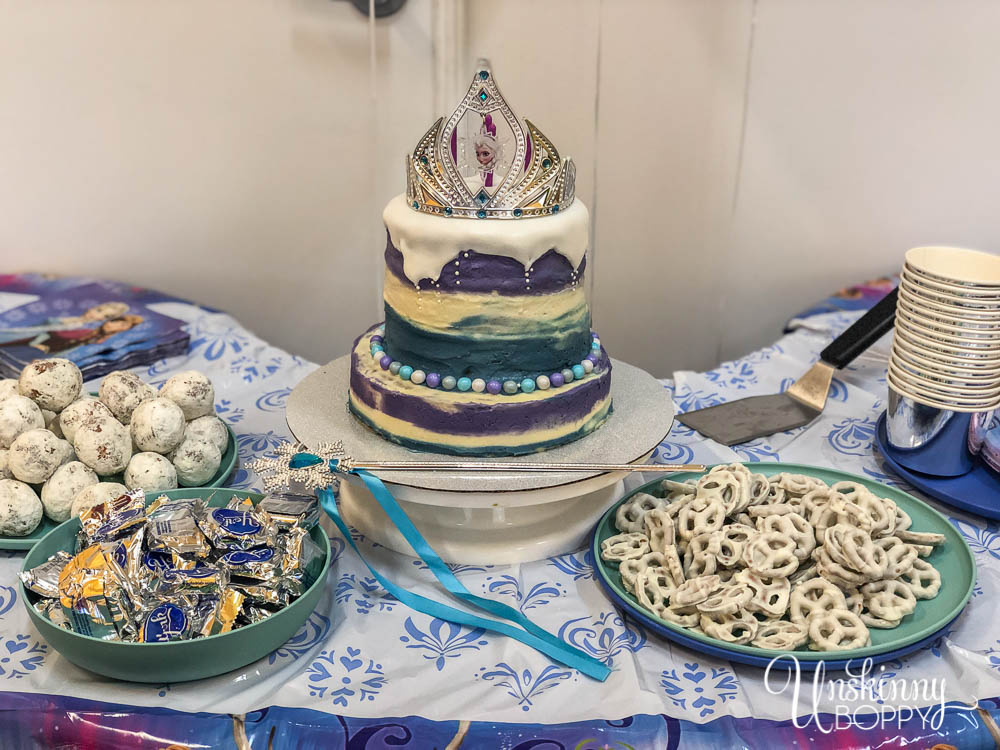
When your cake is in sitting in its final resting place at the party, sit an Elsa crown on the top for the final touch! We used one that came with my daughter’s dress-up outfit but here is a similar one: Elsa Wand and Crown
If you need more icing you can double the recipe.
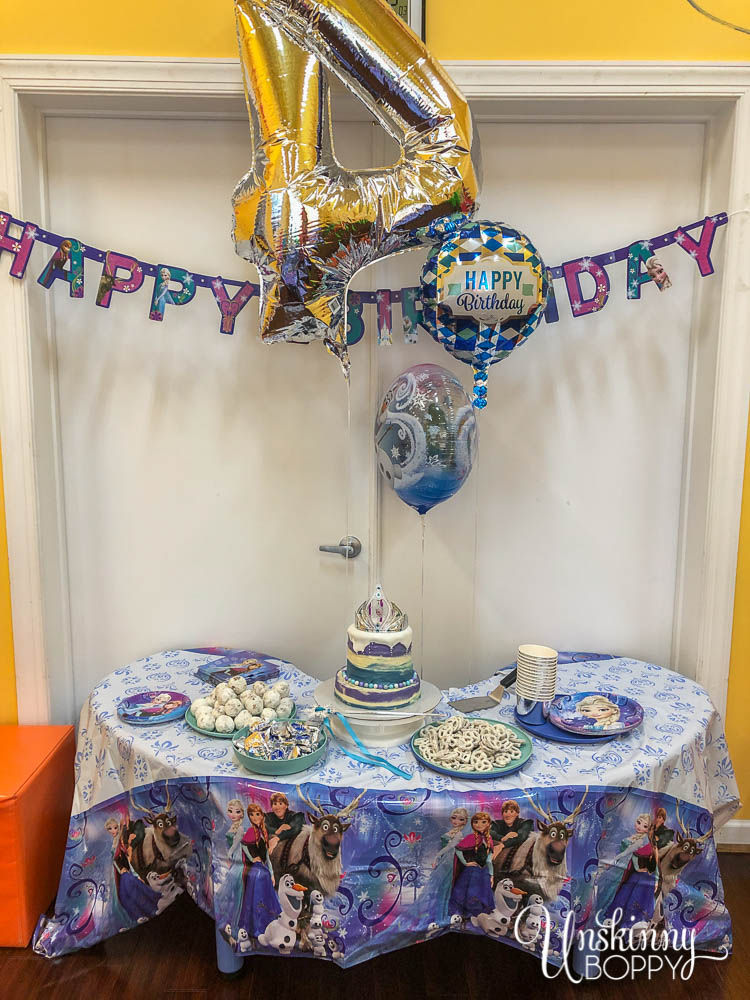
Here are a few shots of her actual birthday party setup.
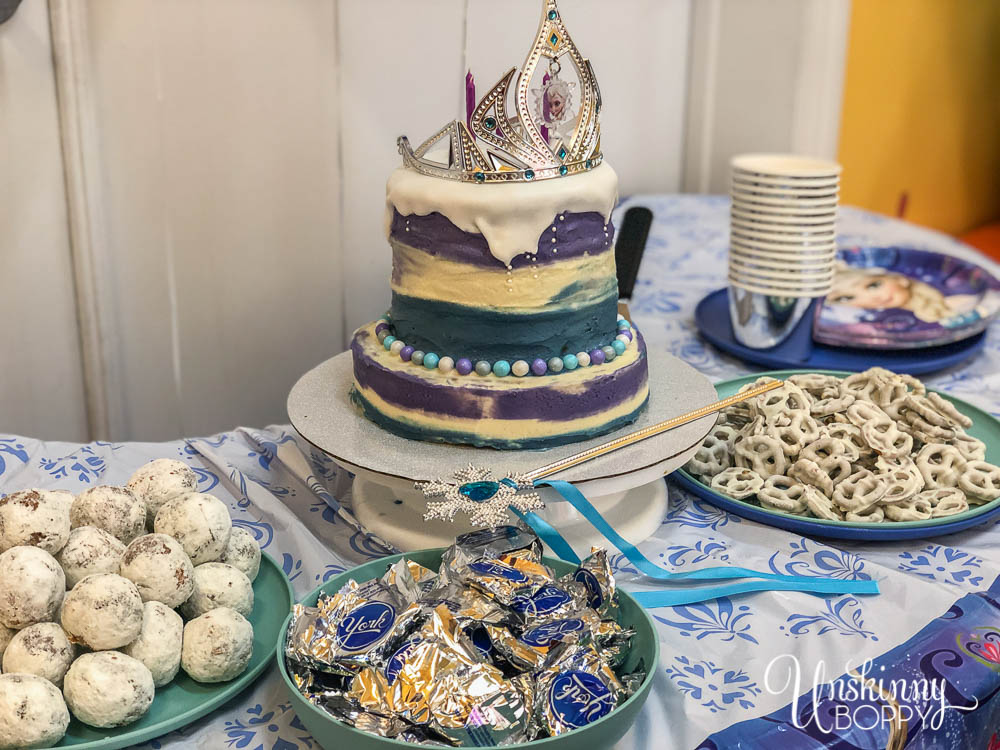
We served pizza for the party guests, but I also had white chocolate covered pretzels and large powdered sugar doughnuts from the Publix bakery as “Snowballs”. I also had some York peppermint patties as a final little sweet touch.
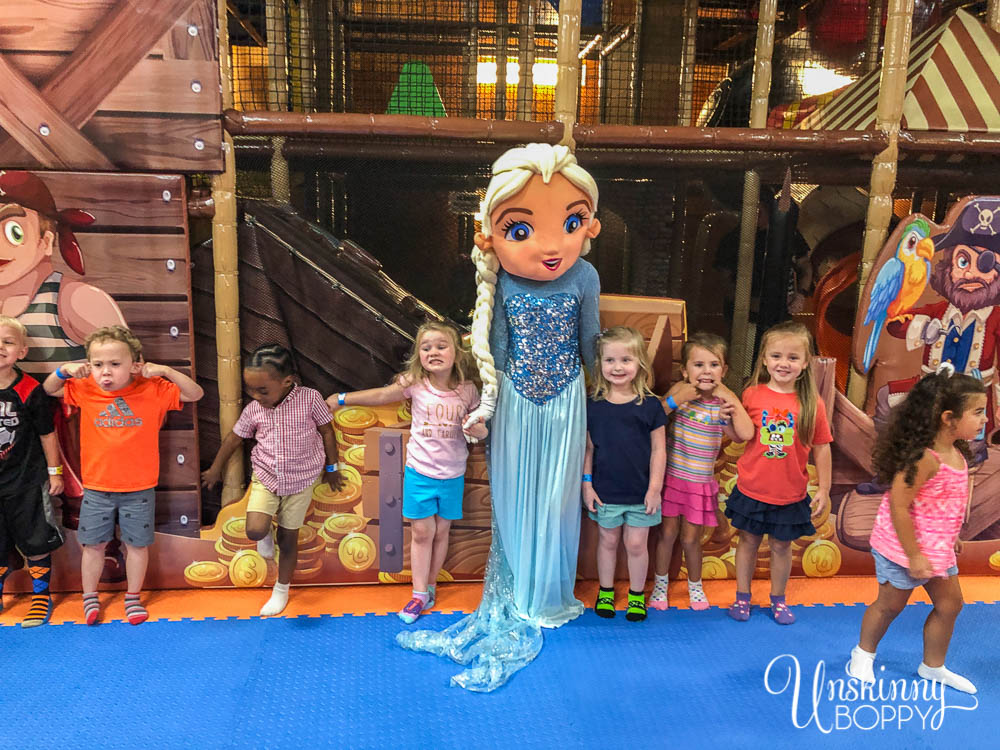
The party was lots of fun with all her little classmates. She even got to dance with Elsa at Let’s Play, the party place!
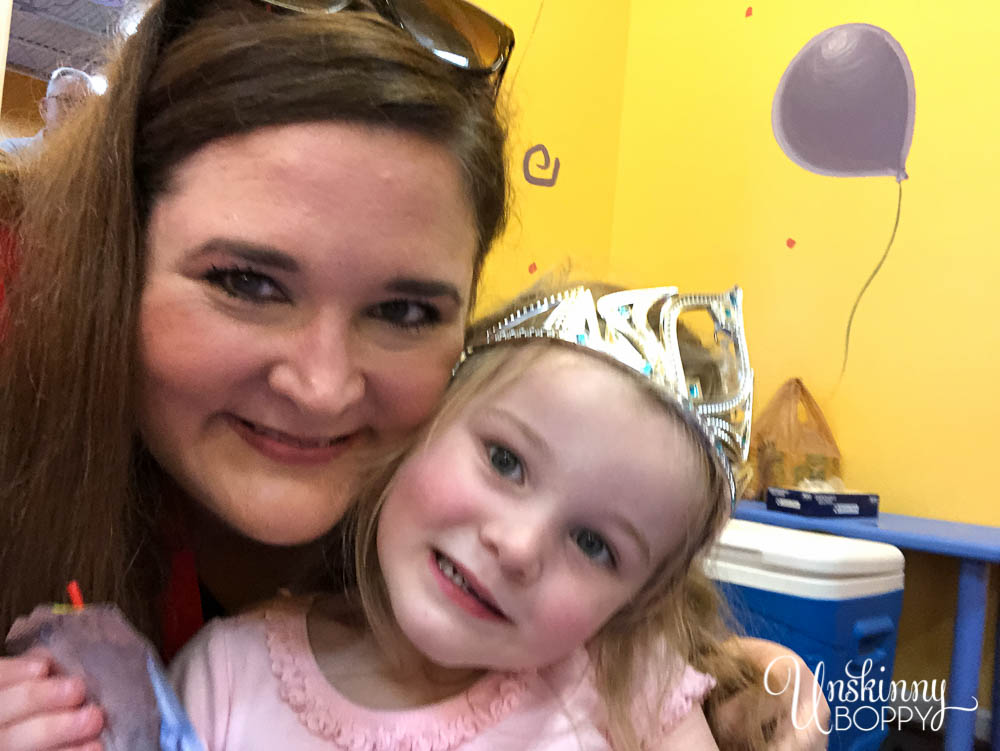
Happy 4th Birthday, Caroline! We love you so much!!
If you have been thinking about making your kid’s birthday cake at home, I encourage you to give this a try. Worst case you go by a sheet cake at the grocery store if yours turns out to be a fail. It’s really not that bad though.
The hardest part of this whole thing is washing all those dirty dishes afterward!


I adore this cake since it is both lovely and unique.
I am grateful for this website because it makes our job easier
wow nice post
This is also a very good article that I really enjoyed reading. It’s not every day I get to see something like this. Hope you will have many more good articles to share with us
This is amazing thanks for sharing this blog I have become a fan of your blogs now. This blog is so interesting and informative.
Fantastic article with a wealth of information! Keep up the great work and continue sharing valuable updates with everyone. Thank you!
Thanks for sharing this informative blog. I loved it!
Those table cloth reminds me of one that i bought on last christmas!
The cake seems delicious to be honest!
Very interesting and amazing details you provide. Thank you for this incredibly informative article. Great Recipe.
Hi! Do I just use the 1 packet of cake mix? It looks like you have a larger (9”?) round cake on the bottom and then a few 6” ones stacked on top of it? Thanks!
Hey there!
Yes, that is a 9″ on bottom and two 6′ on top, all cut in half with icing in between each layer.
You’re definitely going to need to at least double the recipe to make the Elsa cake. This was made in 2019 and shrinkflation has made all packaged mixes less than they used to be so keep that in mind. I do think 2 boxes would do it, but I can’t guarantee it.
Maybe make the cakes a few days ahead so you have time to add to it if you don’ t think it’s tall enough! Good luck!