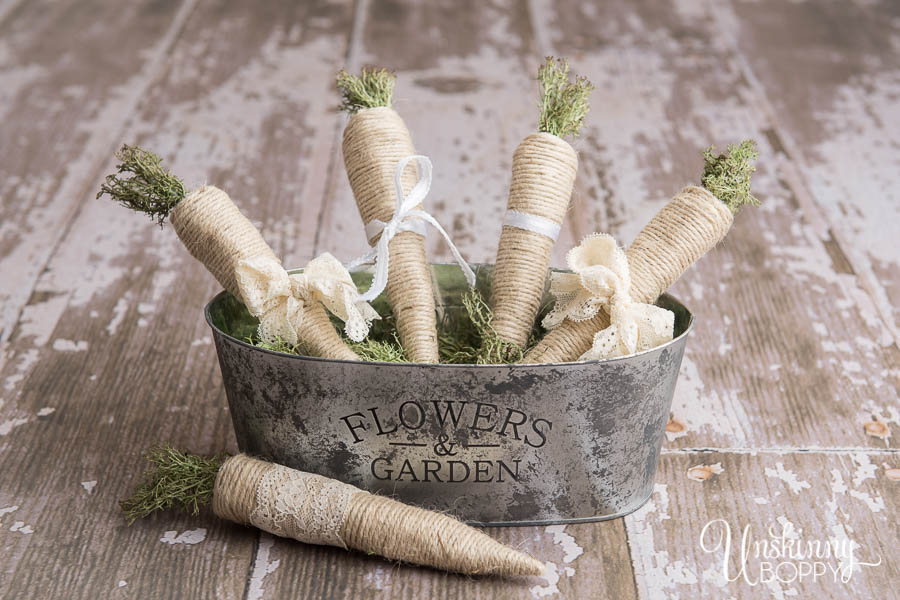
Need a cute but cheap easter craft idea? This cute farmhouse bucket o’ carrots is super simple to make with items purchased from the Dollar Tree!
Easter is right around the corner, and I’m PUMPED for Spring to arrive.
I’ll be upfront — I am not an Easter decorator. Plastic eggs and neon pastels have never been my thing and I have spent years watching the holiday pass without a single bunny in my house.
Then I discovered that Easter also includes carrots, and suddenly I was very interested.
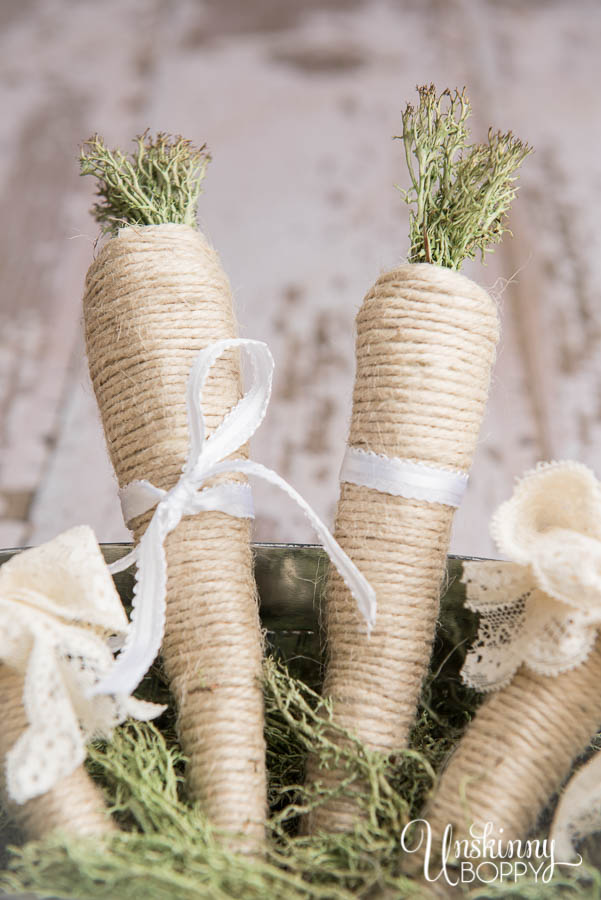
These farmhouse twine carrots are everything I want Easter decor to be — neutral, textural, a little rustic, and completely handmade looking even though they cost almost nothing to make. The whole bundle sitting in a galvanized bucket looks like something from a boutique farmhouse shop. It came from the Dollar Tree.
I’m not even a little embarrassed about that.
BUT, carrots? The gardener in me can get behind that.
Also, this project appealed to me as a pretty, farmhouse-y neutral-colored Easter decor with creamy beige and greens instead of neon pink and yellow.
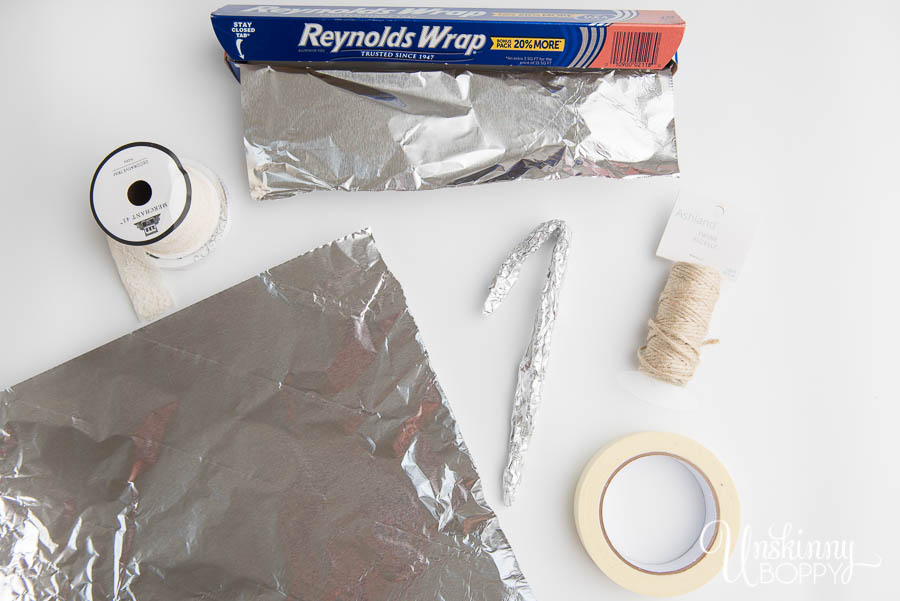
What You Need
Everything on this list is available at Dollar Tree depending on your location. If your local store doesn’t have something, Amazon or a craft store will carry it.
- Aluminum foil — standard kitchen foil works perfectly
- Masking tape or painter’s tape — masking tape preferred for the color
- Natural jute twine — the thinner the twine, the more refined the finished carrot
- Reindeer moss — for the carrot tops
- Gray chalk paint — just a small amount for distressing the bucket
- Lace or ribbon — for bows and finishing details
- Hot glue gun and glue sticks — essential for this project
- Plastic shopping bag — for the paint distressing technique
- Galvanized tin bucket or flower pot — for display
Total cost if sourcing from Dollar Tree: $5-8 for all materials.

Easy Easter Craft DIY Directions:
Step 1:
Start with approximately a 15” wide section of aluminum foil. Begin to form a carrot-like shape by rolling or bunching the aluminum foil. At first the aluminum foil will create a long stick like shape and you will bend the top down. At this point it will start to look like a candy cane, as we want the top thicker and taper off to the bottom.
Step 2:
Repeat step #1 bunching the second layer sightly loser than the first and folding the top of the second layer down as you roll to help the carrot keep the desired length (folding as you go helps it not be super long like the first step, as we won’t be bending the top like a candy cane hook like the first).
*Side note: the more bends, curves and flaws the better and more realistic the carrot shape will be.
*If you still feel as though the carrot is still too skinny, keep repeating till the carrot is to the thickness and length of your liking.
Step 3:
Once you have the carrot shape to your desire, begin wrapping a layer of masking or painters tape (I prefer the color of masking tape if there are any gaps in between the twine) around the carrot.
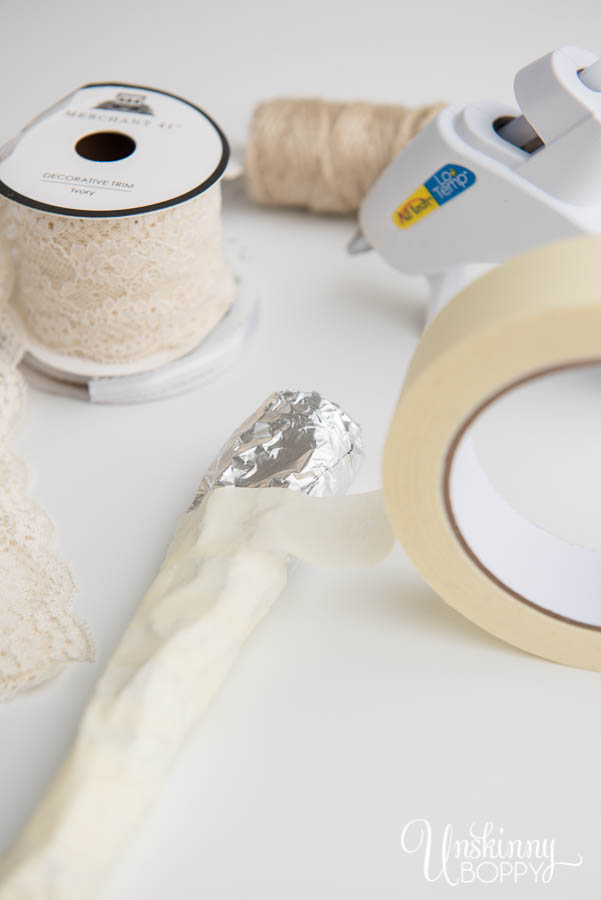
Step 4:
Next, start from the bottom point of the carrot hot gluing the twine to the very tip. Tightly begin to wrap the twine up the carrot adding a small amount of glue every inch or so to help it stay in place.
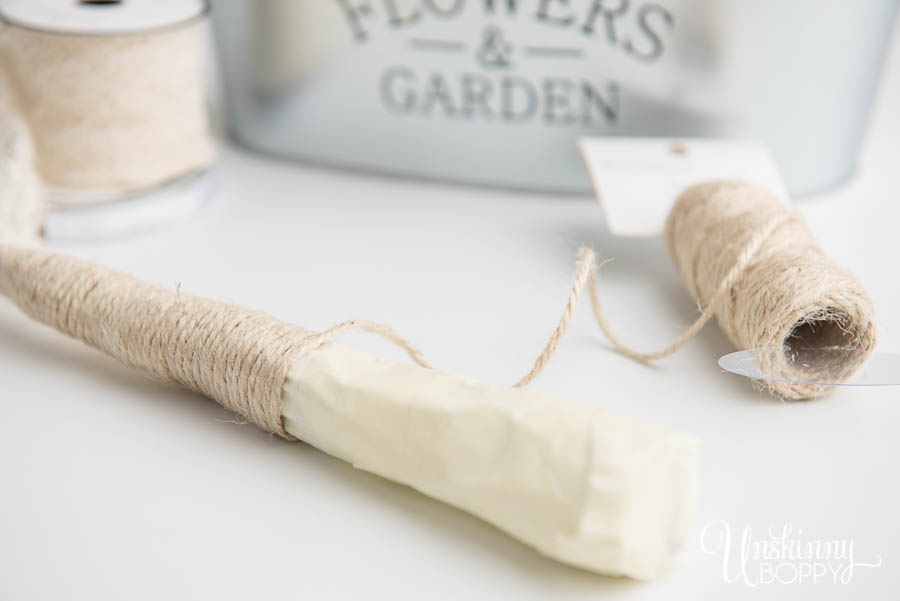
*Each layer of twine should lay nicely next to the previous layer, no overlapping. Wrapping tightly will be the key to keeping each layer in place.
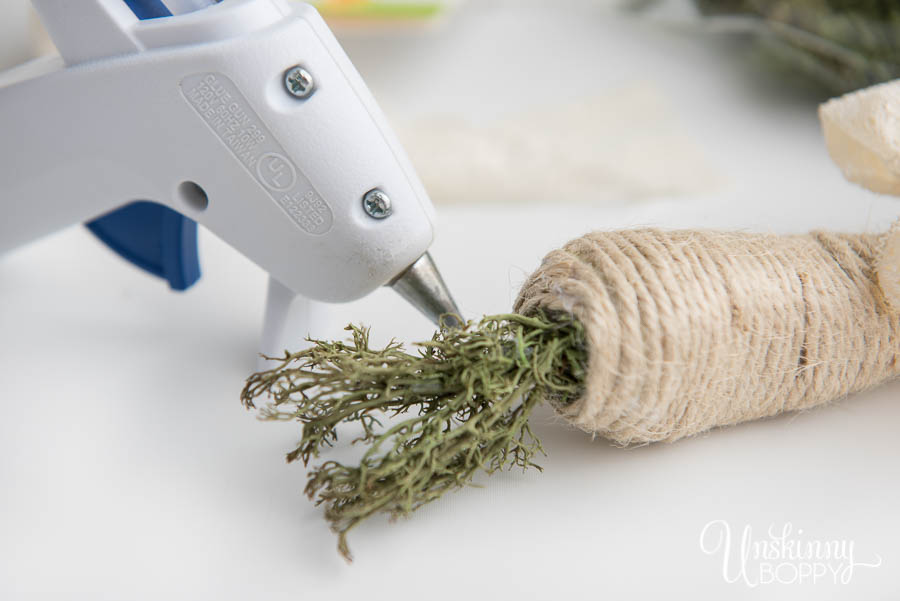
Step 5:
At the top of the carrot, create a small hole within the aluminum foil/ masking tape and hot glue a pinch of reindeer moss to create a “leafy” stem. Continue wrapping the twine around the top hot gluing layer by layer to keep the twine flat and adhered.
Step 6:
Add some lace or ribbon creating a bow or whatever style you desire.
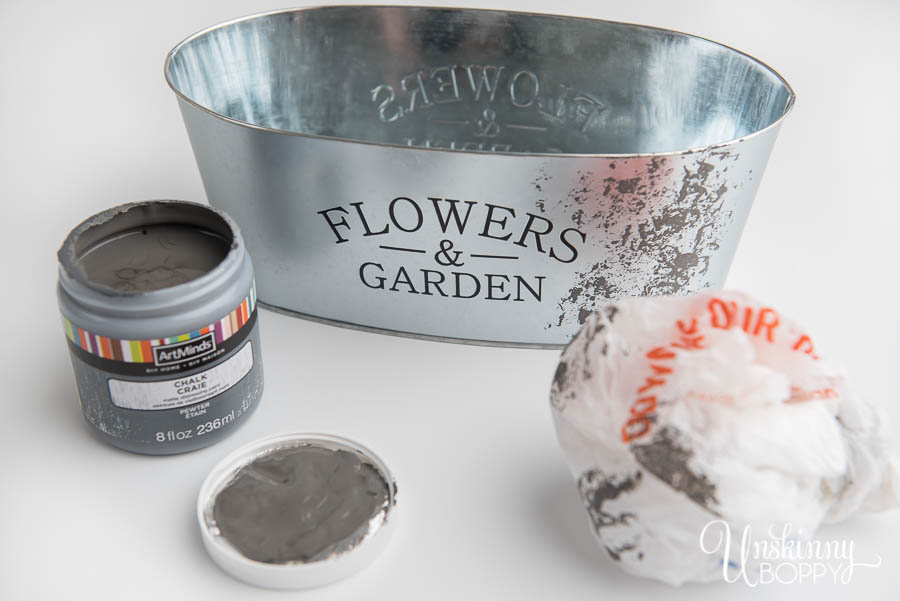
Step 7:
The tin flower and garden bucket is a bit too shiny and perfect looking. To give it a rustic, weathered look take a scrunched up plastic shopping bag and VERY lighting dab it in gray chalk paint. A little bit goes a very long way. Be sure not to pick up too much on the bag. Start randomly stamping the tin with the plastic bag to create the faux galvanized look.
Step 8:
Once dry, add carrots to the bucket and more reindeer moss to replicate the carrots growing in grass and you are finished!

Variations and Display Ideas
Wreath version: Wire several twine carrots to a plain grapevine wreath for an Easter front door wreath that doesn’t look like every other Easter wreath in the neighborhood.
Centerpiece version: Arrange carrots in a wooden crate or shallow tray with moss and small spring flowers for an Easter table centerpiece.
Gift tag version: Make mini carrots about 3 inches long and tie them to Easter baskets or gift bags as a handmade tag alternative.
Neutral color upgrade: Wrap the carrots in cream or off-white twine instead of natural jute for an even more refined, almost Scandinavian farmhouse look.
FAQ — Questions about this Carrot Easter Craft
Each individual carrot takes about 15-20 minutes once you get the technique down. Your first carrot will take a little longer while you figure out the foil shaping and twine wrapping. A bundle of 5-6 carrots takes about 90 minutes total from start to finish, not including drying time for the bucket distressing.
Natural jute twine gives the most authentic farmhouse look. Thinner twine produces a more refined, tighter wrap. Thicker twine goes faster but shows more gaps. Standard craft twine from the Dollar Tree or craft store works well. Avoid synthetic twine — it doesn’t look as natural and is harder to work with.
Older kids ages 10 and up can handle most of this project with supervision. The hot glue gun requires adult supervision or adult handling for younger children. The foil shaping and twine wrapping steps are manageable for kids. This is a great Easter craft to do together.
Chalk paint is recommended because its matte finish and thick consistency create the most realistic distressed patina. Regular paint can work but tends to look more painted and less weathered. Rust-Oleum Chalked Finish paint is widely available at hardware and craft stores and works perfectly for this technique.
Pack the bottom of your bucket with crumpled newspaper, plastic bags, or a small piece of floral foam before adding moss on top. This raises the bottom of the bucket so your carrots sit higher and gives them something to lean against so they stay upright and arranged how you want them.
These are not a one-season decoration. Stored properly in a box or bin away from moisture, twine carrots will last for years. I’ve had mine for several years and they look exactly the same as when I made them. Pull them out every Easter and they’re just as cute as the first year.
Yes — a light coat of clear matte spray sealant will protect the twine from dust and help the moss stay in place longer. Spray lightly from a distance so the sealant doesn’t darken or stiffen the twine texture.
Reindeer moss is available at most craft stores in the floral and terrarium supply section, at Dollar Tree seasonally, and you can find Reindeer moss on Amazon year-round. It’s also called preserved mood moss or sheet moss depending on the brand.


I want this! So cute.
This is an adorable craft idea for Easter. I want to make these!
What a cute project for Easter! Love that the carrots are shaped from tin foil!
These are so darned cute! Thanks for sharing!
Adorable and cute!
I love this idea! How creative!!!
You have the best ideas! My grand daughters will LOVE to make these.
Thanks for sharing, Beth.
OMG!!! This is so cute and pretty, the carrot looks fabulous and the tin is wonderful. you amaze me with your creativity Beth. Thanks for the lovely post.
Beth, This is such a cute idea! And they look so easy to make. I love the simple aging technique for the bucket too.
These are so cute!
These carrots are so simple, and so adorable! They woukd be the perfect centerpiece for Easter! In a galvanized tub, with maybe a lace table runner!!!
How adorable! I may just have to make a few of these for my kitchen table
The post is particularly good and simple. This is exactly what I ask.
The instructions are very meticulous and easy to do. I will learn it this way.